 |
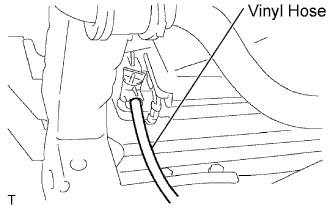
Install a vinyl hose onto the radiator side.
ENGINE ASSEMBLY > REMOVAL |
| 1. REMOVE HOOD SUB-ASSEMBLY |
| 2. DISCHARGE FUEL SYSTEM PRESSURE |
| 3. REMOVE NO. 1 ENGINE UNDER COVER SUB-ASSEMBLY (for Pre Runner and 4WD Type) |
Remove the 4bolts, then remove the engine under cover No.1.
| 4. REMOVE NO. 2 ENGINE UNDER COVER SUB-ASSEMBLY (for Pre Runner and 4WD Type, Regular Cab) |
Remove the 4 bolts, then remove engine cover No.2.
| 5. DRAIN ENGINE COOLANT |
Remove the 4 bolts, then remove the engine under cover No. 1. (PRE RUNNER AND 4WD TYPE)
|
Install a vinyl hose onto the radiator side.
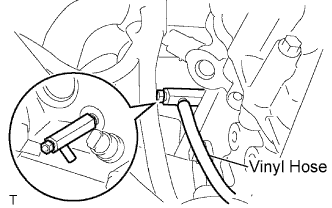 |
Install a vinyl hose onto the engine side.
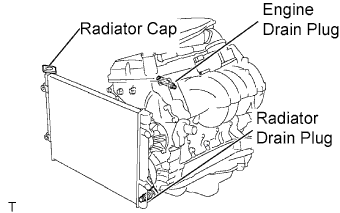 |
Loosen the engine drain plug.
Loosen the radiator drain plug.
Remove the radiator cap and drain coolant.
Drain the coolant from the reservoir tank.
| 6. REMOVE BATTERY |
| 7. REMOVE BATTERY TRAY |
| 8. REMOVE RADIATOR SUPPORT TO FRAME SEAL LH |
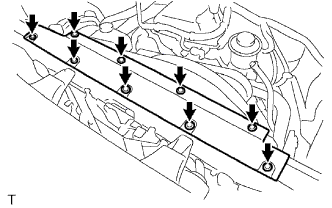 |
Disengage the 9 clips, then remove the radiator support to frame seal LH.
| 9. REMOVE FAN SHROUD |
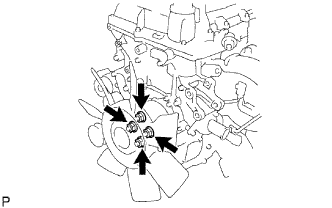 |
Loosen the 4 nuts shown in the illustration.
Remove the fan and generator V belt.
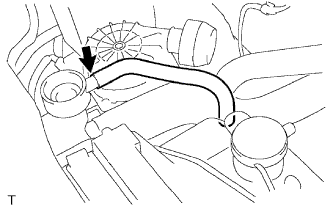 |
Disconnect the radiator reserve tank hose from the radiator.
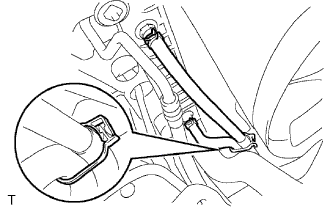 |
Disconnect the oil cooler inlet and outlet hoses from the fan shroud. (for Automatic Transmission)
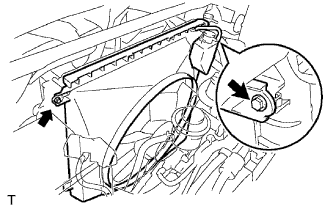 |
Remove the 2 bolts shown in the illustration.
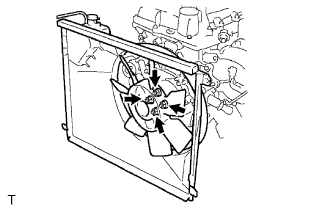 |
Remove the 4 nuts, then remove the fan shroud and fan with fluid coupling together.
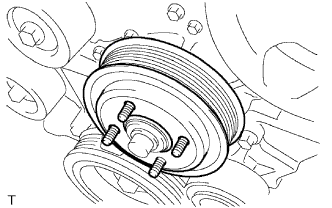 |
Remove the fan pulley.
| 10. REMOVE AIR CLEANER CAP SUB-ASSEMBLY |
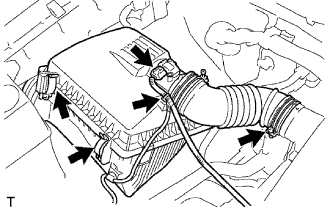 |
Disconnect the mass air flow meter connector.
Disconnect the wire harness clamp.
Loosen the hose clamp bolt, then disconnect the air cleaner hose No. 1.
Disconnect the 2 air cleaner clamps.
Remove the air cleaner cap together with the air cleaner hose No. 1.
| 11. REMOVE AIR CLEANER FILTER ELEMENT SUB-ASSEMBLY |
| 12. REMOVE AIR CLEANER CASE |
Remove the 3 bolts, then remove the air cleaner case.
| 13. SEPARATE VANE PUMP |
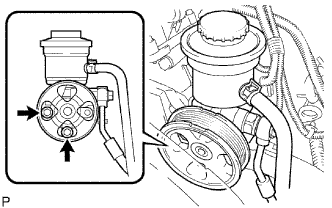 |
Disconnect the vane pump connector.
Remove the 2 bolts, then separate the vane pump.
| 14. REMOVE NO. 2 RADIATOR HOSE |
| 15. SEPARATE COMPRESSOR AND MAGNETIC CLUTCH (w/ Air Conditioning System) |
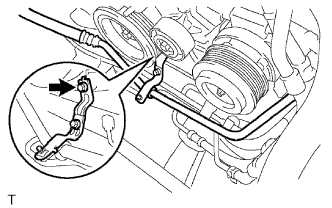 |
Remove the bolt shown in the illustration.
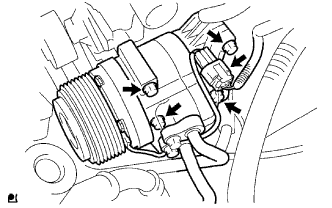 |
Disconnect the compressor and magnetic clutch connector.
Remove the 4 bolts, then separate the compressor and magnetic clutch.
| 16. REMOVE RADIATOR HOSE INLET |
| 17. SEPARATE WATER HOSE SUB-ASSEMBLY |
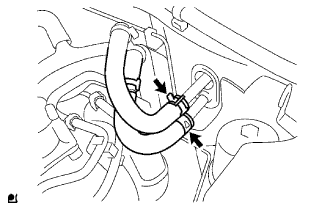 |
Separate the water hoses.
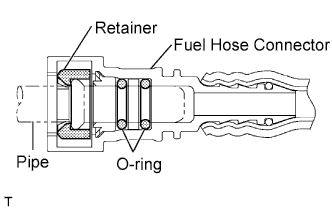
| 18. DISCONNECT FUEL HOSE |
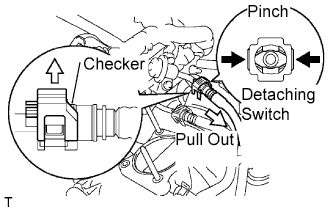 |
Pull the checker of the fuel hose upward.
Pinch the detaching switch of the fuel hose connector and pull out the fuel hose.
 |
| 19. DISCONNECT NO. 2 FUEL HOSE |
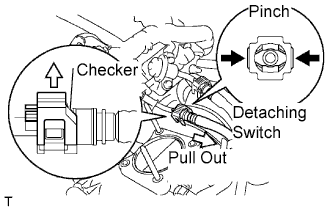 |
Pull the checker of the fuel hose upward.
Pinch the detaching switch of the fuel hose connector and pull out the fuel hose.
|
| 20. SEPARATE FUEL VAPOR FEED HOSE ASSEMBLY |
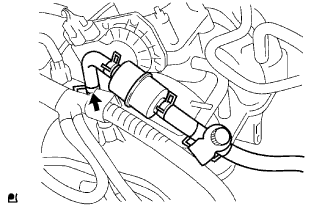 |
Disconnect the fuel vapor feed hose.
| 21. DISCONNECT NO. 1 AIR INJECTION HOSE |
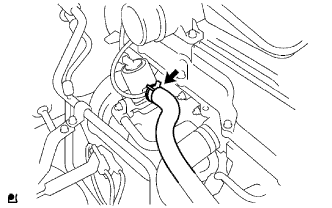 |
Disconnect the No.1 air injection hose.
| 22. DISCONNECT ENGINE WIRE |
Disconnect the connector from the ECM, then pull the engine wire harness to the compartment side.
Disconnect all wire harnesses and connectors in the engine room.
| 23. REMOVE EXHAUST PIPE ASSEMBLY TAIL |
Remove the 2 bolts and 2 nuts.
Remove the exhaust pipe tail from the 4 exhaust pipe supports.
Remove the gasket from the exhaust pipe front.
| 24. REMOVE EXHAUST PIPE ASSEMBLY FRONT |
Remove the 2 bolts and 2 compression springs.
Remove the exhaust pipe front from the exhaust pipe support.
Remove the gasket from the exhaust manifold.
| 25. REMOVE MANUAL TRANSMISSION UNIT ASSEMBLY (for Manual Transmission) |
| Transmission | See page |
| R155 |
Click here
|
| R155F |
Click here
|
| 26. REMOVE AUTOMATIC TRANSMISSION ASSEMBLY (for Automatic Transmission) |
| Transmission | See page |
| A340E |
Click here
|
| A340F |
Click here
|
| 27. REMOVE ENGINE ASSEMBLY |
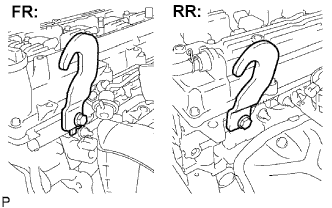 |
Install the engine hanger with the bolt.
| Part Name | Part No. |
| Engine hanger | 12281-75040 |
| Bolt | 91552-A1020 |
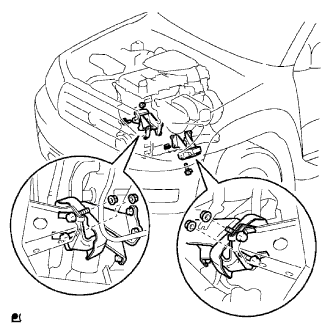 |
Attach the engine sling device and chain block to the engine hangers.
Remove the 4 bolts and 4 nuts.
Lift the engine out of the vehicle slowly and carefully by operating the engine sling device and chain block.
| 28. REMOVE CLUTCH COVER ASSEMBLY (for Manual Transmission) |
| Transmission | See page |
| R155 |
Click here
|
| R155F |
Click here
|
| 29. REMOVE CLUTCH DISC ASSEMBLY (for Manual Transmission) |
| Transmission | See page |
| R155 |
Click here
|
| R155F |
Click here
|
| 30. REMOVE FLYWHEEL SUB-ASSEMBLY (for Manual Transmission) |
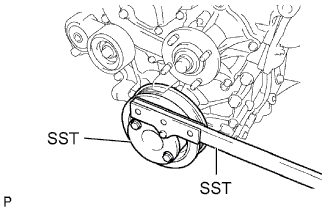 |
Using SST, hold the crankshaft pulley.
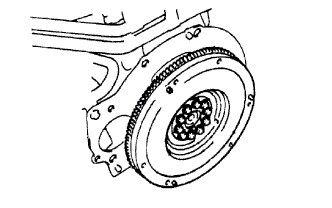 |
Remove the 10 bolts, then remove the flywheel.
| 31. REMOVE DRIVE PLATE AND RING GEAR SUB-ASSEMBLY (for Automatic Transmission) |
|
Using SST, hold the crankshaft pulley.
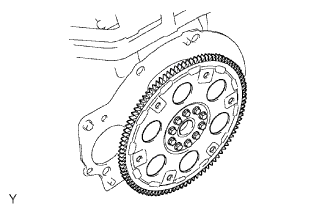 |
Remove the 10 bolts, drive plate spacer rear, drive plate and ring gear and drive plate spacer front.
| 32. REMOVE REAR END PLATE |
Remove the 2 bolts, then remove the rear end plate.
| 33. REMOVE INTAKE AIR CONNECTOR |
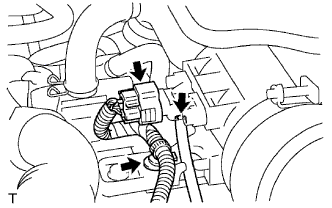 |
Disconnect the pressure sensor connector.
Disengage the wire harness clamp.
Disconnect the vacuum hose.
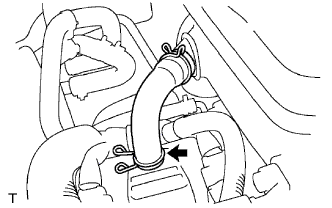 |
Disconnect the No. 2 ventilation hose.
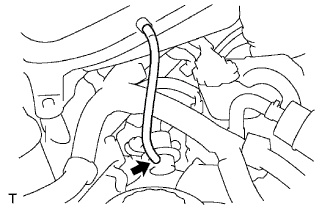 |
Disconnect the vacuum hose.
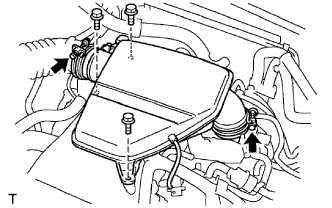 |
Loosen the 2 hose clamp bolts.
Remove the 3 bolts, then remove the intake air connector.
| 34. REMOVE FUEL HOSE |
|
Pull the checker of the fuel hose upward.
Pinch the detaching switch of the fuel hose connector and pull out the fuel hose.
|
| 35. REMOVE NO. 2 FUEL HOSE |
|
Pull the checker of the fuel hose upward.
Pinch the detaching switch of the fuel hose connector and pull out the fuel hose.
|
| 36. REMOVE THROTTLE WITH MOTOR BODY ASSEMBLY |
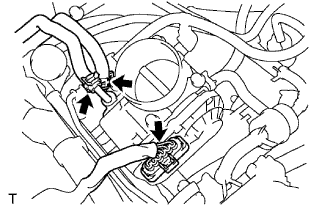 |
Disconnect the water by-pass hose.
Disconnect the No. 2 water by-pass hose.
Disconnect the throttle motor connector.
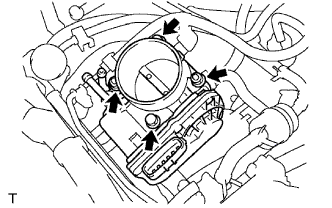 |
Remove the 2 bolts and 2 nuts, then remove the throttle with motor body.
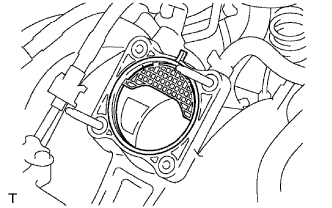 |
Remove the gasket from the intake manifold.
| 37. REMOVE NO. 1 INTAKE MANIFOLD TO HEAD GASKET |
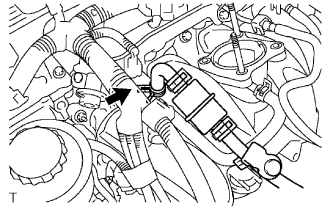 |
Disconnect the fuel vapor feed hose from the VSV.
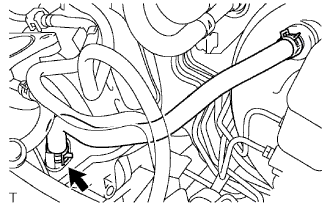 |
Disconnect the vacuum hose.
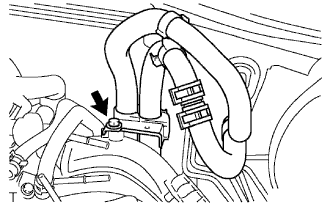 |
Remove the bolt, then remove the clamp bracket.
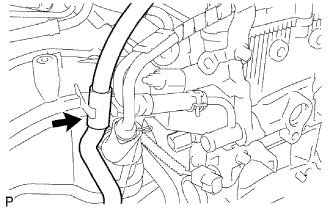 |
Disconnect the water by-pass hose No. 2.
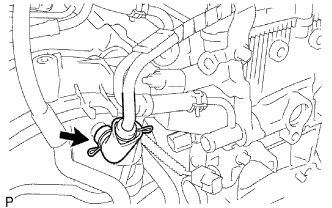 |
Disconnect the ventilation hose No. 3.
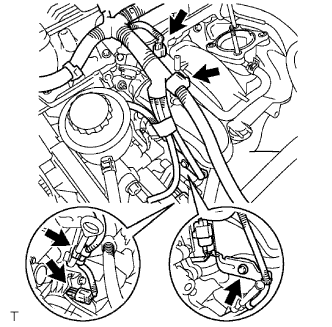 |
Disconnect the VSV connector.
Disengage the engine wire harness clamp.
Disconnect the compressor magnetic clutch connector. (w/ AIR CONDITIONING)
Disengage the wire harness clamp.
Remove the bolt and harness clamp bracket.
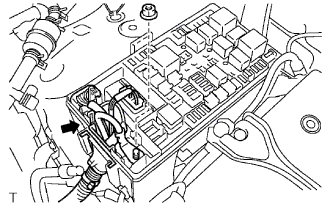 |
Disconnect the 3 connectors.
Remove the nut shown in the illustration.
Disconnect the engine wire harness from the relay block.
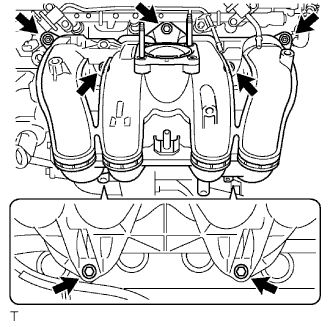 |
Remove the 5 bolts and 2 nuts, then remove the intake manifold.
| 38. REMOVE IDLE PULLEY ASSEMBLY WITH BRACKET (w/ Air Conditioning System) |
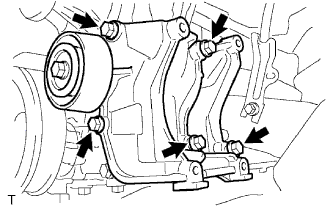 |
Remove the 5 bolts, then remove the idle pulley with bracket.
| 39. REMOVE ENGINE WIRE |
| 40. REMOVE OIL LEVEL GAGE SUB-ASSEMBLY |
| 41. REMOVE OIL LEVEL GAGE GUIDE |
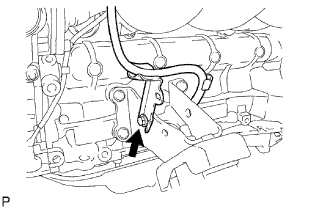 |
Remove the bolts, then remove the oil level gage guide.
| 42. REMOVE FRONT NO. 1 ENGINE MOUNTING BRACKET |
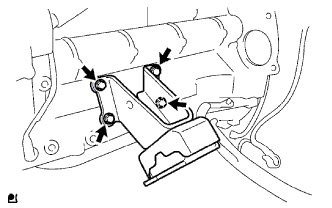 |
Remove the 4 bolts, then remove the engine mounting bracket front No. 1 LH with engine mounting insulator front.
| 43. REMOVE THERMOSTAT |
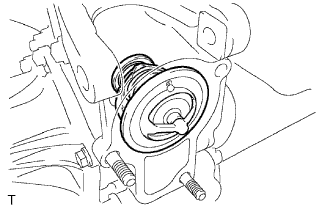 |
Remove the thermostat from the timing chain cover.
| 44. REMOVE FUEL INJECTOR ASSEMBLY |
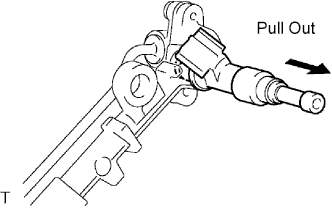 |
Pull the 4 fuel injectors out of the fuel delivery pipe.
| 45. REMOVE KNOCK SENSOR |
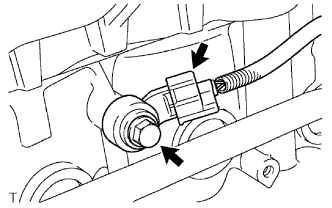 |
Disconnect the knock control sensor connector.
Remove the bolt, then remove the knock control sensor.
| 46. REMOVE ENGINE COOLANT TEMPERATURE SENSOR |
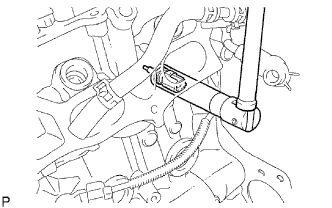 |
Using a 19 mm deep socket wrench, remove the engine coolant temperature sensor.
| 47. REMOVE NO. 1 WATER BY-PASS PIPE |
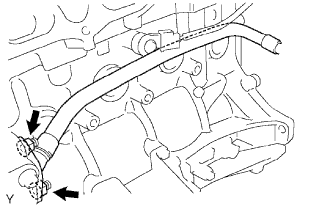 |
Remove the 2 nuts, then remove the water by-pass pipe No. 1.
| 48. REMOVE VENTILATION PIPE |
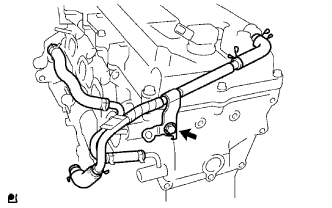 |
Remove the bolts, then remove the ventilation pipe.
| 49. REMOVE IGNITION COIL ASSEMBLY |
| 50. REMOVE SPARK PLUG |
| 51. REMOVE GENERATOR ASSEMBLY |
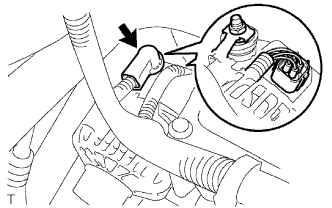 |
Remove the terminal cap.
Remove the nut, then remove the generator wire.
Disconnect the generator connector.
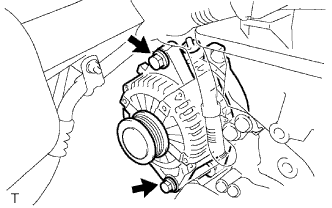 |
Remove the 2 bolts, then remove the generator.
| 52. REMOVE NO. 1 IDLER PULLEY SUB-ASSEMBLY |
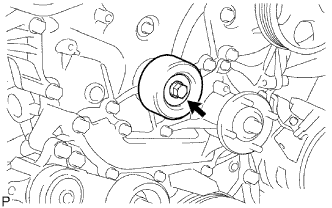 |
Remove the bolt and No. 1 idler pulley sub-assembly.
| 53. REMOVE V-RIBBED BELT TENSIONER ASSEMBLY |
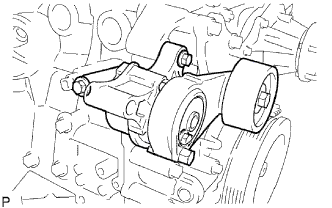 |
Remove the 3 bolts, then remove the V-ribbed belt tensioner.
| 54. REMOVE NO. 1 EXHAUST MANIFOLD HEAT INSULATOR |
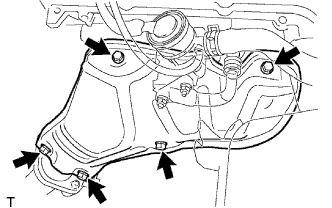 |
Remove the 5 bolts, then remove the exhaust manifold heat insulator No. 1.
| 55. REMOVE AIR SWITCHING VALVE ASSEMBLY |
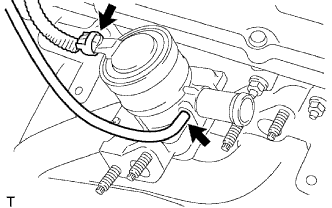 |
Disconnect the vacuum hose.
Disconnect the air switching valve connector.
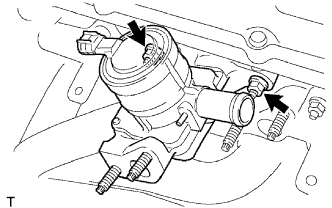 |
Remove the 2 nuts, then remove the air switching valve.
Remove the gasket.
| 56. REMOVE EXHAUST MANIFOLD |
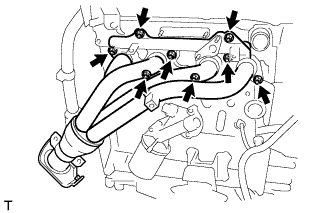 |
Remove the 8 nuts, then remove the exhaust manifold.
| 57. REMOVE FRONT NO. 1 ENGINE MOUNTING BRACKET RH |
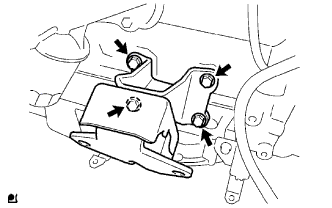 |
Remove the 4 bolts, then remove the engine mounting bracket front No. 1 together with the engine mounting insulator front.
| 58. REMOVE ENGINE OIL PRESSURE SWITCH ASSEMBLY |