WF1AM TRANSFER TRANSFER ASSEMBLY INSTALLATION
CAUTION / NOTICE / HINT
- CAUTION:
-
Be sure to perform this procedure with several people as the transfer assembly is very heavy.
PROCEDURE

 36100
1.INSTALL TRANSFER ASSEMBLY
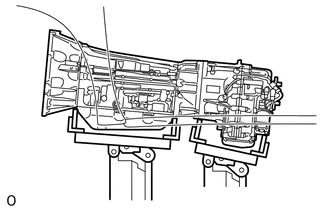
Support the transfer assembly with a transmission jack.
- NOTICE:
-
Secure the transfer assembly to the transmission jack using a belt, etc. to prevent it from falling.
Raise the transfer assembly so that it is level with the automatic transmission assembly and install the transfer assembly with the 8 bolts.
- Torque:
- 40 N*m (408 kgf*cm, 30 ft.*lbf)
- NOTICE:
-
Take care not to damage the rear adaptor oil seal with the transfer input shaft spline.
2.CONNECT WIRE HARNESS AND CONNECTOR
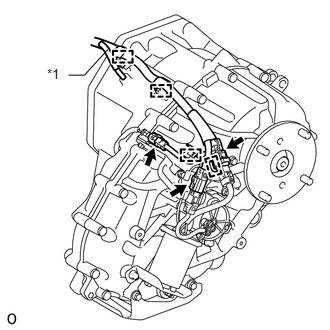
Connect the 3 connectors, 4 clamps and transfer breather hose.
| *1 | Transfer Breather Hose |
12371
3.INSTALL REAR NO. 1 ENGINE MOUNTING INSULATOR
Remove the transmission jack from the transfer assembly.
- NOTICE:
-
Do not remove the transmission jack from the automatic transmission assembly in this step.
Install the rear No. 1 engine mounting insulator with the 4 bolts.
- Torque:
- 59 N*m (602 kgf*cm, 44 ft.*lbf)
51204
4.INSTALL NO. 3 FRAME CROSSMEMBER SUB-ASSEMBLY
Install the No. 3 frame crossmember sub-assembly to the rear No. 1 engine mounting insulator with the 4 bolts.
- Torque:
- 21 N*m (214 kgf*cm, 15 ft.*lbf)
Install the No. 3 frame crossmember sub-assembly with the 4 bolts, 4 washers and 4 nuts.
- Torque:
- 110 N*m (1122 kgf*cm, 81 ft.*lbf)
- NOTICE:
-
Install the bolt from the front of the vehicle, install the washer and nut to the bolt, and then tighten the nut.
Remove the transmission jack from the automatic transmission assembly.
37100
5.INSTALL PROPELLER WITH CENTER BEARING SHAFT ASSEMBLY
37140
6.INSTALL FRONT PROPELLER SHAFT ASSEMBLY
7.ADD TRANSFER OIL
8.CHECK TRANSFER OIL
9.CHECK FOR TRANSFER OIL LEAK