WF1AM TRANSFER TRANSFER ASSEMBLY REMOVAL
CAUTION / NOTICE / HINT
- CAUTION:
-
Be sure to perform this procedure with several people as the transfer assembly is very heavy.
- NOTICE:
-
Change the vehicle to 2WD mode before removing the transfer shift actuator assembly.
-
If the vehicle cannot be changed to 2WD mode, since the new transfer shift actuator assembly is set in the 2WD position, connect all the connectors to the vehicle side wire harnesses to set the new transfer shift actuator assembly to the drive state of the vehicle before installing the new transfer shift actuator assembly.
PROCEDURE

 1.DRAIN TRANSFER OIL
37140
2.REMOVE FRONT PROPELLER SHAFT ASSEMBLY
37100
3.REMOVE PROPELLER WITH CENTER BEARING SHAFT ASSEMBLY
35000
4.SUPPORT AUTOMATIC TRANSMISSION ASSEMBLY
51204
5.REMOVE NO. 3 FRAME CROSSMEMBER SUB-ASSEMBLY
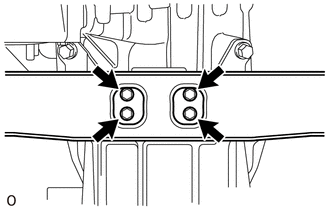
Remove the 4 bolts of the rear No. 1 engine mounting insulator.
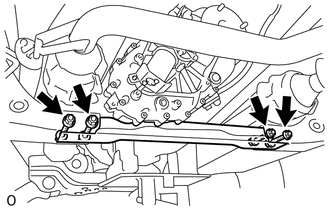
Remove the 4 nuts, 4 washers, 4 bolts and No. 3 frame crossmember sub-assembly.
12371
6.REMOVE REAR NO. 1 ENGINE MOUNTING INSULATOR
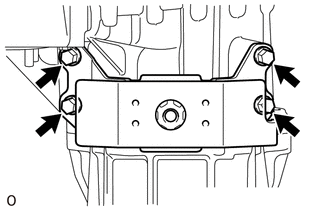
Remove the 4 bolts and rear No. 1 engine mounting insulator from the transfer assembly.
36100
7.SUPPORT TRANSFER ASSEMBLY
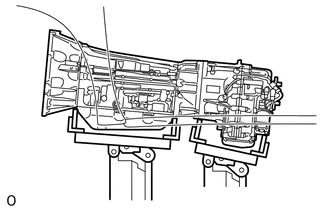
Support the transfer assembly with a transmission jack.
- NOTICE:
-
Secure the transfer assembly to the transmission jack using a belt, etc. to prevent it from falling.
8.DISCONNECT WIRE HARNESS AND CONNECTOR
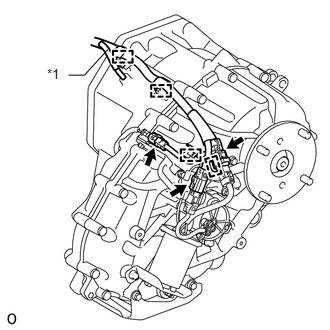
Disconnect the 3 connectors, 4 clamps and transfer breather hose.
| *1 | Transfer Breather Hose |
36100
9.REMOVE TRANSFER ASSEMBLY
Remove the 8 bolts.
Pull the transfer assembly straight up and remove it from the automatic transmission assembly.
- NOTICE:
-
Take care not to damage the rear adaptor oil seal with the transfer input shaft spline.