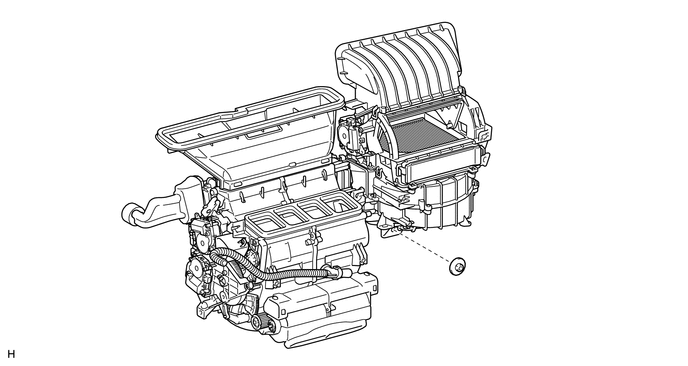
AIR CONDITIONING AIR CONDITIONING UNIT REMOVAL
PROCEDURE

 1.RECOVER REFRIGERANT FROM REFRIGERATION SYSTEM
2.DRAIN ENGINE COOLANT
for 1UR-FE: (See page Engine / Hybrid System>1UR-FE COOLING>COOLANT>REPLACEMENT)
for 3UR-FE: (See page Engine / Hybrid System>3UR-FE COOLING>COOLANT>REPLACEMENT)
for 3UR-FBE: (See page Engine / Hybrid System>3UR-FBE COOLING>COOLANT>REPLACEMENT)
3. PRECAUTION
- NOTICE:
-
After turning the ignition switch off, waiting time may be required before disconnecting the cable from the battery terminal. Therefore, make sure to read the disconnecting the cable from the battery terminal notice before proceeding with work (See page General>INTRODUCTION>REPAIR INSTRUCTION>INITIALIZATION).
4.DISCONNECT CABLE FROM NEGATIVE BATTERY TERMINAL
- CAUTION:
-
Wait at least 90 seconds after disconnecting the cable from the negative (-) battery terminal to disable the SRS system.
- NOTICE:
-
When disconnecting the cable, some systems need to be initialized after the cable is reconnected (See page General>INTRODUCTION>REPAIR INSTRUCTION>INITIALIZATION).
88892N
5.REMOVE NO. 2 COOLER COVER
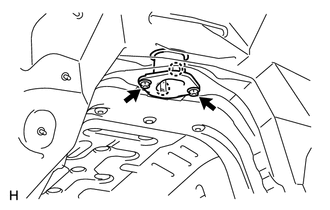
Remove the 2 nuts.
Detach the 2 claws and remove the No. 2 cooler cover.
88707
6.DISCONNECT SUCTION PIPE SUB-ASSEMBLY AND AIR CONDITIONER TUBE ASSEMBLY
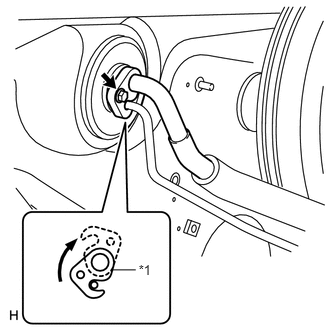
Remove the bolt.
Detach the plate as shown in the illustration.
| *1 | Plate |
Disconnect the suction pipe sub-assembly and air conditioner tube assembly.
- NOTICE:
- ·
Do not use a screwdriver or similar tool to disconnect the tube.
·Seal the openings of the disconnected parts using vinyl tape to prevent moisture and foreign matter from entering them.
Remove the 2 O-rings from the suction pipe sub-assembly and liquid tube.
87245
7.DISCONNECT INLET HEATER WATER HOSE AND OUTLET HEATER WATER HOSE
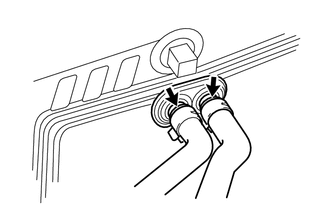
Using pliers, grip the claws of the clip and slide the clip.
Disconnect the inlet heater water hose and outlet heater water hose.
8.REMOVE FRONT WIPER MOTOR AND BRACKET
45250
9.REMOVE STEERING COLUMN ASSEMBLY
55301
10.REMOVE INSTRUMENT PANEL SUB-ASSEMBLY
for Column Shift Type: (See page Vehicle Interior>INTERIOR PANEL>INSTRUMENT PANEL SAFETY PAD(for Column Shift Type)>REMOVAL)
for Floor Shift Type: (See page Vehicle Interior>INTERIOR PANEL>INSTRUMENT PANEL SAFETY PAD(for Floor Shift Type)>REMOVAL)
55331
11.REMOVE INSTRUMENT PANEL REINFORCEMENT ASSEMBLY
Disconnect the clamps, connectors and wire harness.
Remove the 11 bolts and 4 nuts.
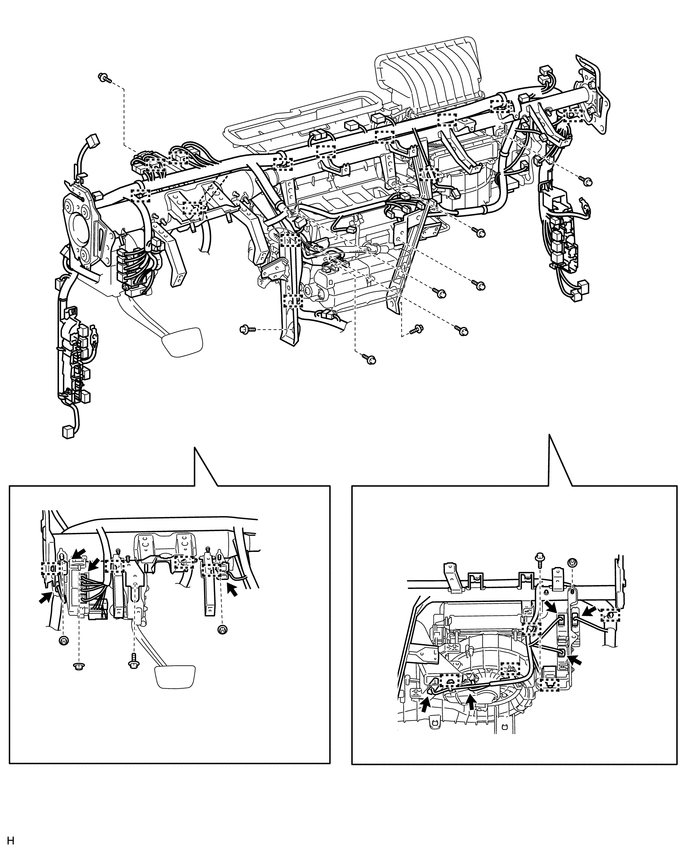
Remove the instrument panel reinforcement assembly.
for Driver Side:
Remove the 2 caps and 3 bolts.
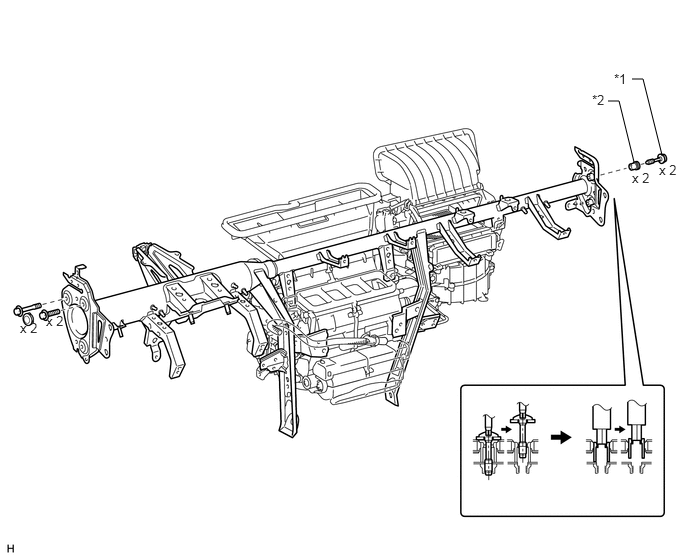
| *1 | 'TORX' Bolt | *2 | Collar |
for Passenger Side:
Using a T40 "TORX" socket, remove the 2 "TORX" bolts.
- HINT:
-
When removing the bolts, the collars may come off with the bolts.
for Passenger Side:
Using a 12 mm hexagon wrench, remove the 2 collars.
87212
12.REMOVE REAR NO. 1 AIR DUCT (except Regular Cab)
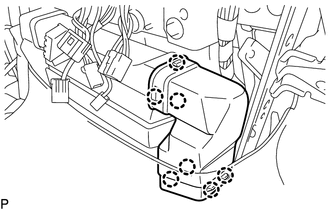
Detach the 7 claws and remove the rear No. 1 air duct.
87214D
13.REMOVE REAR NO. 3 AIR DUCT (except Regular Cab)
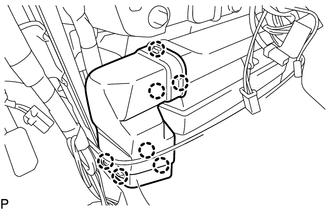
Detach the 7 claws and remove the rear No. 3 air duct.
14.REMOVE AIR CONDITIONING UNIT
Remove the nut and air conditioning unit.