K320 MULTIDRIVE / CVT CONTINUOUSLY VARIABLE TRANSAXLE ASSEMBLY(When Not Using the Engine Support Bridge) REMOVAL
CAUTION / NOTICE / HINT
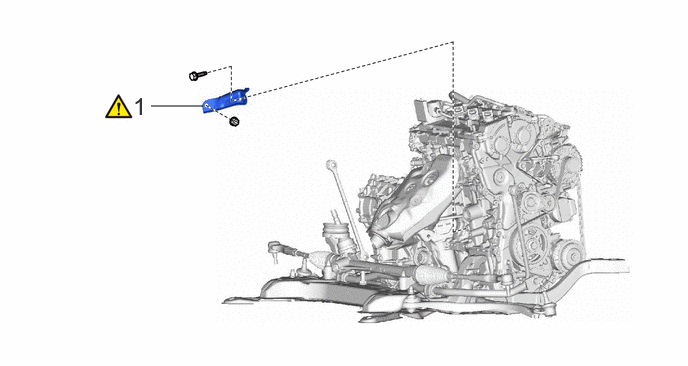
| Procedure | Part Name Code | 
|

|

|
|
|---|---|---|---|---|---|
| 1 | MANIFOLD STAY | 17118 | ( ) |
- | - |
| Procedure | Part Name Code |
|
|
|
|
|---|---|---|---|---|---|
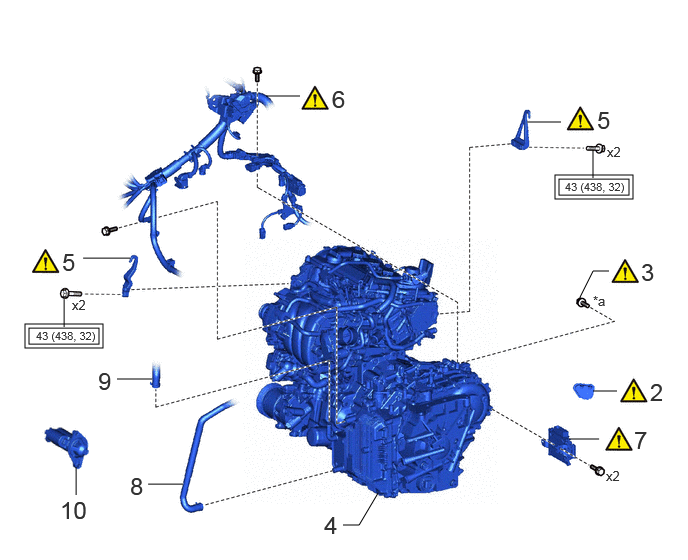
| 2 | FLYWHEEL HOUSING UNDER COVER | 11361J | ()
|
- | - |
| 3 | DRIVE PLATE AND TORQUE CONVERTER ASSEMBLY SETTING BOLT | 32101G | ()
|
- | - |
| 4 | ENGINE ASSEMBLY WITH TRANSAXLE | - | - | - | - |
| 5 | ENGINE HANGER | - | ()
|
- | - |
| 6 | ENGINE WIRE | 82121 | ()
|
- | - |
| 7 | TCM | 89535B | ()
|
- | - |
| 8 | NO. 4 WATER BY-PASS HOSE | 16281N | - | - | - |
| 9 | NO. 3 WATER BY-PASS HOSE ASSEMBLY | 16290F | - | - | - |
| 10 | STARTER ASSEMBLY | 28100 | - | - | - |
| *a | BLACK COLOR: x 1
SILVER COLOR: x 5 |
- | - |

|
Tightening torque for "Major areas involving basic vehicle performance such as moving/turning/stopping": N*m (kgf*cm, ft.*lbf) | - | - |
| Procedure | Part Name Code |
|
|
|
|
|---|---|---|---|---|---|
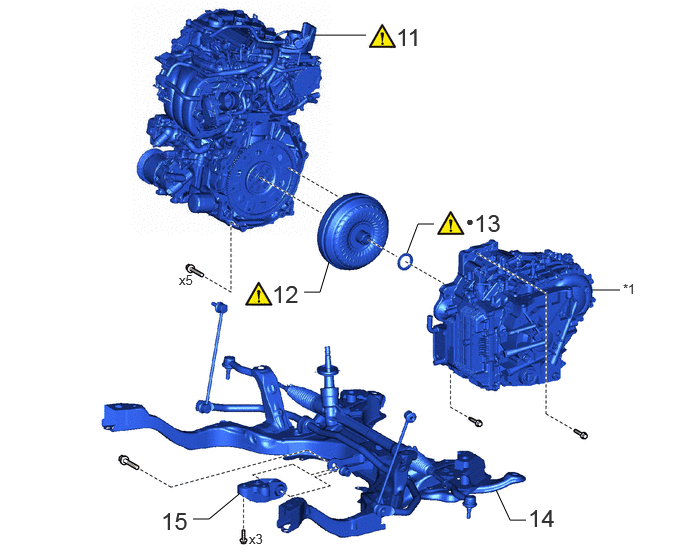
| 11 | ENGINE ASSEMBLY | - | ()
|
- | - |
| 12 | TORQUE CONVERTER ASSEMBLY | 32000A | ()
|
- | - |
| 13 | CVT TYPE T OIL SEAL | - | ()
|
- | - |
| 14 | FRONT SUSPENSION CROSSMEMBER SUB-ASSEMBLY | 51201 | - | - | - |
| 15 | NO. 2 ENGINE MOVING CONTROL ROD | 12364B | - | - | - |
| *1 | CONTINUOUSLY VARIABLE TRANSAXLE ASSEMBLY | - | - |
| ● | Non-reusable part | - | - |
| Procedure | Part Name Code |
|
|
|
|
|---|---|---|---|---|---|
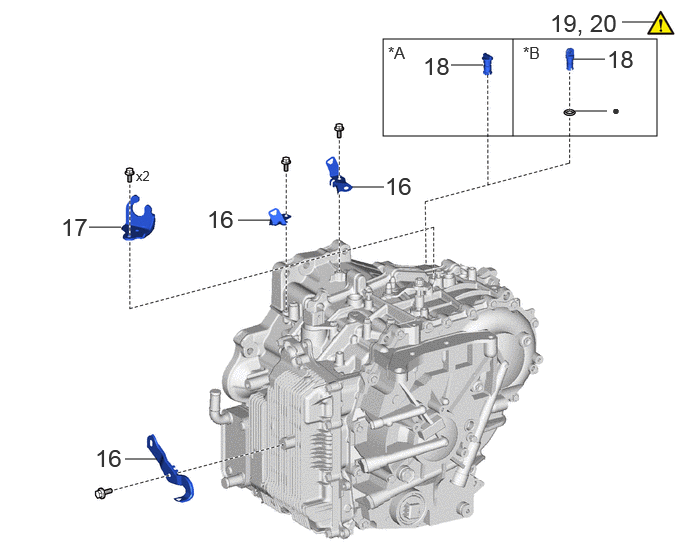
| 16 | WIRE HARNESS CLAMP BRACKET | - | - | - | - |
| 17 | NO. 1 TRANSMISSION CONTROL CABLE BRACKET | 33823 | - | - | - |
| 18 | TRANSMISSION CASE PLUG ASSEMBLY | 35150B | - | - | - |
| 19 | INSPECT TORQUE CONVERTER ASSEMBLY | 32000A | ()
|
- | - |
| 20 | INSPECT DRIVE PLATE AND RING GEAR SUB-ASSEMBLY | 32101B | ()
|
- | - |
| *A | for Type A | *B | for Type B |
| ● | Non-reusable part | - | - |
CAUTION / NOTICE / HINT
The necessary procedures (adjustment, calibration, initialization, or registration) that must be performed after parts are removed, installed, or replaced during the continuously variable transaxle assembly removal/installation are shown below.
| Replaced Part or Performed Procedure | Necessary Procedure | Effect/Inoperative Function when Necessary Procedure not Performed | Link |
|---|---|---|---|
| Auxiliary battery terminal is disconnected/reconnected | Memorize steering angle neutral point | Parking assist monitor system | ()
|
| Panoramic view monitor system | ()
|
||
·
Air intake system parts ·
Exhaust system parts |
Inspection after repair | ·
Poor idle, etc. ·
Engine start function, etc. |
()
|
| Replacement of continuously variable transaxle assembly | 1.
Reset memory 2.
Transaxle compensation code (Input) 3.
CVT oil pressure calibration |
·
Large shift shock ·
Deterioration of fuel efficiency |
for Initialization:
( )
for Registration: ( )
|
| Replacement of CVT fluid | ATF thermal degradation estimate reset | The value of the Data List item "ATF Thermal Degradation Estimate" is not estimated correctly | ()
|
| Front wheel alignment adjustment | Calibration | ·
DTCs are stored ·
ABS warning light illuminates ·
Slip indicator light illuminates ·
VSC disabled or malfunctions |
()
|
| Suspension, tires, etc. | ·
Ultrasonic sensor detection angle ·
Ultrasonic sensor detection angle registration |
Parking support brake system | ()
|
| Rear television camera assembly optical axis (Back camera position setting) | Parking assist monitor system | ()
|
|
·
Parking assist ECU initialization ·
Adjust steering angle |
Panoramic view monitor system | ()
|
- CAUTION:
- ·
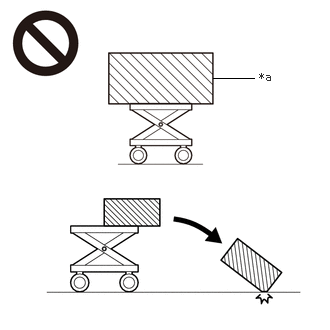 2.219,0.813 2.646,0.813 false 2.698,0.729 3.01,0.927 0.313,0.198 10 false *a
*a An Object Exceeding Weight Limit of Engine Lifter
The engine assembly with transaxle is very heavy. Be sure to follow the procedure described in the repair manual, or the engine lifter may suddenly drop or the engine assembly with transaxle may fall off the engine lifter.
- ·
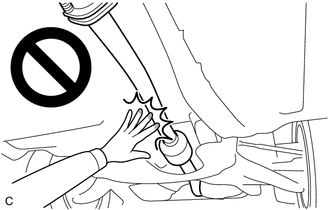
When the engine is hot, do not touch high-temperature areas such as the engine or exhaust pipe.
·Touching high-temperature areas such as the engine and exhaust pipe could result in burns.
- HINT:
-
When the cable is disconnected / reconnected to the auxiliary battery terminal, systems temporarily stop operating. However, each system has a function that completes learning the first time the system is used.
- ·
Learning completes when vehicle is driven
Effect/Inoperative Function When Necessary Procedures are not Performed Necessary Procedures Link Lane tracing assist system Drive the vehicle straight ahead at 35 km/h (22 mph) or more for 5 second or more. ( )
Pre-collision system Parking support brake system
·Learning completes when vehicle is operated normally
Effect/Inoperative Function When Necessary Procedures are not Performed Necessary Procedures Link Power door lock control system
·Back door opener
Perform door unlock operation with door control switch or electrical key transmitter sub-assembly switch. ( )
Power back door system Fully close the back door by hand.
- HINT:
-
Initialization is not necessary if the above procedures are performed while the back door is closed.
( )
Air conditioning system After the ignition switch is turned to ON, the servo motor standard position is recognized. -
PROCEDURE

 17118
1.REMOVE MANIFOLD STAY
|
|
Click here()
|
11361J
2.REMOVE FLYWHEEL HOUSING UNDER COVER


|
Remove in this Direction | - | - |
32101G
3.REMOVE DRIVE PLATE AND TORQUE CONVERTER ASSEMBLY SETTING BOLT
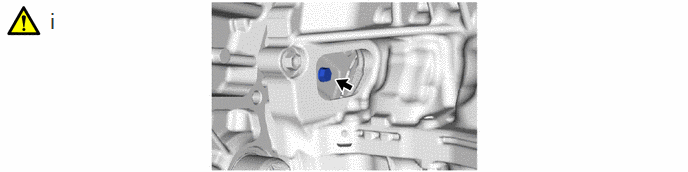
Turn the crankshaft to gain access to the 6 drive plate and torque converter assembly setting bolts and remove each drive plate and torque converter assembly setting bolt while holding the crankshaft pulley bolt with a wrench.
- HINT:
-
There will be one black colored drive plate and torque converter assembly setting bolt.
4.REMOVE ENGINE ASSEMBLY WITH TRANSAXLE
5.INSTALL ENGINE HANGER
|
|
Click here()
|
82121
6.DISCONNECT ENGINE WIRE
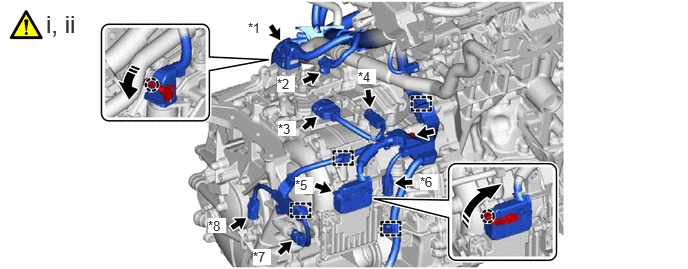
| *1 | Transmission Wire Connector | *2 | Shift Stroke Sensor Connector |
| *3 | Park/Neutral Position Switch Connector | *4 | Transmission Revolution Sensor (NOUT) Connector |
| *5 | TCM Connector | *6 | Transmission Revolution Sensor (NSS) Connector |
| *7 | Oil Pressure Sensor Connector | *8 | Transmission Revolution Sensor (NT) Connector |
|
|
Remove in this Direction | - | - |
Disconnect all the clamps and connectors and remove the engine wire from the engine assembly with transaxle.
Remove the bolt.
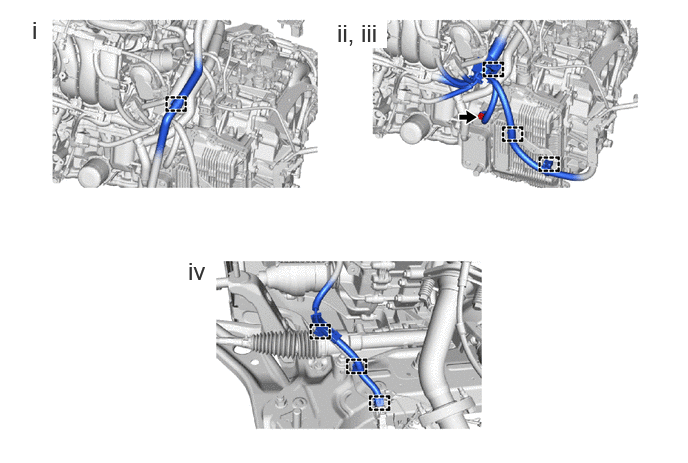
Disconnect the No. 3 water by-pass hose assembly.
Disengage the 3 clamps.
Remove the bolt and disconnect the engine wire from the continuously variable transaxle assembly.
Disengage the 3 clamps to disconnect the engine wire from the front suspension crossmember sub-assembly.
89535B
7.REMOVE TCM
|
|
|

16281N
8.DISCONNECT NO. 4 WATER BY-PASS HOSE
16290F
9.DISCONNECT NO. 3 WATER BY-PASS HOSE ASSEMBLY
28100
10.REMOVE STARTER ASSEMBLY
11.REMOVE ENGINE ASSEMBLY
|
|
|
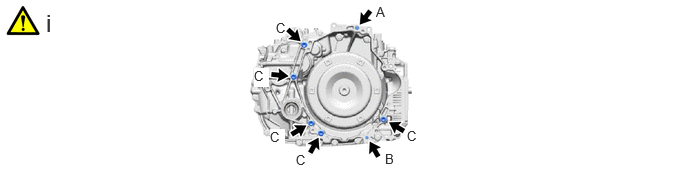
Remove the 7 bolts and engine assembly from the continuously variable transaxle assembly.
32000A
12.REMOVE TORQUE CONVERTER ASSEMBLY
|
|
|

13.REMOVE CVT TYPE T OIL SEAL
|
|
|
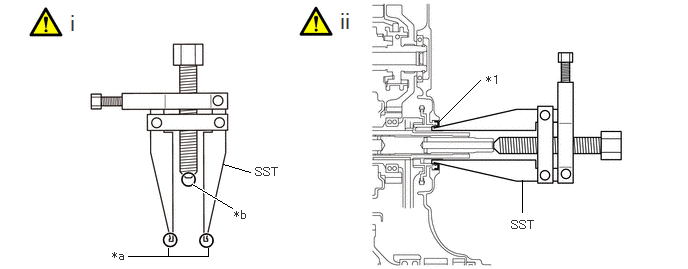
| *1 | CVT type T oil seal | - | - |
| *a | Claw | *b | Center Bolt |
Clean the tips of both the claws of SST and the center bolt.
- SST
- 09308-10010
Using SST, remove the CVT type T oil seal.
- NOTICE:
-
Pay attention to the angle of the claws when opening them, and ensure that they do not come into contact with the transaxle housing, as there is the possibility that metal particles could be produced if they do.
51201
14.REMOVE FRONT SUSPENSION CROSSMEMBER SUB-ASSEMBLY
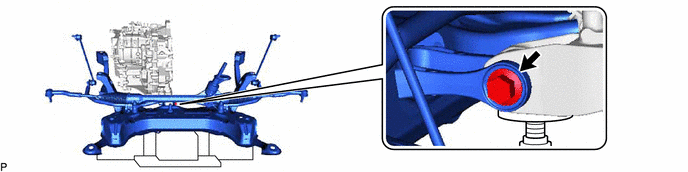
12364B
15.REMOVE NO. 2 ENGINE MOVING CONTROL ROD

16.REMOVE WIRE HARNESS CLAMP BRACKET

33823
17.REMOVE NO. 1 TRANSMISSION CONTROL CABLE BRACKET

35150B
18.REMOVE TRANSMISSION CASE PLUG ASSEMBLY
for Type A:

for Type B:

32000A
19.INSPECT TORQUE CONVERTER ASSEMBLY
32101B
20.INSPECT DRIVE PLATE AND RING GEAR SUB-ASSEMBLY