AXLE AND DIFFERENTIAL REAR DIFFERENTIAL CARRIER OIL SEAL REPLACEMENT
CAUTION / NOTICE / HINT
The necessary procedures (adjustment, calibration, initialization, or registration) that must be performed after parts are removed and installed, or replaced during diaphragm oil seal replacement are shown below.
| Replaced Part or Performed Procedure | Necessary Procedure | Effect/Inoperative Function when Necessary Procedure not Performed | Link |
|---|---|---|---|
| Gas leaks from exhaust system | Inspection after repair | ·
Poor idle, etc. ·
Engine start function, etc. |
( ) |
| Tire | ECU Data Initialization (When performing tire replacement after RoB code X2104 is output) | Active torque split AWD system | ()
|
| Suspension, tires, etc. | Rear television camera assembly optical axis (Back camera position setting) | Parking assist monitor system | ()
|
| Rear wheel alignment adjustment | Calibration | ·
DTCs are stored ·
Slip indicator light illuminates ·
VSC disabled or malfunctions |
()
|
- CAUTION:
- ·
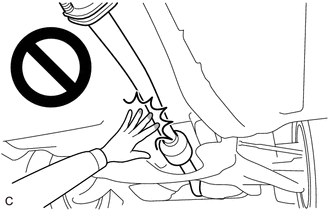
To prevent burns, do not touch the engine, exhaust pipe or other high temperature components while the engine is hot.
·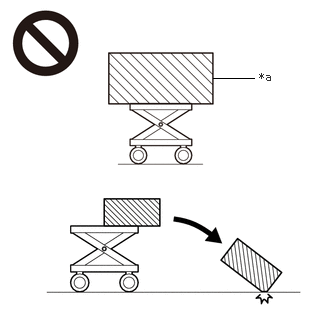 2.219,0.813 2.646,0.813 false 2.698,0.729 3.01,0.927 0.313,0.198 10 false *a
*a An Object Exceeding Weight Limit of Engine Lifter
The rear differential carrier assembly is very heavy. Be sure to follow the procedure described in the repair manual, or the engine lifter may suddenly drop or the rear differential carrier assembly may fall off the engine lifter.
PROCEDURE

 41110
1.REMOVE REAR DIFFERENTIAL CARRIER ASSEMBLY
2.SEPARATE ELECTRO MAGNETIC CONTROL COUPLING WIRE HARNESS
3.REMOVE ELECTRO MAGNETIC CONTROL COUPLING SUB-ASSEMBLY
41330E
4.REMOVE TRANSMISSION COUPLING CONICAL SPRING WASHER
41330H
5.REMOVE TRANSMISSION COUPLING SPACER
41410D
6.REMOVE DIAPHRAGM OIL SEAL
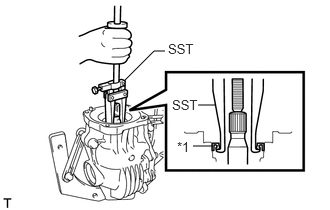
| *1 | Diaphragm Oil Seal |
Using SST, remove the diaphragm oil seal from the rear differential carrier assembly.
- SST
- 09308-00010
41410D
7.INSTALL DIAPHRAGM OIL SEAL
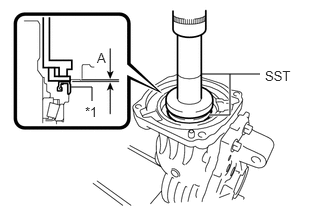
| *1 | Diaphragm Oil Seal |
Using SST and a press, install a new diaphragm oil seal into the rear differential carrier assembly.
- SST
- 09506-35010
09554-22010
- NOTICE:
- ·
Install the diaphragm oil seal uniformly.
·Press fit the diaphragm oil seal straight.
·Do not damage the diaphragm oil seal.
·Do not excessively press in the diaphragm oil seal.
·Make sure to install the diaphragm oil seal as specified, otherwise a malfunction such as an oil leak may occur.
- Standard Distance (A):
0.7 to 1.3 mm (0.0276 to 0.0511 in.)
Apply a light coat of MP grease to the lip of the new diaphragm oil seal.
41330H
8.INSTALL TRANSMISSION COUPLING SPACER
41330E
9.INSTALL TRANSMISSION COUPLING CONICAL SPRING WASHER
10.INSTALL ELECTRO MAGNETIC CONTROL COUPLING SUB-ASSEMBLY
11.INSTALL ELECTRO MAGNETIC CONTROL COUPLING WIRE HARNESS
41110
12.INSTALL REAR DIFFERENTIAL CARRIER ASSEMBLY