AXLE AND DIFFERENTIAL REAR DIFFERENTIAL CARRIER ASSEMBLY REMOVAL
CAUTION / NOTICE / HINT
The necessary procedures (adjustment, calibration, initialization, or registration) that must be performed after parts are removed and installed, or replaced during the rear differential carrier assembly removal/installation are shown below.
| Replaced Part or Performed Procedure | Necessary Procedure | Effect/Inoperative Function when Necessary Procedure not Performed | Link |
|---|---|---|---|
| Replacement of 4WD linear solenoid (transmission coupling assembly) | ECU data write | Active torque split AWD system | ( ) |
| Gas leaks from exhaust system | Inspection after repair | ·
Poor idle, etc. ·
Engine start function, etc. |
()
|
| Tire | ECU Data Initialization (When performing tire replacement after RoB code X2104 is output) | Active torque split AWD system | ()
|
| Suspension, tires, etc. | Rear television camera assembly optical axis (Back camera position setting) | Parking assist monitor system | ()
|
| Rear wheel alignment adjustment | Calibration | ·
DTCs are stored ·
Slip indicator light illuminates ·
VSC disabled or malfunctions |
()
|
- CAUTION:
- ·
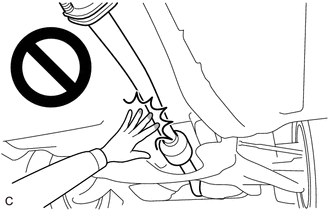
To prevent burns, do not touch the engine, exhaust pipe or other high temperature components while the engine is hot.
·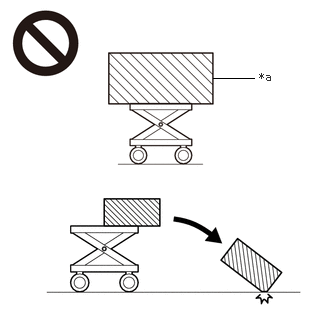 2.219,0.813 2.646,0.813 false 2.698,0.729 3.01,0.927 0.313,0.198 10 false *a
*a An Object Exceeding Weight Limit of Engine Lifter
The rear differential carrier assembly is very heavy. Be sure to follow the procedure described in the repair manual, or the engine lifter may suddenly drop or the rear differential carrier assembly may fall off the engine lifter.
PROCEDURE

 1.DRAIN DIFFERENTIAL OIL
37100
2.REMOVE PROPELLER WITH CENTER BEARING SHAFT ASSEMBLY
3.REMOVE REAR DRIVE SHAFT ASSEMBLY
48812
4.REMOVE REAR STABILIZER BAR
52380
5.LOOSEN REAR NO. 1 DIFFERENTIAL SUPPORT
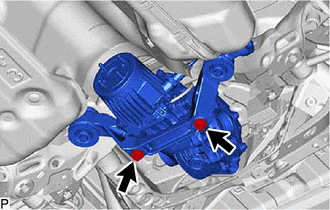
Loosen the 2 bolts.
41110
6.REMOVE REAR DIFFERENTIAL CARRIER ASSEMBLY
- NOTICE:
- ·
Do not damage the contact surface when removing the rear differential carrier assembly.
·The remaining oil may leak out when removing the rear differential carrier assembly.
·Securely support the rear differential carrier assembly while performing this step to avoid excessively tilting or dropping the rear differential carrier assembly.
·Remove the bolts and nuts with the rear differential carrier assembly secured.
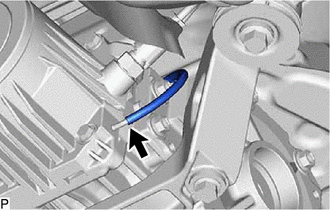
Disconnect the vacuum hose from the electro magnetic control coupling sub-assembly.
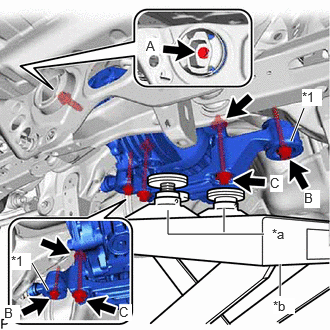
| *1 | Rear Lower Differential Mount Stopper |
| *a | Attachment |
| *b | Engine Lifter |
Support the rear differential carrier assembly with an engine lifter using 2 attachments or equivalent tools as shown in the illustration.
Remove the bolt (A) from the rear differential support.
Remove the 2 bolts (B), and 2 rear lower differential mount stoppers from the rear No. 1 differential support.
Remove the 2 bolts (C), 2 nuts from the rear No. 1 differential support.
- HINT:
-
The nuts have tabs to prevent them from rotating.
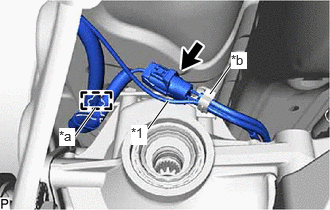
| *1 | Vacuum Hose |
| *a | Clamp (A) |
| *b | Clamp (B) |
Disconnect the connector and disengage the clamp (A).
Separate the vacuum hose from the clamp (B).
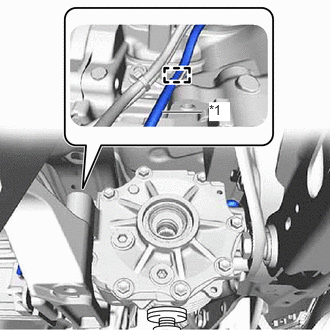
| *1 | Vacuum Hose |
Slightly lower the rear differential carrier assembly, remove the vacuum hose from the clamp.
- NOTICE:
-
Do not damage the vacuum hose and electro magnetic control coupling wire harness.
- HINT:
-
Lower the engine lifter to the extent that the vacuum hose can still be removed.
Lower the rear differential carrier assembly slowly to remove the rear differential carrier assembly.
- NOTICE:
- ·
Do not damage the vacuum hose and electro magnetic control coupling wire harness.
·Move the engine lifter forward and backward as necessary to prevent the rear differential carrier assembly from contacting the rear suspension member sub-assembly.
41653
7.REMOVE REAR UPPER DIFFERENTIAL MOUNT STOPPER
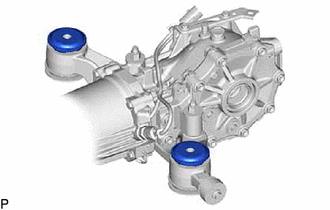
Remove the 2 rear upper differential mount stoppers from the rear No. 1 differential support.
41196
8.REMOVE REAR DIFFERENTIAL DYNAMIC DAMPER
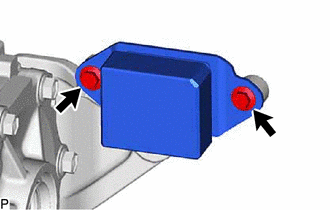
Remove the 2 bolts and rear differential dynamic damper from the rear differential support.
52391A
9.REMOVE REAR DIFFERENTIAL SUPPORT
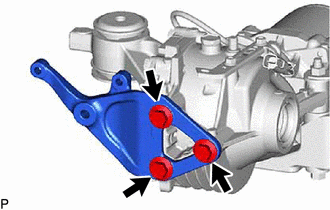
Remove the 3 bolts and rear differential support from the rear differential carrier assembly.