HVAC Control Unit Removal and Installation
Precautions: General safety (00)
Removal
1)Disconnect negative (–) cable at battery.
2)For LHD model, remove steering column hole cover. 
3)For LHD model, remove knee air bag (inflator) module (if equipped).
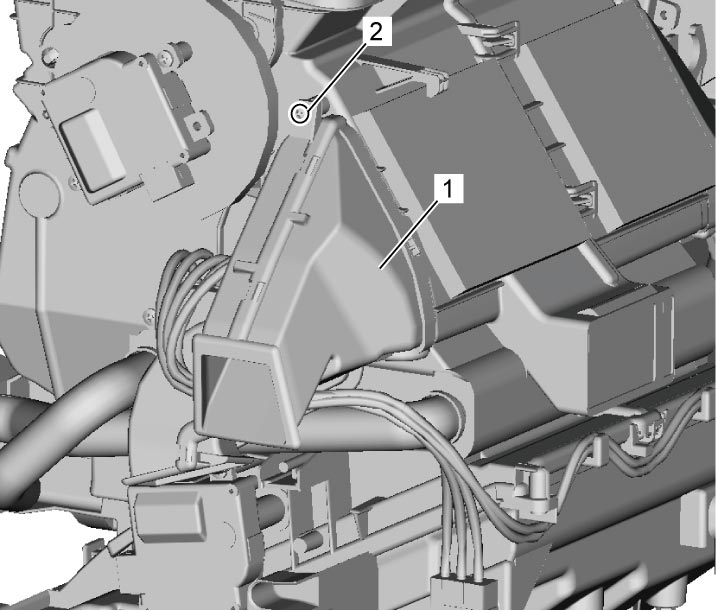
4)For LHD model, remove driver side foot duct (1) from HVAC unit by removing screw (2).

5)For RHD model, remove glove box.
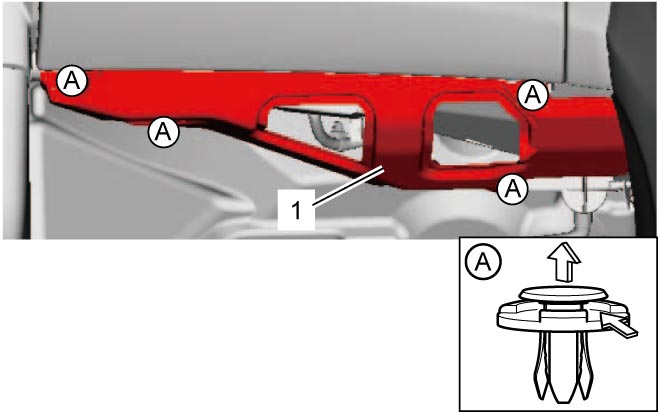
6)For RHD model, remove passenger side instrument panel undercover (1).
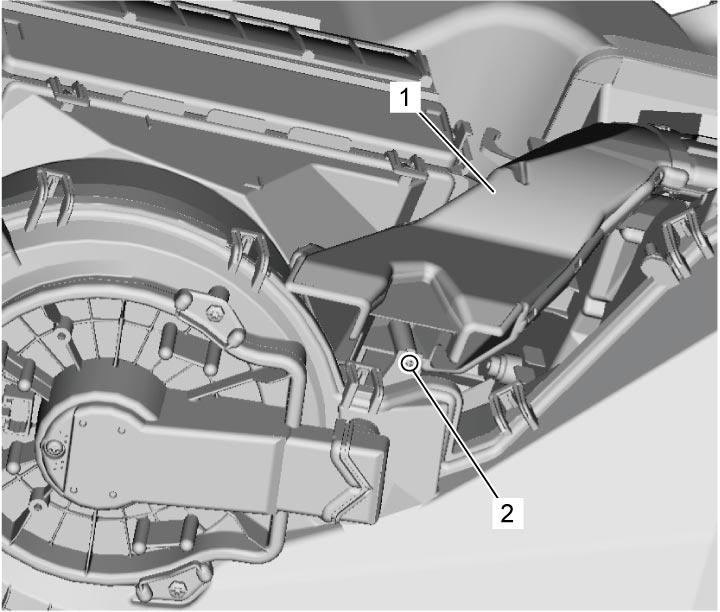
7)For RHD model, remove passenger side foot duct (1) from HVAC unit by removing screw (2).
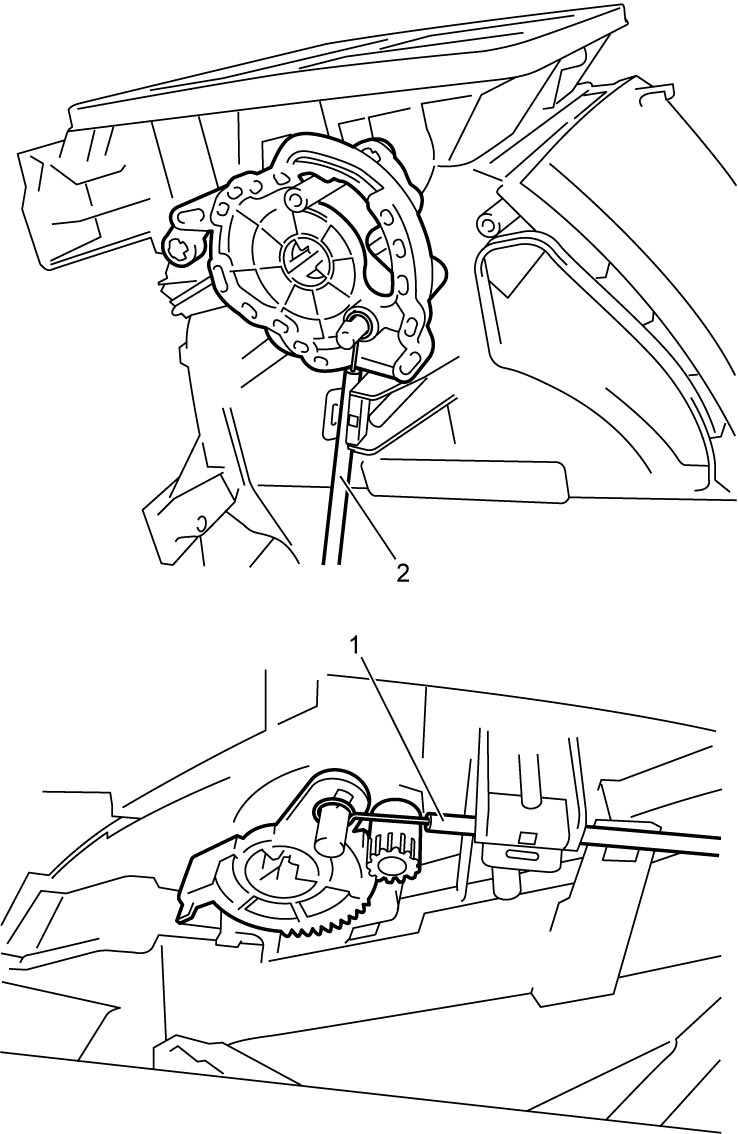
8)Disconnect temperature control cable (1) and air flow control cable (2) from HVAC unit.
9)Remove instrument panel center garnish, audio unit or navigation unit from instrument panel.
10)Remove HVAC control unit (1) from instrument panel carefully.
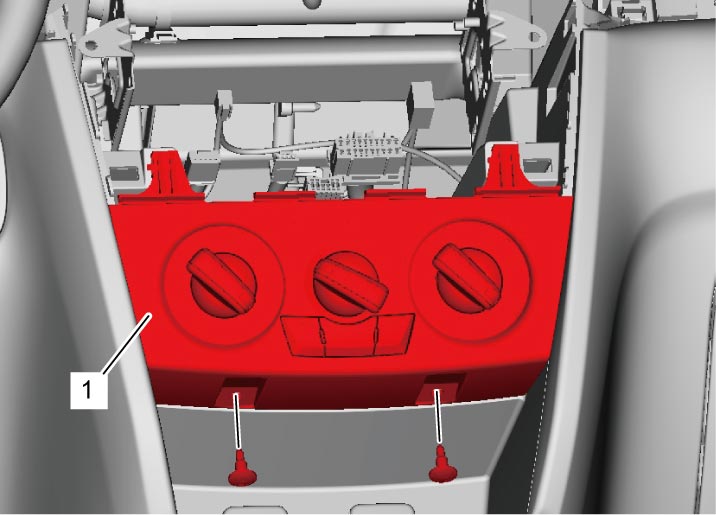
11)Disconnect HVAC control unit connectors.
Installation
Reverse removal procedure noting the following points.
•Connect temperature control cable and air flow control cable of HVAC control unit to corresponding links of HVAC unit as follows:
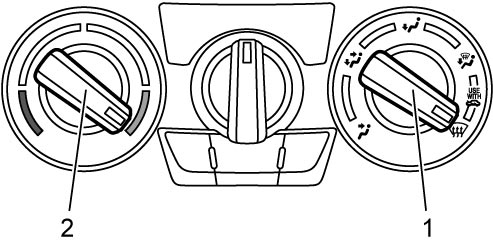
a.Set air flow selector (1) to “DEF” position and temperature selector (2) to “MAX HOT” position.
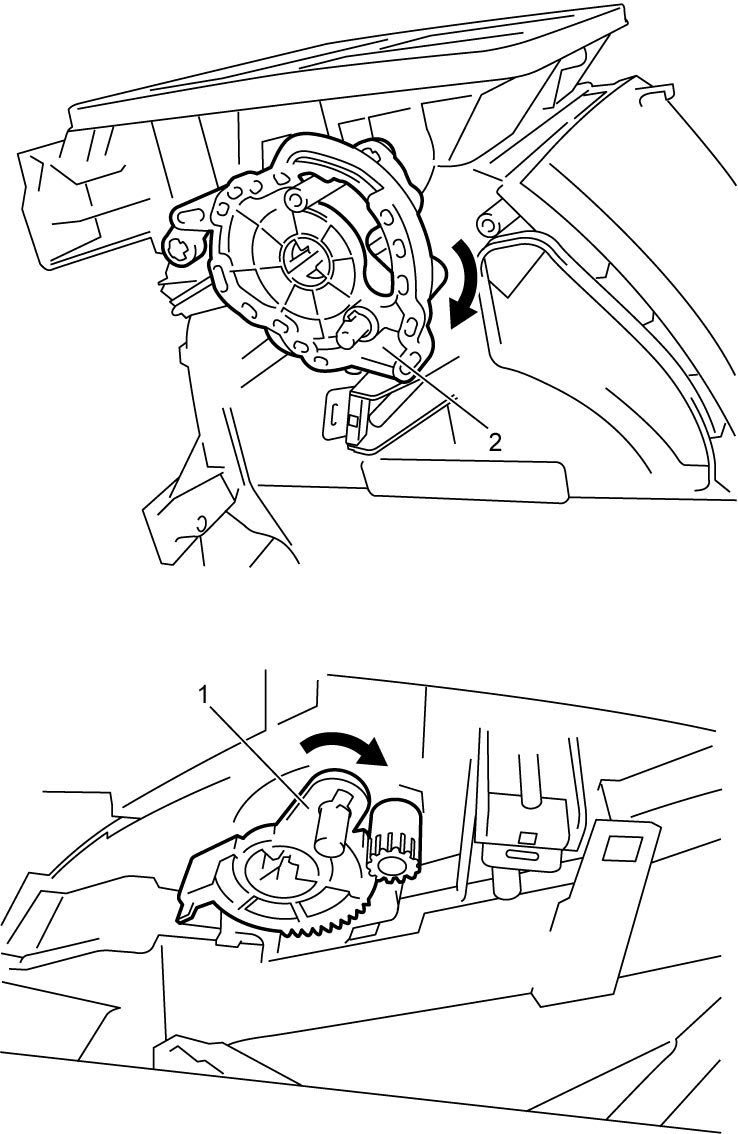
 b.Move temperature control lever (1) and air flow control plate (2) fully in arrow direction.
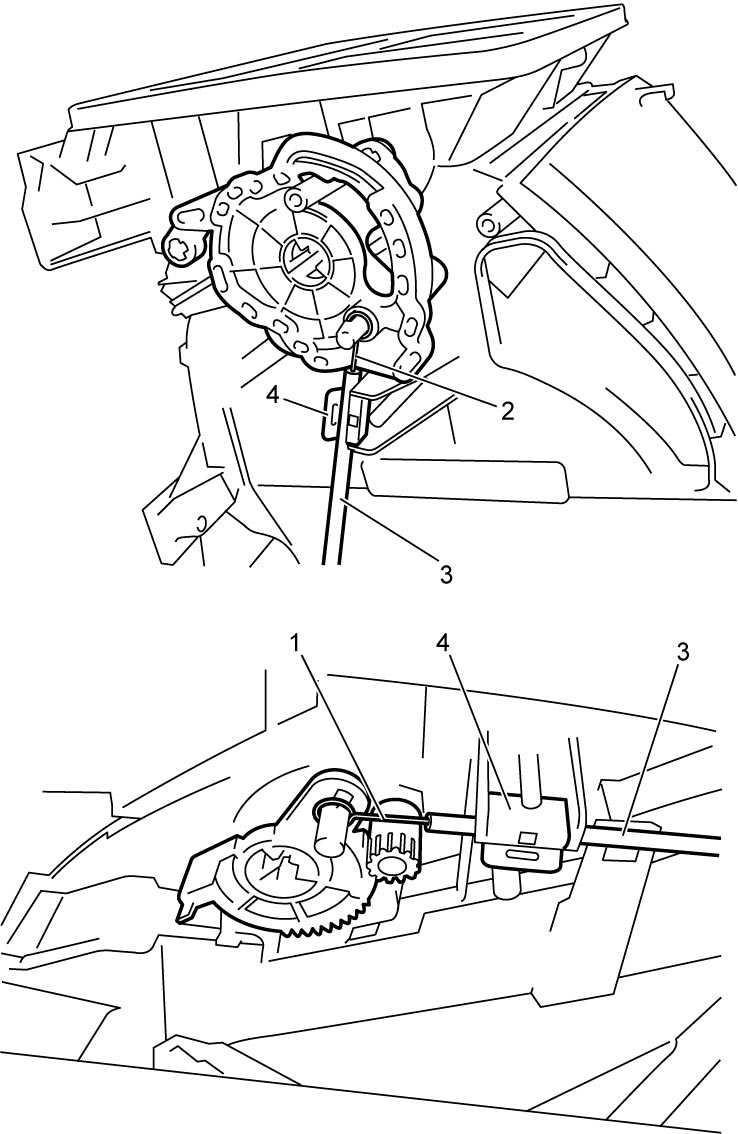
 c.Position air flow control cable above temperature control cable, fix temperature control inner cable (1) to pin of temperature control lever and air flow control inner cable (2) to pin of air flow control plate.
d.Fix each outer cable (3) to each cable lock clamp (4).
d.Fix each outer cable (3) to each cable lock clamp (4).
NOTE:
After installing control cables, check that control lever and plate move smoothly and stop at proper position.
•Check that air flow outlet changes correctly as air flow selector is changed.
•Check that outlet temperature changes correctly as temperature selector is changed.
•Check that outlet temperature changes correctly as temperature selector is changed.