FA20 ENGINE MECHANICAL ENGINE UNIT REMOVAL
CAUTION / NOTICE / HINT
- CAUTION:
- ·
The exhaust valve is encapsulated with metallic sodium. The metallic sodium is a strong alkaline and prone to cause a serious chemical reaction. Therefore, extra caution is required when handling or disposing the exhaust valve.
·Never disassemble the exhaust valve. The metallic sodium may cause blindness if it gets into your eyes, or cause burn injuries or chemical reactions resulting in fire if it comes into contact with your skin or any heat source.
·Make sure to wear safety glasses and protective gloves when removing a damaged exhaust valve.
·Do not intentionally damage the exhaust valve to remove the metallic sodium.
- NOTICE:
-
If it is clearly stated that the industrial waste disposal method is not pressing but dissolution, ask the industrial waste disposal operator to dispose of the valve. If the exhaust valve is damaged, remove the exhaust valve, perform the following neutralization process, and then dispose of it according to the same procedures that are provided for other parts.
- HINT:
- ·
The exhaust valve is encapsulated with metallic sodium. This is safe as long as it does not come into contact with air.
·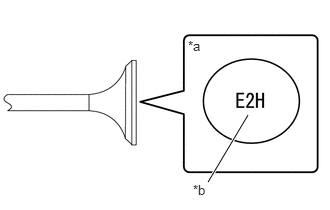 2.167,1.896 2.583,1.198 true 1.958,0.396 2.271,0.594 0.313,0.198 10 false *a 2.01,1.896 2.323,2.094 0.313,0.198 10 false *b
The exhaust valve in which metallic sodium is encapsulated can be identified with the embossed mark.
·For removal of the exhaust valve, see pageEngine / Hybrid System>FA20 (ENGINE MECHANICAL)>CYLINDER HEAD>DISASSEMBLY
·For disposal of the exhaust valve, see pageEngine / Hybrid System>FA20 (ENGINE MECHANICAL)>CYLINDER HEAD>DISASSEMBLY
| *a | Example |
| *b | Embossed mark (E2H, E3H or E4H is for FA20 Engine) |
PROCEDURE

 1.REMOVE ENGINE HANGERS
Remove the bolt and engine hanger.
27029
2.REMOVE GENERATOR COVER
27029A
3.REMOVE BELT GENERATOR COVER
16361A
4.REMOVE FAN AND GENERATOR V BELT
27020
5.REMOVE GENERATOR ASSEMBLY
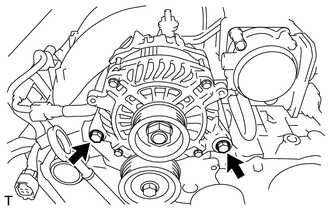
Remove the 2 bolts and generator assembly.
11452
6.REMOVE OIL LEVEL DIPSTICK GUIDE
16604
7.REMOVE NO. 2 IDLER PULLEY SUB-ASSEMBLY
16620
8.REMOVE V-RIBBED BELT TENSIONER ASSEMBLY
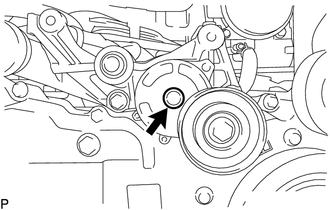
Remove the cap.
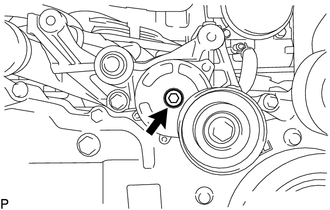
Using an 8 mm hexagon wrench, remove the bolt and V-ribbed belt tensioner assembly.
9.REMOVE GENERATOR BRACKET
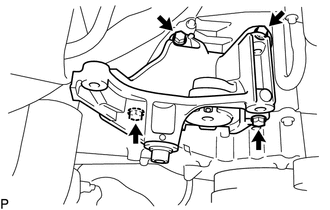
Remove the 4 bolts and generator bracket.
88310E
10.REMOVE COMPRESSOR WITH MAGNET CLUTCH (w/ Air Conditioning System)
16631
11.REMOVE IDLER PULLEY BRACKET (w/o Air Conditioning System)
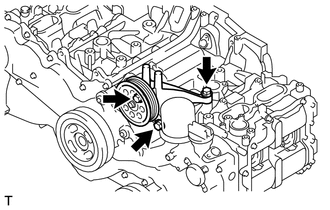
Remove the 3 bolts and the idler pulley bracket.
23261A
12.REMOVE INJECTOR COVER (for Bank 2)
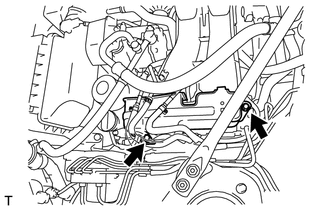
Remove the 2 bolts and injector cover.
23261A
13.REMOVE INJECTOR COVER (for Bank 1)
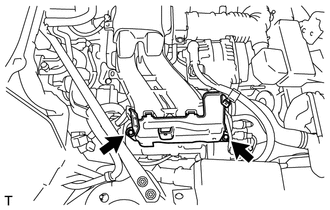
Remove the 2 bolts and injector cover.
23807
14.REMOVE FUEL DELIVERY PIPE SUB-ASSEMBLY
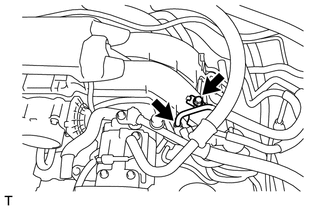
Remove the bolt and disconnect the fuel delivery pipe sub-assembly.
Disconnect the No. 2 fuel vapor feed hose.
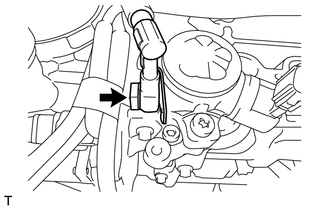
Remove the union bolt and gasket, and disconnect the fuel delivery pipe sub-assembly.
12261
15.SEPARATE VENTILATION HOSE
17111
16.REMOVE INTAKE MANIFOLD
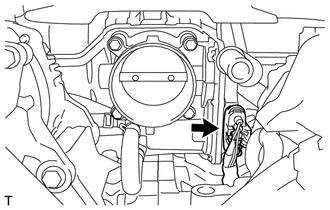
Disconnect the throttle body assembly connector.
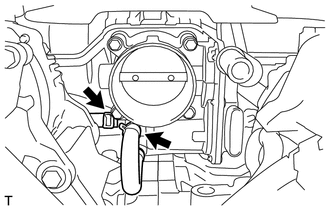
Disconnect the 2 water by-pass hoses from the throttle body assembly.
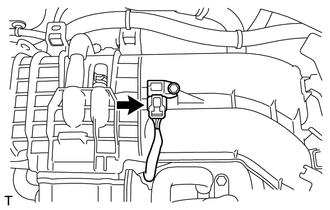
Disconnect the vacuum sensor connector.
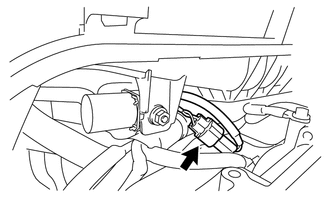
Disconnect the No. 1 vacuum switching valve assembly connector.
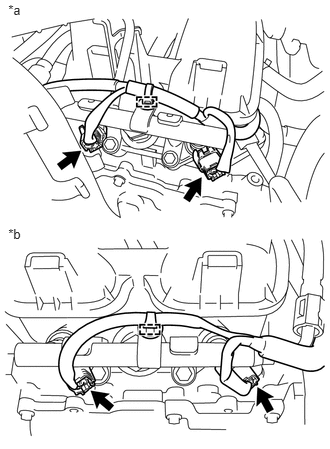
Disengage the 2 clamps and disconnect the 4 connectors.
| *a | for Bank 2 |
| *b | for Bank 1 |
Disconnect the wire harness.
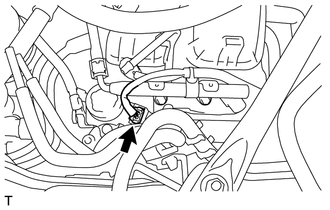
Disconnect the fuel pump connector.
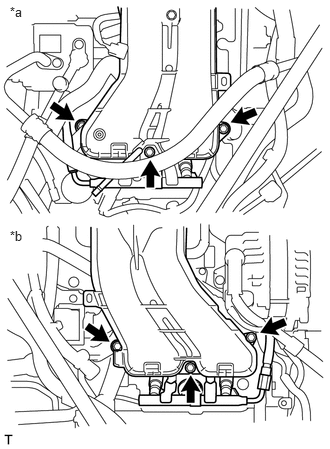
Remove the 6 bolts, intake manifold and 2 gaskets.
| *a | for Bank 2 |
| *b | for Bank 1 |
23815
17.REMOVE NO. 2 FUEL DELIVERY PIPE
23814B
18.REMOVE FUEL DELIVERY PIPE
23815E
19.REMOVE FUEL DELIVERY PIPE LH
23814E
20.REMOVE FUEL DELIVERY PIPE RH
23250
21.REMOVE FUEL INJECTOR ASSEMBLY
23250B
22.REMOVE FUEL INJECTOR O-RING
23100X
23.REMOVE FUEL PUMP ASSEMBLY
13751A
24.REMOVE VALVE LIFTER
11104E
25.REMOVE PUMP DRIVE CASE ASSEMBLY
82121
26.REMOVE ENGINE WIRE
Remove the 2 bolts and separate the ground wire harness.
Disconnect each connector and clamp, and remove the engine wire.
12262
27.REMOVE NO. 2 VENTILATION HOSE
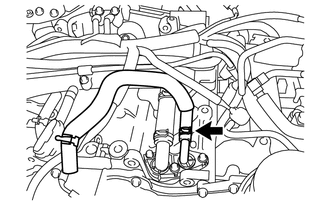
Disconnect the No. 2 ventilation hose.
16264
28.REMOVE NO. 2 WATER BY-PASS HOSE
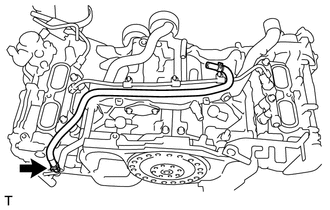
Disconnect the No. 2 water by-pass hose.
32943C
29.REMOVE NO. 3 TRANSMISSION OIL COOLER HOSE (for Automatic Transmission)
Disconnect the No. 3 transmission oil cooler hose.
16268
30.REMOVE NO. 1 WATER BY-PASS PIPE (for Manual Transmission)
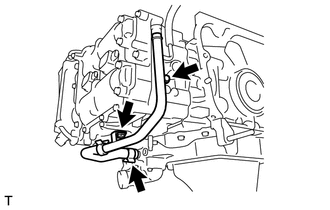
Loosen the hose clip and disconnect the water by-pass hose.
Remove the 2 bolts and the No. 1 water by-pass pipe.
16268
31.REMOVE NO. 1 WATER BY-PASS PIPE (for Automatic Transmission)
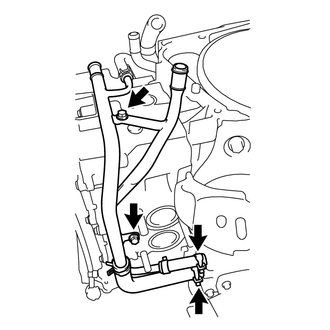
Loosen the 2 hose clips and disconnect the 2 water by-pass hoses.
Remove the 2 bolts and No. 1 water by-pass pipe.
19500
32.REMOVE IGNITION COIL ASSEMBLY
Remove the 4 bolts and 4 ignition coil assemblies.