TX6A AUTOMATIC TRANSMISSION / TRANSAXLE AUTOMATIC TRANSMISSION ASSEMBLY REMOVAL
PROCEDURE

 1.DISCONNECT CABLE FROM NEGATIVE BATTERY TERMINAL
51441
2.REMOVE NO. 1 ENGINE UNDER COVER
51442E
3.REMOVE NO. 2 ENGINE UNDER COVER
51444A
4.REMOVE REAR ENGINE UNDER COVER LH (w/ Floor Under Cover)
51443C
5.REMOVE REAR ENGINE UNDER COVER RH (w/ Floor Under Cover)
- HINT:
-
Use the same procedure for the RH side as for the LH side.
6.DRAIN AUTOMATIC TRANSMISSION FLUID
37100
7.REMOVE PROPELLER WITH CENTER BEARING SHAFT ASSEMBLY
48811
8.REMOVE FRONT STABILIZER BAR
28100
9.REMOVE STARTER ASSEMBLY
10.DISCONNECT WIRING HARNESS CONNECTOR
- HINT:
-
Fix disconnected harness components with tape to keep them out of the way.
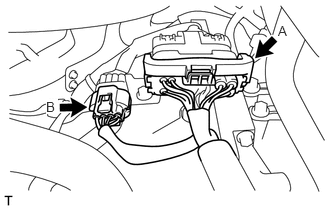
Release the lock of connector (A) and disconnect the connector.
Disconnect the connector (B).
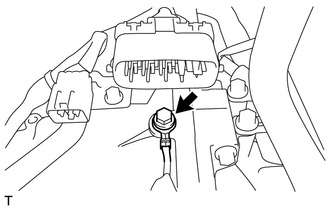
Remove the bolt and disconnect the ground cable.
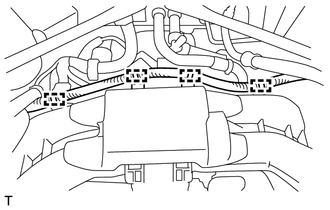
Disengage the 4 wire harness clamps.
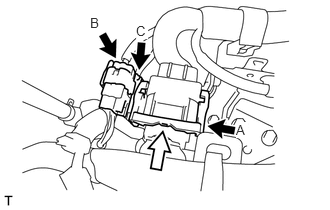
Release the lock of connector (A) and disconnect the connector.
Disconnect the connector (B) and (C).
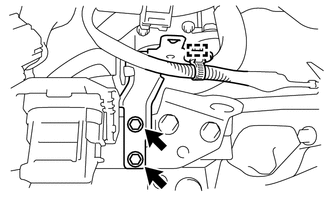
Disengage the wire harness clamp.
Remove the 2 bolts and the wire harness clamp bracket.
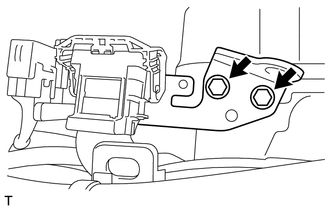
Remove the 2 bolts and the No. 2 engine hanger.
44771
11.DISCONNECT VACUUM TUBE CONNECTOR HOSE (for LHD)
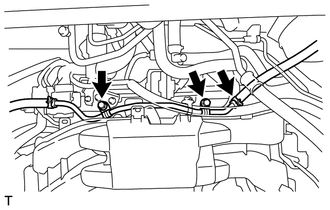
Remove the 2 bolts and the disconnect the union to check valve hose.
11361J
12.REMOVE FLYWHEEL HOUSING UNDER COVER
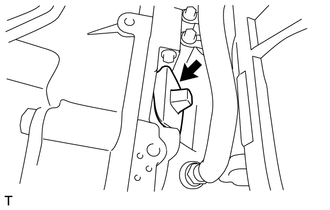
Remove the flywheel housing side cover from the automatic transmission assembly.
32101C
13.REMOVE DRIVE PLATE AND TORQUE CONVERTER SETTING BOLT
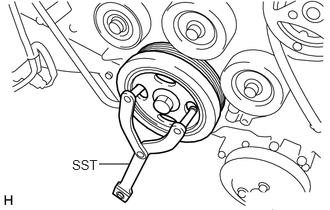
Using SST, hold the crankshaft pulley.
- SST
- 09960-10010 (09962-01000, 09963-01000)
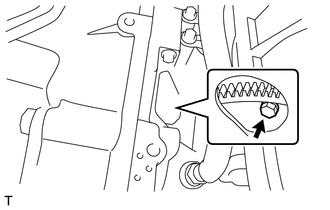
Remove the 6 drive plate and torque converter setting bolt.
35000
14.DISCONNECT AUTOMATIC TRANSMISSION ASSEMBLY
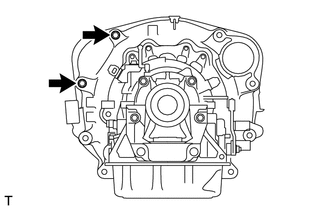
Remove the 2 bolts from the automatic transmission assembly.
17141
15.REMOVE EXHAUST MANIFOLD
16.SUSPEND ENGINE ASSEMBLY
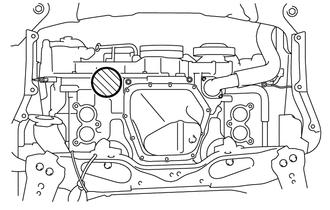
Support the engine assembly with an engine lifter so that it is stable shown in the illustration.

|
Attachment Placement Positions |
- NOTICE:
- ·
Set the engine assembly with transmission so that it is horizontal.
·Never attach the attachment and plate lift attachment to the oil pan section of the engine assembly.
32943B
17.REMOVE TRANSMISSION OIL COOLER HOSE
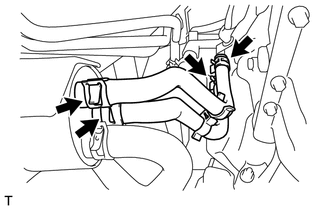
Loosen the 4 hose clamps and remove the 2 transmission oil cooler hoses.
- NOTICE:
-
Use a container to catch any coolant which flows out of the transmission oil cooler hoses.
32907A
18.SEPARATE OIL COOLER TUBE
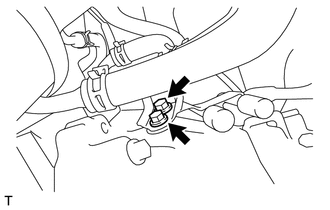
Remove the 2 bolts and separate the oil cooler tube.
89413B
19.REMOVE TRANSMISSION REVOLUTION SENSOR (NT)
33702B
20.REMOVE FLOOR SHIFT GEAR SHIFTING ROD SUB-ASSEMBLY
While pushing the shift lock release button, move the shift lever to N.
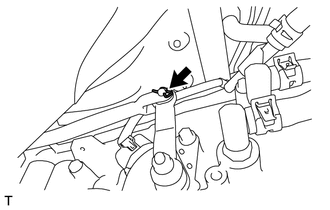
Remove the clip, pin and the floor shift gear shifting rod sub-assembly from the transmission control shaft lever RH.
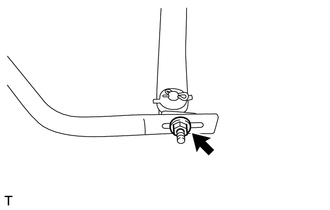
Remove the nut and disconnect the floor shift gear shifting rod sub-assembly.
17455
21.REMOVE EXHAUST PIPE BRACKET
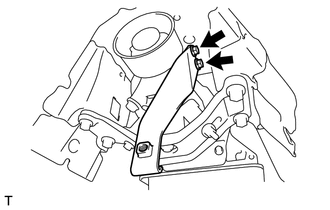
Remove the 2 bolts and the exhaust pipe bracket from the automatic transmission assembly.
35000
22.SUPPORT AUTOMATIC TRANSMISSION ASSEMBLY
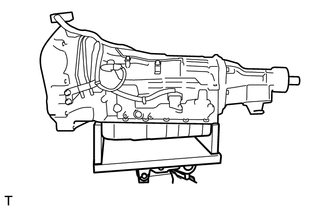
Support the automatic transmission assembly with a high transmission jack.
- NOTICE:
-
To prevent damage to and deformation of the oil pan, never place a jack under the oil pan area of the automatic transmission assembly.
12372
23.REMOVE REAR NO. 2 ENGINE MOUNTING INSULATOR
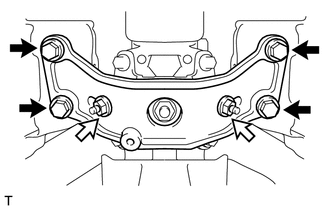
Remove the 4 bolts, 2 washers and 2 nuts and the rear No. 2 engine mounting insulator from the rear No. 1 engine mounting insulator.

|
Bolt |

|
Nut |
12371
24.REMOVE REAR NO. 1 ENGINE MOUNTING INSULATOR
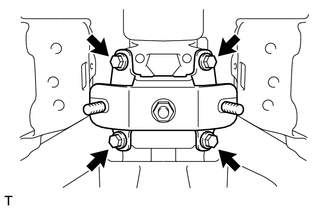
Remove the 4 bolts and the rear No. 1 engine mounting insulator from the automatic transmission assembly.
35000
25.REMOVE AUTOMATIC TRANSMISSION ASSEMBLY
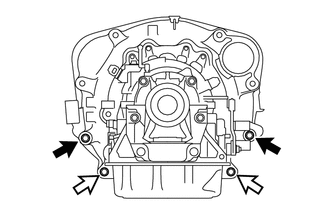
Remove the 2 bolts and 2 nuts and the automatic transmission assembly from the engine assembly.
|
|
Bolt |
|
|
Nut |
- NOTICE:
- ·
To prevent damage to the knock pins, do not pry between the automatic transmission assembly and the engine assembly.
·Do not allow the torque converter to fall off.
26.DISCONNECT WIRE HARNESS
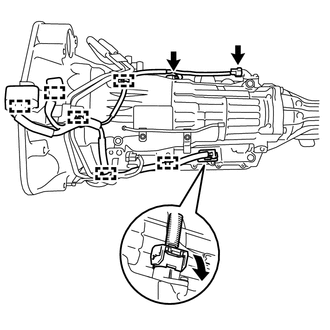
Disconnect the park/neutral position switch connector, transmission wire connector and the transmission revolution sensor connector.
- HINT:
-
Disengage the claw, press down the lever, and disconnect the transmission wire connector.
Disengage the 6 wire harness clamps and the wire harness from the automatic transmission assembly.
32916
27.REMOVE OIL COOLER TUBE
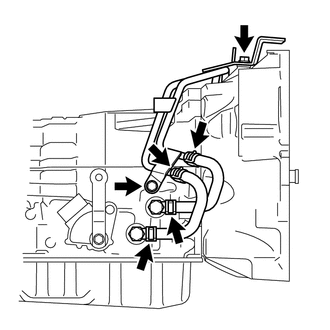
Loosen the 4 hose clamps and remove the 2 oil cooler hoses.
- NOTICE:
-
Use a container to catch any coolant which flows out of the oil cooler hoses.
Remove the 2 bolts and the oil cooler tube from the automatic transmission assembly.
32000
28.REMOVE TORQUE CONVERTER ASSEMBLY
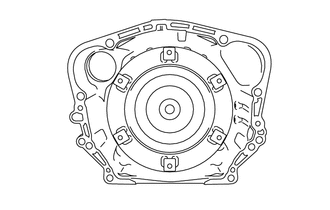
Remove the torque converter assembly from the automatic transmission assembly.
- NOTICE:
-
Remove the torque converter assembly from the input shaft horizontally.
32000
29.INSPECT TORQUE CONVERTER ASSEMBLY