REMOVAL
Removal / installation · Vehicles built from Aug 2014
Versions by build date: Aug 2013 – Jul 2014 from Aug 2014
| 1. DISCONNECT NO. 2 PARKING BRAKE SHOE ASSEMBLY WITH PARKING BRAKE SHOE LEVER |

- HINT:
- Refer to the procedures up to "Remove No. 2 Parking Brake Shoe Assembly with Parking Brake Shoe Lever" (Click here).
| 2. REMOVE FUEL TANK SUB-ASSEMBLY |
for 1GR-FE:
Remove the fuel tank sub-assembly (Click here).
for 1KD-FTV, for 3 Door:
Remove the fuel tank sub-assembly (Click here).
for 1KD-FTV, for 5 Door:
Remove the fuel tank sub-assembly (Click here).
for 2TR-FE, for 3 Door:
Remove the fuel tank sub-assembly (Click here).
for 2TR-FE, for 5 Door:
Remove the fuel tank sub-assembly (Click here).
for 5L-E:
Remove the fuel tank sub-assembly (Click here).
| 3. REMOVE CENTER EXHAUST PIPE ASSEMBLY (for 3 Door) |
for 1KD-FTV:
Remove the center exhaust pipe assembly (Click here).
for 2TR-FE:
Remove the center exhaust pipe assembly (Click here).
| 4. REMOVE REAR CONSOLE BOX ASSEMBLY |
for Automatic Transmission:
Remove the rear console box assembly (Click here).
for Manual Transmission:
Remove the rear console box assembly (Click here).
w/ Refrigerated Cool Box:
Remove the rear console box assembly (Click here).
for Bench Seat Type:
Remove the rear console box assembly (Click here).
| 5. REMOVE NO. 2 PARKING BRAKE CABLE ASSEMBLY |
Loosen the adjusting nut.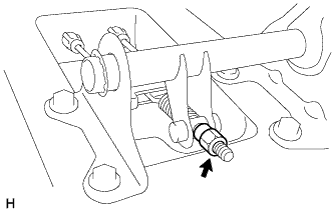

Disconnect the No. 2 parking brake cable from the No. 1 parking brake pull rod.
Pinch the claws of the No. 2 parking brake cable and push the cable outside of the vehicle slightly.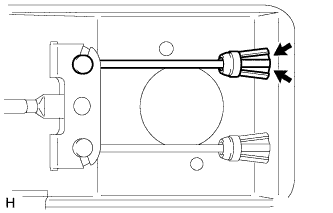
Remove the 2 bolts and disconnect the No. 2 parking brake cable assembly from the backing plate.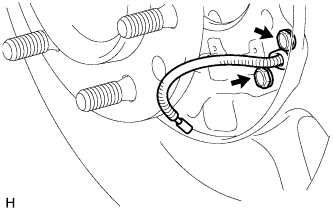
for 3 Door:
Remove the 2 bolts, 3 nuts and No. 2 parking brake cable.
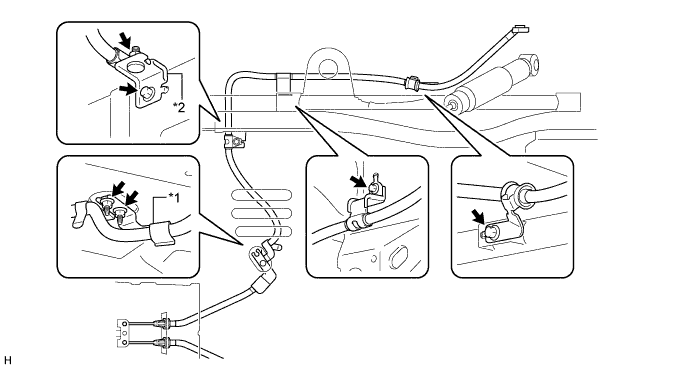
Text in Illustration *1
No. 1 Parking Brake Cable Clamp
*2
No. 3 Parking Brake Cable Clamp
Detach the No. 1 parking brake cable clamp from the No. 2 parking brake cable.
Remove the No. 3 parking brake cable clamp from the body.
for 5 Door:
Remove the No. 1 parking brake cable heat insulator.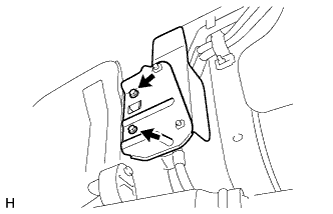
Remove the 5 bolts and No. 2 parking brake cable.
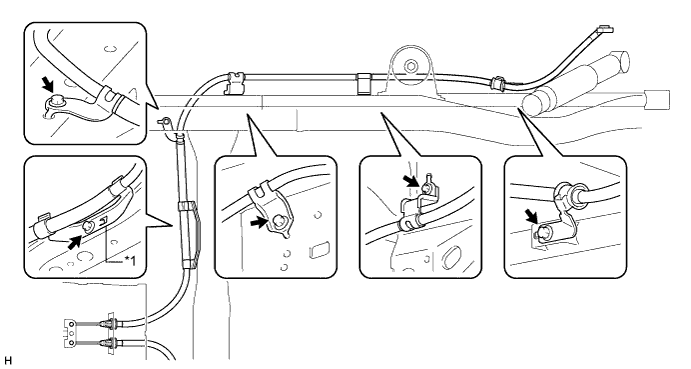
Text in Illustration *1
No. 2 Parking Brake Cable Clamp
-
-
Detach the No. 2 parking brake cable clamp from the No. 2 parking brake cable.
| 6. REMOVE NO. 3 PARKING BRAKE CABLE ASSEMBLY |
Loosen the adjusting nut.
Disconnect the No. 3 parking brake cable from the No. 1 parking brake pull rod.
Pinch the claws of the No. 3 parking brake cable and push the cable outside of the vehicle slightly.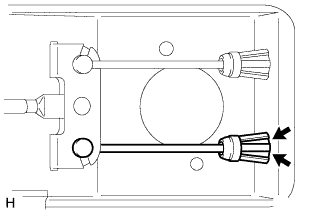
Remove the 2 bolts and disconnect the No. 3 parking brake cable assembly from the backing plate.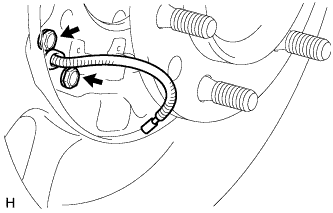
for 3 Door:
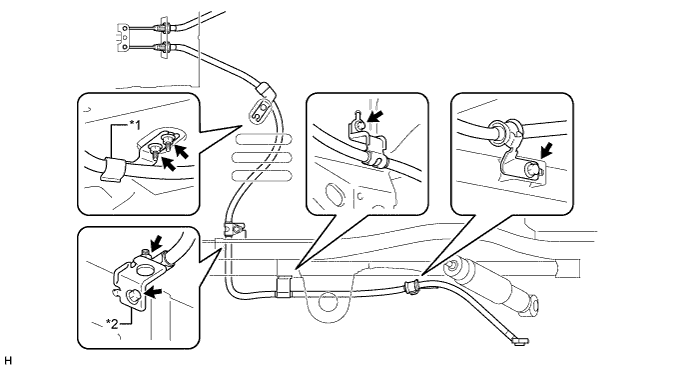
Text in Illustration *1
No. 2 Parking Brake Cable Clamp
*2
No. 4 Parking Brake Cable Clamp
Remove the 2 bolts, 3 nuts and No. 3 parking brake cable.
Detach the No. 2 parking brake cable clamp from the No. 3 parking brake cable.
Remove the No. 4 parking brake cable clamp from the body.
for 5 Door:
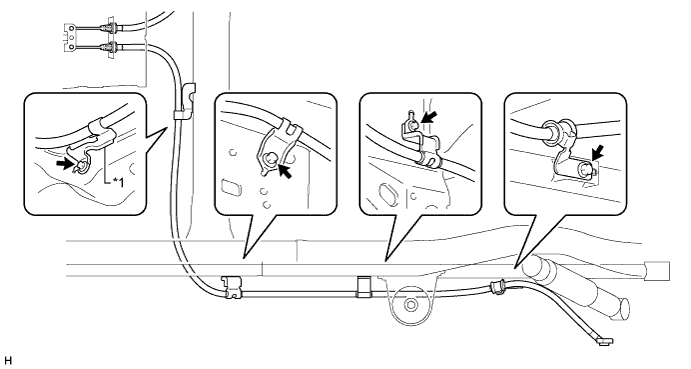
Text in Illustration *1
No. 3 Parking Brake Cable Clamp
*2
-
Remove the 4 bolts and No. 3 parking brake cable.
Detach the No. 3 parking brake cable clamp from the No. 3 parking brake cable.