2011-2013 Land Cruiser · Service Manual Engine / Hybrid / EV System

REMOVAL

Removal / installation · Vehicles built from Jan 2012

Versions by build date: Sep 2011 – Dec 2011 from Jan 2012


1. RECOVER REFRIGERANT FROM REFRIGERATION SYSTEM
  1. Start the engine.

  1. Turn the A/C switch on.

  1. Operate the cooler compressor while the engine speed is approximately 1000 rpm for 5 to 6 minutes to circulate the refrigerant and collect the compressor oil remaining in each component into the cooler compressor.

  1. Stop the engine.

  1. Recover the refrigerant from the A/C system using a refrigerant recovery unit.


2. DISCHARGE FUEL SYSTEM PRESSURE
(Click here)

3. PRECAUTION

NOTICE:
After turning the ignition switch off, waiting time may be required before disconnecting the cable from the battery terminal. Therefore, make sure to read the disconnecting the cable from the battery terminal notice before proceeding with work (Click here).


4. DISCONNECT CABLE FROM NEGATIVE BATTERY TERMINAL

NOTICE:
When disconnecting the cable, some systems need to be initialized after the cable is reconnected (Click here).


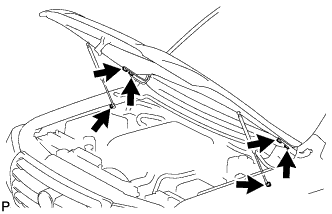
5. REMOVE HOOD SUB-ASSEMBLY

  1. A174152
    Remove the 2 hood support bolts and disconnect the hood supports.

  1. Remove the 4 bolts and hood.


6. REMOVE COWL TOP VENTILATOR LOUVER SUB-ASSEMBLY
(Click here)

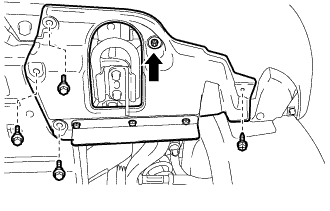
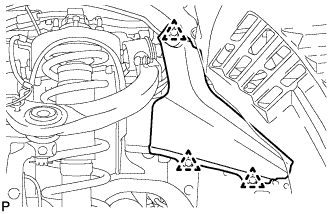
7. REMOVE FRONT FENDER SPLASH SHIELD SUB-ASSEMBLY LH

  1. B310791
    Remove the 3 bolts and screw.

  1. Turn the clip indicated by the arrow in the illustration to remove the front fender splash shield sub-assembly LH.


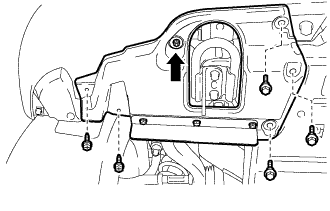
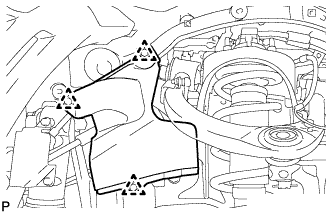
8. REMOVE FRONT FENDER SPLASH SHIELD SUB-ASSEMBLY RH

  1. B310792
    Remove the 3 bolts and 2 screws.

  1. Turn the clip indicated by the arrow in the illustration to remove the front fender splash shield sub-assembly RH.


9. REMOVE NO. 1 ENGINE UNDER COVER SUB-ASSEMBLY

  1. A178461
    Remove the 10 bolts and No. 1 engine under cover.


10. REMOVE NO. 2 ENGINE UNDER COVER
  1. Remove the 2 bolts and No. 2 engine under cover.


11. REMOVE UPPER RADIATOR SUPPORT SEAL

  1. Remove the 7 clips and radiator support seal.

    B180890E02


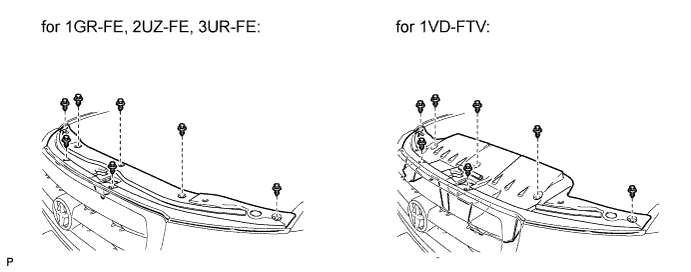
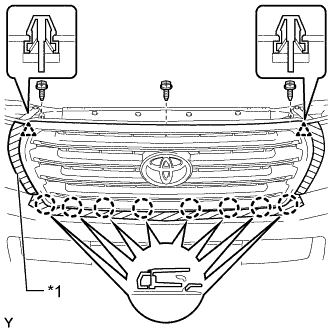
12. REMOVE RADIATOR GRILLE

  1. B302174E01
    Put protective tape around the radiator grille assembly.
    Text in Illustration 
    *1
    Protective Tape

  1. Remove the 3 screws.

  1. Detach the 2 clips and 8 claws, and remove the radiator grille assembly.

  1. w/ Wide View Front Monitor System:

    1. Disconnect the connector.


13. REMOVE FRONT BUMPER COVER
  1. for Standard (Click here)
  2. w/ Winch (Click here)

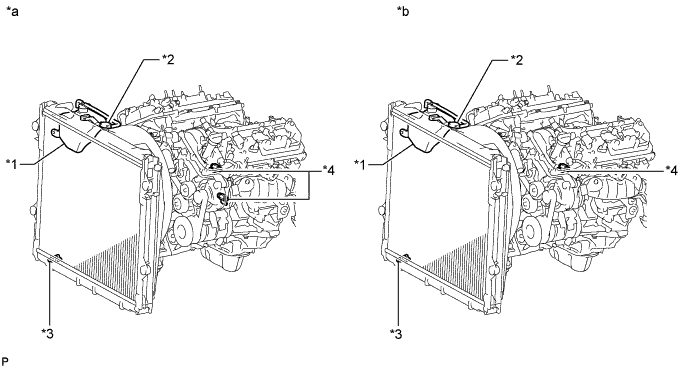
14. DRAIN ENGINE COOLANT

CAUTION:
Do not remove the radiator cap while the engine and radiator are still hot. Pressurized, hot engine coolant and steam may be released and cause serious burns.


A274035E01
Text in Illustration 
*1
Radiator Reservoir
*2
Radiator Cap
*3
Radiator Drain Cock Plug
*4
Cylinder Block Water Drain Cock Plug
*a
for Type A
*b
for Type B
  1. for Type A:
    Loosen the radiator drain cock plug and 2 cylinder block water drain cock plugs.

  1. for Type B:
    Loosen the radiator drain cock plug and cylinder block water drain cock plug.

  1. Remove the radiator cap. Then drain the coolant.

    HINT:
    Collect the coolant in a container and dispose of it according to the regulations in your area.

  1. for Type A:
    Tighten the 2 cylinder block water drain cock plugs.

    Torque:
    13 N*m{ 130 kgf*cm , 9 ft.*lbf }

  1. for Type B:
    Tighten the cylinder block water drain cock plug.

    Torque:
    13 N*m{ 130 kgf*cm , 9 ft.*lbf }

  1. Tighten the radiator drain cock plug by hand.


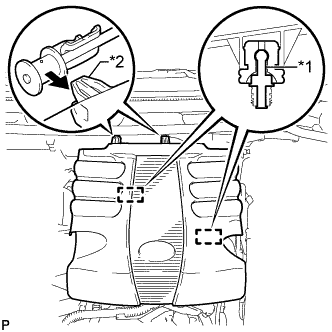
15. REMOVE V-BANK COVER

  1. A267633E01
    Raise the front of the V-bank cover to detach the 2 pins. Then remove the 2 V-bank cover hooks from the bracket, and remove the V-bank cover.
    Text in Illustration 
    *1
    Pin
    *2
    Hook


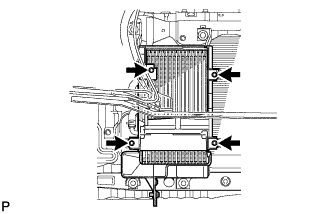
16. REMOVE TRANSMISSION OIL COOLER AIR DUCT (w/ Air Cooled Transmission Oil Cooler)

  1. A266155
    Remove the 4 bolts and oil cooler air duct.


17. REMOVE RADIATOR SIDE DEFLECTOR RH (w/o Air Cooled Transmission Oil Cooler)

  1. A266156
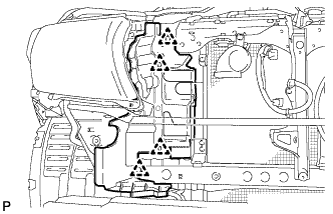
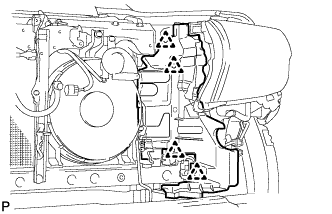
    Using a clip remover, remove the 4 clips and move the side deflector so that the radiator can be removed in a later step.


18. REMOVE RADIATOR SIDE DEFLECTOR LH

  1. A266157
    Using a clip remover, remove the 4 clips and move the side deflector so that the radiator can be removed in a later step.


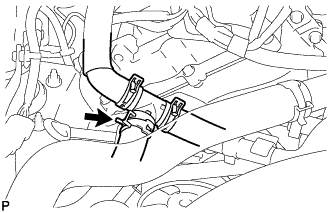
19. REMOVE NO. 1 RADIATOR HOSE

20. REMOVE NO. 2 RADIATOR HOSE

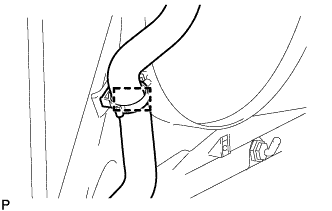
  1. A273588
    Detach the clamp and remove the No. 2 radiator hose.


21. DISCONNECT OIL COOLER TUBE (w/ Air Cooled Transmission Oil Cooler)

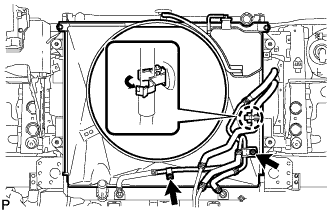
  1. A266158
    Detach the claw to open the flexible hose clamp, and then remove the 2 bolts to disconnect the oil cooler tube from the fan shroud.


22. REMOVE FAN SHROUD
  1. Loosen the 4 nuts holding the fluid coupling fan.

  1. Remove the fan and generator V-belt (Click here).

  1. A273614
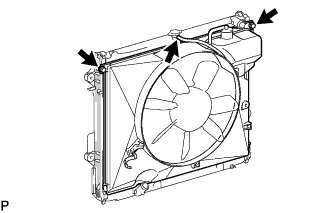
    Disconnect the reservoir hose from the upper side of the radiator tank.

  1. Remove the 2 bolts holding the fan shroud.

  1. Remove the 4 nuts of the fluid coupling fan, and then remove the shroud together with the coupling fan.

    NOTICE:
    Be careful not to damage the radiator core.

  1. Remove the fan pulley from the water pump.


23. DISCONNECT INLET OIL COOLER HOSE (for Automatic Transmission)

  1. A266159
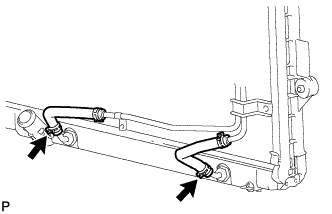
    Disconnect the oil cooler hose.


24. DISCONNECT OUTLET OIL COOLER HOSE (for Automatic Transmission)
  1. Disconnect the oil cooler hose.


25. REMOVE RADIATOR ASSEMBLY

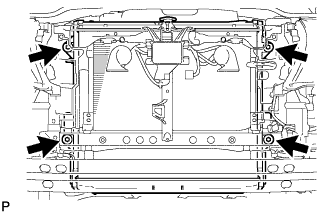
  1. A174323
    Remove the 4 bolts and radiator.


26. DRAIN ENGINE OIL
  1. Remove the oil filler cap.

  1. Remove the 2 bolts and No. 2 engine under cover seal.

  1. Remove the oil pan drain plug and gasket, and drain the engine oil into a container.

  1. Install a new gasket and the oil pan drain plug.

    Torque:
    40 N*m{ 408 kgf*cm , 30 ft.*lbf }

  1. Install the No. 2 engine under cover seal with the 2 bolts.

    Torque:
    10 N*m{ 102 kgf*cm , 7 ft.*lbf }


27. REMOVE AIR CLEANER CAP AND HOSE

  1. A273474
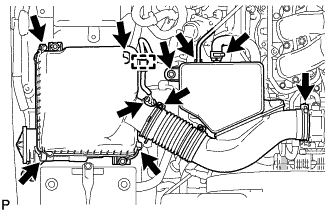
    Remove the air cleaner cap and hose.

    1. Disconnect the mass air flow meter connector, vacuum hose and ventilation hose and detach the clamp.

    2. Loosen the clamp.

    3. Unfasten the 4 hook clamps, and then remove the bolt and the air cleaner cap and hose.


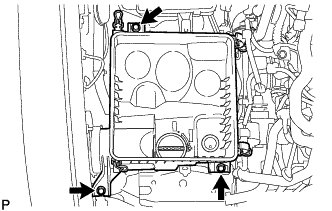
28. REMOVE AIR CLEANER CASE SUB-ASSEMBLY
  1. Remove the air cleaner filter element.

  1. A270980
    Remove the 3 bolts and air cleaner case.


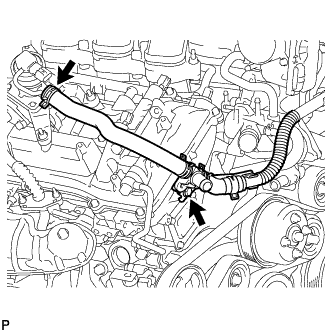
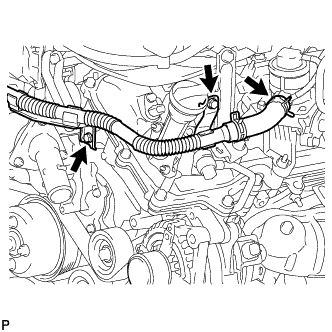
29. REMOVE AIR TUBE ASSEMBLY (w/ Secondary Air Injection System)

  1. A270147
    Disconnect the No. 3 air hose.

  1. A270144
    for Bank 1 Side:
    Remove the bolt and disconnect the air tube assembly from the emission control valve set.

  1. A270145
    for Bank 2 Side:
    Remove the 2 bolts and disconnect the air tube assembly from the No. 2 emission control valve set.


30. REMOVE INTAKE AIR SURGE TANK

  1. A270146
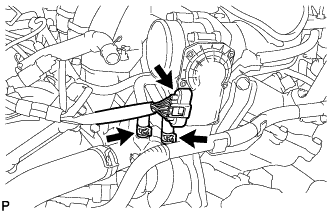
    Disconnect the throttle body connector.

  1. Disconnect the No. 4 water by-pass hose.

  1. Disconnect the No. 5 water by-pass hose.

  1. A221457
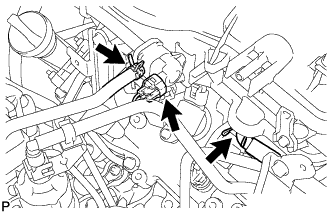
    Disconnect the purge line hose.

  1. Disconnect the No. 1 vacuum switching valve connector.

  1. Disconnect the No. 1 PCV hose.

  1. A221460
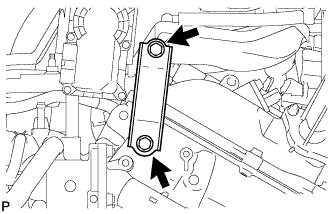
    Remove the 2 bolts and throttle body bracket.

  1. A270141
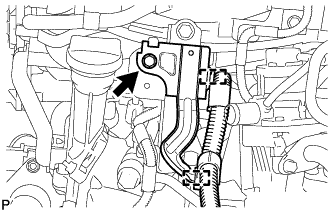
    Detach the 2 wire harness clamps and remove the bolt and bracket.

  1. A221461
    Detach the wire harness clamp.

  1. A238095
    Remove the 2 bolts and No. 1 surge tank stay.

  1. A270142
    for Manual Transmission:
    Remove the nut and disconnect the clutch flexible hose bracket.

  1. A272721
    Remove the 2 bolts and No. 2 surge tank stay.

  1. A221465
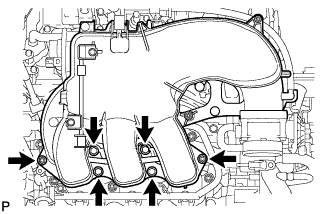
    Remove the 2 nuts, 4 bolts and intake air surge tank.

  1. Remove the gasket.


31. DISCONNECT ENGINE WIRE
  1. Remove the junction block cover.

  1. A263398
    Disconnect the ECM connector (Click here).

  1. Detach the wire harness clamp.

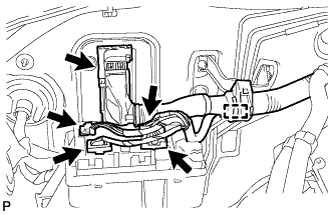
  1. Disconnect the 4 connectors from the junction block.

  1. Remove the engine room relay block cover.

  1. A263402
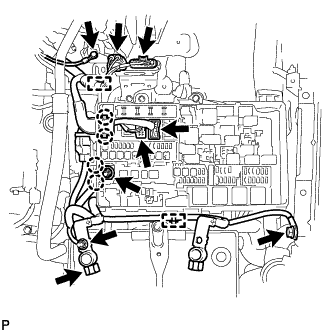
    Remove the bolt and disconnect the ground wire from the bracket.

  1. w/ Secondary Air Injection System:
    Disconnect the 2 air injection control driver connectors and detach the clamp.

  1. Disconnect the 2 connectors and 2 clips from the engine room junction block.

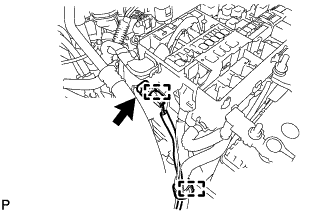
  1. Remove the nut and disconnect the wire and 2 clips from the engine room junction block.

  1. Remove the nut and disconnect the wire from the positive (+) battery cable.

  1. Disconnect the cable from the positive (+) battery terminal.

  1. Remove the bolt and detach the wire harness clamp, and then disconnect the ground wire from the body.

  1. A267745
    Disconnect the connector and detach the 2 clamps.

  1. A267746
    w/ Winch:
    Remove the 2 bolts and winch ground wire.

  1. A263401
    Disconnect the power steering switch connector and detach the clamp.

  1. A263400
    w/ Secondary Air Injection System:
    Disconnect the air pump connector and detach the clamp.


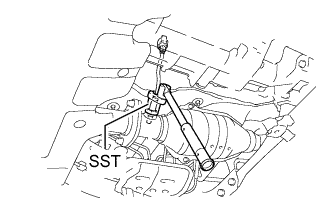
32. REMOVE HEATED OXYGEN SENSOR (for Bank 1 Sensor 2)

  1. A183479E01
    Disconnect the sensor connector.

  1. A175737E01
    Using SST, remove the sensor.
    SST
    09224-00010  


33. REMOVE TAILPIPE ASSEMBLY
  1. Remove the bolt, clamp and gasket.

  1. Remove the tailpipe from the 2 exhaust pipe supports.


34. REMOVE CENTER EXHAUST PIPE ASSEMBLY
  1. Remove the 4 bolts and 2 compression springs.

  1. Remove the center exhaust pipe from the 3 exhaust pipe supports.

  1. Remove the 2 gaskets from the front exhaust pipe and front No. 2 exhaust pipe.


35. REMOVE FRONT NO. 2 EXHAUST PIPE ASSEMBLY
  1. Disconnect the heated oxygen sensor connector.

  1. Remove the 2 nuts and front exhaust pipe.

  1. Remove the gasket from the front exhaust pipe.


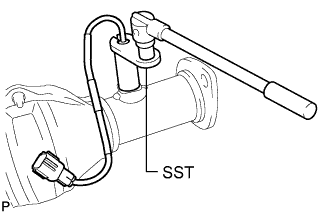
36. REMOVE HEATED OXYGEN SENSOR (for Bank 2 Sensor 2)

  1. A175734E01
    Using SST, remove the sensor.
    SST
    09224-00010  


37. REMOVE FRONT EXHAUST PIPE ASSEMBLY
  1. Disconnect the heated oxygen sensor connector.

  1. Remove the 2 nuts and front exhaust pipe.

  1. Remove the gasket from the front exhaust pipe.


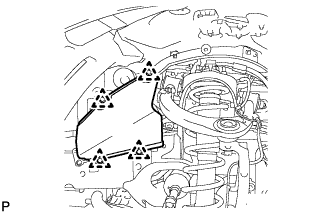
38. REMOVE FRONT FENDER APRON TRIM PACKING A

  1. A177003
    Remove the 3 clips and front fender apron trim packing A.


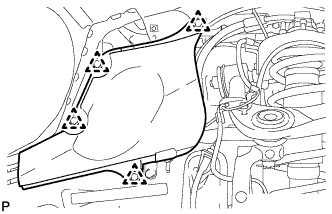
39. REMOVE FRONT FENDER APRON TRIM PACKING B

  1. A177004
    w/ KDSS:
    Remove the 3 clips and front fender apron trim packing B.

  1. A176301
    w/o KDSS:
    Remove the 4 clips and front fender apron trim packing B.


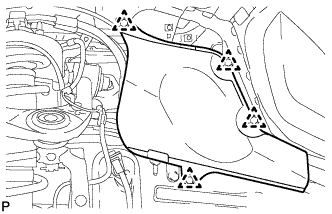
40. REMOVE FRONT FENDER APRON TRIM PACKING C

  1. A177002
    Remove the 4 clips and front fender apron trim packing C.


41. REMOVE FRONT FENDER APRON TRIM PACKING D

  1. A177005
    Remove the 4 clips and front fender apron trim packing D.


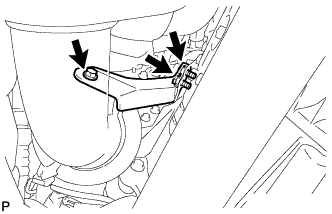
42. REMOVE MANIFOLD STAY

  1. A272722
    Remove the 3 bolts and manifold stay.


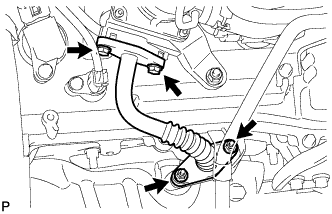
43. REMOVE AIR TUBE (w/ Secondary Air Injection System)

  1. A223569
    Remove the 2 bolts, 2 nuts and air tube.

  1. Remove the 2 gaskets.

    NOTICE:
    Be careful not to damage the installation surface of the gaskets.


44. DISCONNECT NO. 2 STEERING INTERMEDIATE SHAFT
  1. for Manual Tilt and Manual Telescopic Steering Column: (Click here)
  2. for Power Tilt and Power Telescopic Steering Column: (Click here)

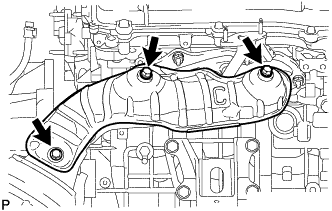
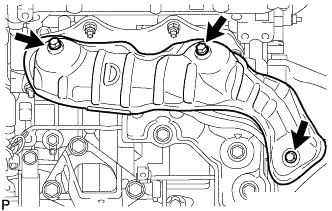
45. REMOVE NO. 1 EXHAUST MANIFOLD HEAT INSULATOR

  1. A272723
    Remove the 3 bolts and heat insulator.


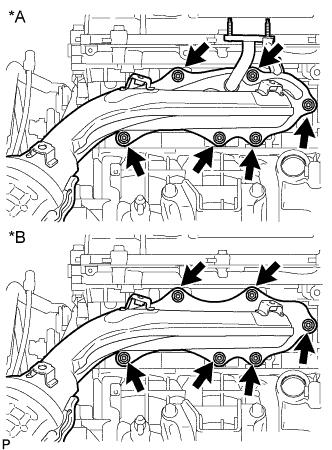
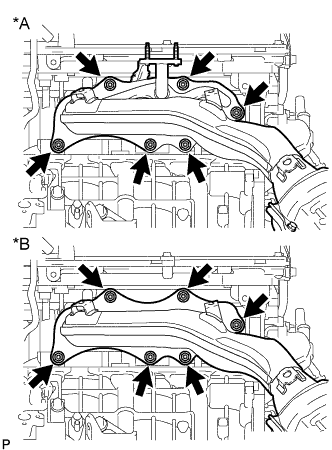
46. REMOVE EXHAUST MANIFOLD SUB-ASSEMBLY RH

  1. A271368E01
    Disconnect the air fuel ratio sensor connector.
    Text in Illustration 
    *A
    w/ Secondary Air Injection System
    *B
    w/o Secondary Air Injection System

  1. Remove the 6 nuts, exhaust manifold sub-assembly RH and gasket.


47. REMOVE NO. 2 MANIFOLD STAY

  1. A176353
    Remove the 3 bolts and No. 2 manifold stay.


48. REMOVE NO. 2 AIR TUBE (w/ Secondary Air Injection System)

  1. A223563
    Remove the 2 bolts, 2 nuts and No. 2 air tube.

  1. Remove the 2 gaskets.

    NOTICE:
    Be careful not to damage the installation surface of the gaskets.


49. REMOVE NO. 2 EXHAUST MANIFOLD HEAT INSULATOR

  1. A272724
    Remove the 3 bolts and heat insulator.


50. REMOVE EXHAUST MANIFOLD SUB-ASSEMBLY LH

  1. A271369E01
    Disconnect the air fuel ratio sensor connector.
    Text in Illustration 
    *A
    w/ Secondary Air Injection System
    *B
    w/o Secondary Air Injection System

  1. Remove the 6 nuts, exhaust manifold sub-assembly LH and gasket.


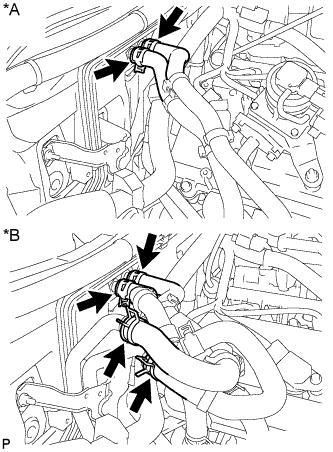
51. DISCONNECT WATER HOSE SUB-ASSEMBLY

  1. A263403E01
    Disconnect the water hoses.
    Text in Illustration 
    *A
    w/o Rear Heater
    *B
    w/ Rear Heater


52. DISCONNECT VANE PUMP ASSEMBLY

  1. A270981
    Disconnect the connector.

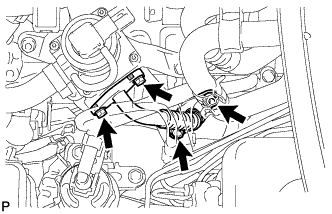
  1. Detach the wire harness clamp.

  1. A223015
    Remove the 2 bolts and disconnect the vane pump.


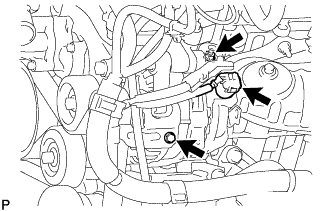
53. REMOVE GENERATOR ASSEMBLY

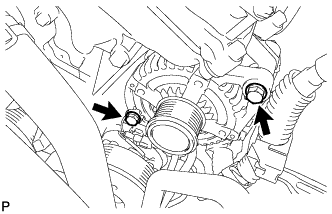
  1. A267518
    Disconnect the generator connector.

  1. Open the terminal cap.

  1. Remove the nut and disconnect the generator wire from terminal B.

  1. Remove the bolt and disconnect the wire harness clamp bracket.

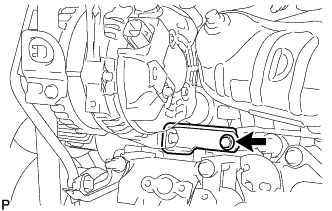
  1. A267519
    Remove the bolt and disconnect the generator bracket.

  1. A222883
    Remove the 2 bolts and generator.

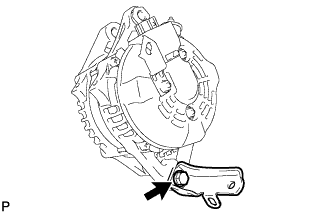
  1. A222885
    Remove the bolt and generator bracket.


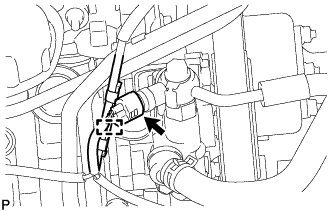
54. DISCONNECT NO. 1 COOLER REFRIGERANT DISCHARGE HOSE

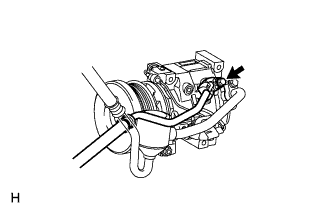
  1. E154178
    Remove the bolt and disconnect the discharge hose from the cooler compressor.

  1. Remove the O-ring from the discharge hose.

    NOTICE:
    Seal the openings of the disconnected parts using vinyl tape to prevent moisture and foreign matter from entering them.


55. DISCONNECT SUCTION HOSE SUB-ASSEMBLY

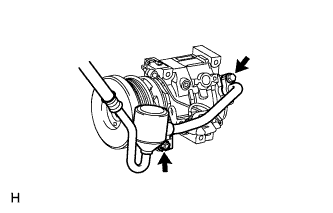
  1. E154179
    Remove the 2 bolts and disconnect the suction hose from the cooler compressor.

  1. Remove the O-ring from the suction hose.

    NOTICE:
    Seal the openings of the disconnected parts using vinyl tape to prevent moisture and foreign matter from entering them.


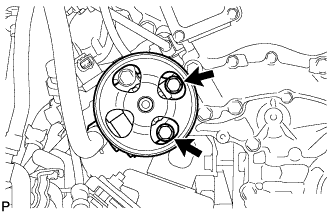
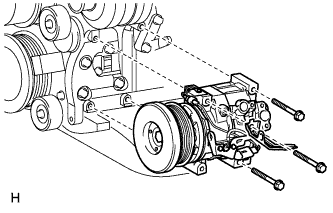
56. REMOVE COOLER COMPRESSOR ASSEMBLY

  1. E154180
    Disconnect the connector.

  1. Remove the 3 bolts and cooler compressor.


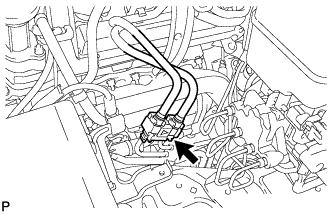
57. DISCONNECT NO. 1 AND NO. 2 FUEL PIPES

  1. A174380
    Disconnect the No. 1 and No. 2 fuel pipes (Click here).


58. REMOVE MANUAL TRANSMISSION ASSEMBLY (for Manual Transmission)
(Click here)

59. REMOVE AUTOMATIC TRANSMISSION ASSEMBLY (for Automatic Transmission)
(Click here)

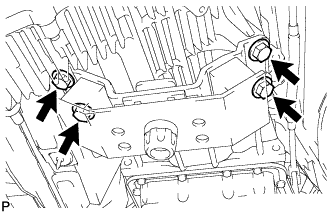
60. REMOVE REAR NO. 1 ENGINE MOUNTING INSULATOR

HINT:
Only perform this procedure when replacement of the engine mounting insulator is necessary.

  1. C171491
    Remove the 4 bolts and rear engine mounting insulator from the transmission.


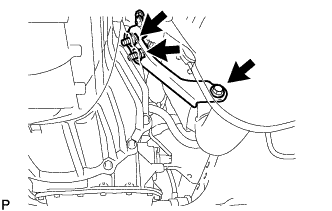
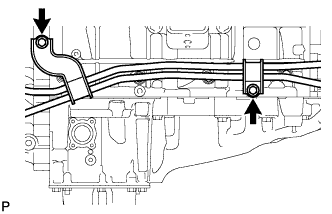
61. DISCONNECT NO. 1 OIL COOLER HOSE TUBE SUB-ASSEMBLY (for Automatic Transmission)

  1. A177664
    Remove the 2 bolts and cooler hose tube.


62. REMOVE CLUTCH COVER ASSEMBLY (for Manual Transmission)

C173303E01
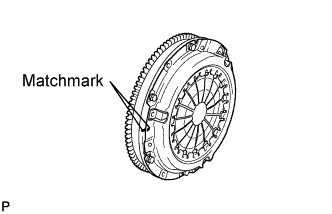
  1. Put matchmarks on the clutch cover and flywheel.

  1. Loosen each set bolt one turn at a time until spring tension is released.

  1. Remove the 6 set bolts, and pull off the clutch cover.

    NOTICE:
    Do not drop the clutch disc.


63. REMOVE CLUTCH DISC ASSEMBLY (for Manual Transmission)

NOTICE:
Keep the lining part of the clutch disc, pressure plate and surface of the flywheel away from oil and foreign matter.


64. REMOVE FLYWHEEL SUB-ASSEMBLY (for Manual Transmission)

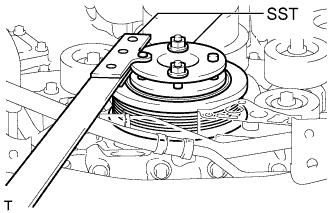
  1. A224775E01
    Using SST, hold the crankshaft.
    SST
    09213-54015   (91651-60855)
    09330-00021  

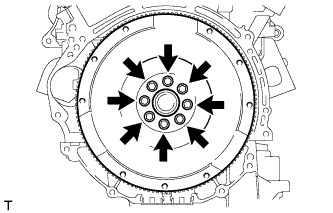
  1. A224776
    Remove the 8 bolts and flywheel.

    NOTICE:
    Do not reuse the bolts.


65. REMOVE DRIVE PLATE AND RING GEAR SUB-ASSEMBLY (for Automatic Transmission)

  1. A224775E01
    Using SST, hold the crankshaft.
    SST
    09213-54015   (91651-60855)
    09330-00021  

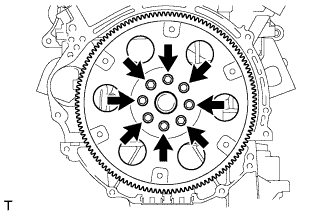
  1. A224777
    Remove the 8 bolts, rear spacer, drive plate and front spacer.

    NOTICE:
    Do not reuse the bolts.


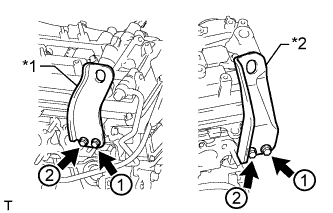
66. INSTALL ENGINE HANGER

  1. A229669E01
    Install 2 engine hangers with 4 bolts as shown in the illustration.

    Torque:
    33 N*m{ 337 kgf*cm , 24 ft.*lbf }

    Text in Illustration 
    *1
    No. 1 Engine Hanger
    *2
    No. 2 Engine Hanger

    HINT:
    No. 1 Engine Hanger
    12281-31110
    No. 2 Engine Hanger
    12282-31140
    Bolt
    91671-C0830


67. REMOVE ENGINE ASSEMBLY
  1. Attach an engine sling device and hang the engine with a chain block.

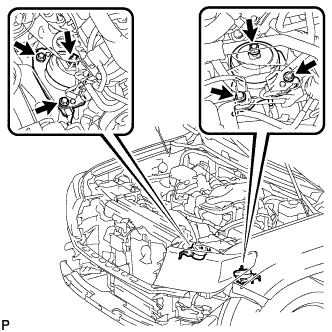
  1. A263404
    Remove the 2 nuts and 4 bolts from the front engine mounting insulator LH and RH.

  1. Lift the engine out of the vehicle carefully.

    NOTICE:
    1. Make sure the engine is clear of all wiring and hoses.
    2. With the exception of installing the engine assembly to an engine stand or removing the engine assembly from an engine stand, do not perform any work on the engine while it is suspended, as doing so is dangerous.
    3. Pay attention to the angle of the sling device as the engine assembly or engine hangers may be damaged or deformed if the angle is incorrect.

  1. Remove the front engine mounting insulator LH and RH.

  1. Place the engine onto a work bench.


68. INSTALL ENGINE STAND
  1. Install the engine onto an engine stand with bolts.

  1. Remove the 4 bolts and 2 engine hangers.


69. REMOVE FRONT NO. 2 ENGINE MOUNTING BRACKET LH
  1. Remove the bolt and front No. 2 engine mounting bracket LH.

← REMOVAL (Sep 2011 – Dec 2011)INSTALLATION (Sep 2011 – Dec 2011) →