AUDIO / VIDEO REAR SEAT ENTERTAINMENT ECU INSTALLATION
CAUTION / NOTICE / HINT
- HINT:
-
A bolt without a torque specification is shown in the standard bolt chart (See page General>SPECIFICATIONS>STANDARD BOLT>SPECIFIED TORQUE FOR STANDARD BOLTS).
PROCEDURE

 86842A
1.INSTALL NO. 1 NAVIGATION WIRE
Attach the clamps to install the No. 1 navigation wire.
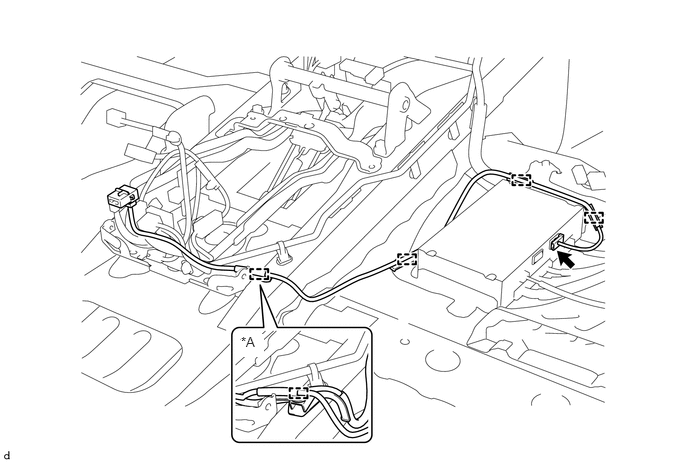
| *A | w/ DCM(Telematics Transceiver) | - | - |
Connect the connector.
2.INSTALL FRONT CONSOLE BOX
w/o Cool Box (See page Vehicle Interior>INTERIOR PANELS / TRIM>FRONT CONSOLE BOX(w/ Cool Box)>INSTALLATION)
w/o Cool Box (See page Vehicle Interior>INTERIOR PANELS / TRIM>FRONT CONSOLE BOX(w/o Cool Box)>INSTALLATION)
86117E
3.INSTALL NO. 3 MULTI-DISPLAY CONTROLLER BRACKET
Install the bracket with the 2 bolts.
86117C
4.INSTALL NO. 2 MULTI-DISPLAY CONTROLLER BRACKET
Install the bracket with the 2 bolts.
86104
5.INSTALL MULTI-DISPLAY CONTROLLER SUB-ASSEMBLY
Install the multi-display controller sub-assembly with the 3 bolts.
Attach the clamps and connect the connectors.
58510D
6.INSTALL FRONT FLOOR CARPET ASSEMBLY
Install the carpet that was pulled back to remove the selector. For further details, refer to the installation procedure (See page Audio / Visual / Telematics>AUDIO / VIDEO>STEREO COMPONENT AMPLIFIER>INSTALLATION).
67913B
7.INSTALL FRONT DOOR SCUFF PLATE RH
62111C
8.INSTALL COWL SIDE TRIM BOARD RH
55317A
9.INSTALL INSTRUMENT SIDE PANEL RH
10.INSTALL FRONT SEAT ASSEMBLY RH
for Manual Seat (See page Vehicle Interior>SEAT>FRONT SEAT ASSEMBLY (for Manual Seat)>INSTALLATION).
for Power Seat (See page Vehicle Interior>SEAT>FRONT SEAT ASSEMBLY (for Power Seat)>INSTALLATION).
11.CONNECT CABLE TO NEGATIVE BATTERY TERMINAL
- NOTICE:
-
When disconnecting the cable, some systems need to be initialized after the cable is reconnected (See page General>INTRODUCTION>REPAIR INSTRUCTION>INITIALIZATION).
12.CHECK SRS WARNING LIGHT
Check the SRS warning light (See page Vehicle Interior>SUPPLEMENTAL RESTRAINT SYSTEMS>AIRBAG SYSTEM>DIAGNOSIS SYSTEM).