1NZ-FXE COOLING RADIATOR REMOVAL
PROCEDURE

 1. PRECAUTION
- NOTICE:
-
After turning the power switch off, waiting time may be required before disconnecting the cable from the negative (-) auxiliary battery terminal. Therefore, make sure to read the disconnecting the cable from the negative (-) auxiliary battery terminal notice before proceeding with work (See page General>INTRODUCTION>REPAIR INSTRUCTION>PRECAUTION).
58165F
2.REMOVE FRONT FLOOR COVER RH
3.DISCONNECT CABLE FROM NEGATIVE AUXILIARY BATTERY TERMINAL
- NOTICE:
-
When disconnecting the cable, some systems need to be initialized after the cable is reconnected (See page General>INTRODUCTION>REPAIR INSTRUCTION>INITIALIZATION).
4.REMOVE NO. 1 ENGINE UNDER COVER ASSEMBLY (Integrated Cover Type)
51442C
5.REMOVE ENGINE UNDER COVER LH (Separated Cover Type)
51441C
6.REMOVE ENGINE UNDER COVER RH (Separated Cover Type)
7.DRAIN COOLANT (for Inverter)
8.DRAIN COOLANT (for Engine)
9.REMOVE FRONT BUMPER ASSEMBLY
53289A
10.REMOVE RADIATOR SUPPORT OPENING COVER
17705
11.REMOVE AIR CLEANER CAP SUB-ASSEMBLY
12.REMOVE AIR CLEANER CASE SUB-ASSEMBLY
53510
13.REMOVE HOOD LOCK ASSEMBLY
16571C
14.DISCONNECT NO. 1 RADIATOR HOSE
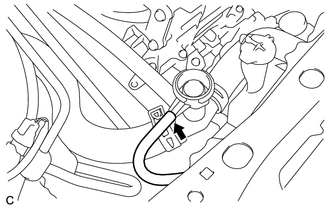
Disconnect the reserve tank hose.
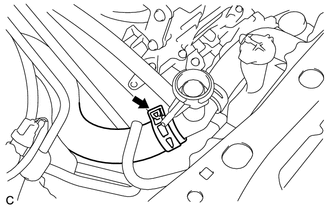
Disconnect the No. 1 radiator hose.
16572D
15.DISCONNECT NO. 2 RADIATOR HOSE
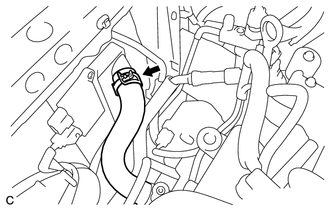
Disconnect the No. 2 radiator hose.
G922F
16.DISCONNECT OUTLET NO. 1 HYBRID WATER PUMP HOSE
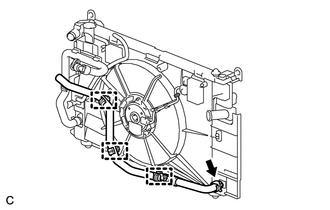
Disconnect the 3 clamps and outlet No. 1 hybrid water pump hose.
G90A0A
17.DISCONNECT NO. 1 INVERTER COOLING HOSE ASSEMBLY
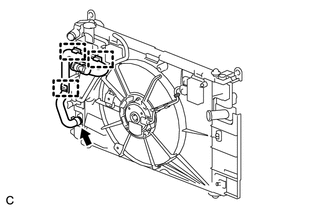
Disconnect the 3 clamps and No. 1 inverter cooling hose assembly.
53205
18.REMOVE UPPER RADIATOR SUPPORT SUB-ASSEMBLY
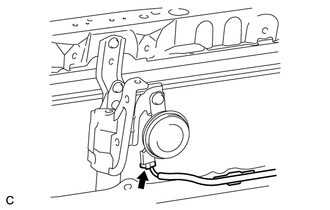
Disconnect the horn connector.
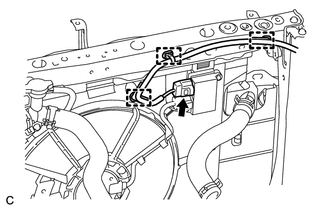
Disconnect the 3 clamps and cooling fan ECU connector.
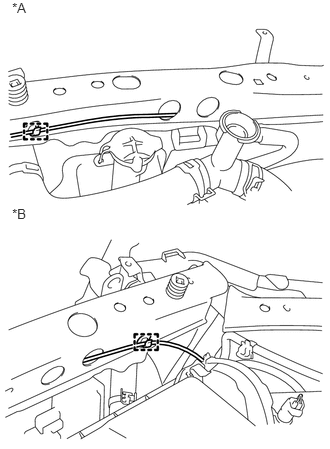
Disconnect the clamp of hood lock control cable.
| *A | for LHD |
| *B | for RHD |
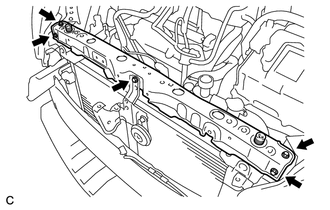
Remove the 5 bolts and upper radiator support sub-assembly.
Remove the 2 radiator support cushions.
16712
19.REMOVE NO. 2 FAN SHROUD
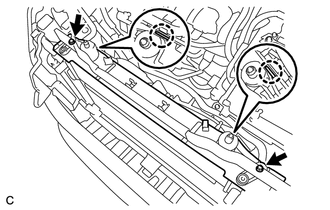
Remove the 2 bolts, 2 claws and No. 2 fan shroud.
16400
20.REMOVE RADIATOR ASSEMBLY
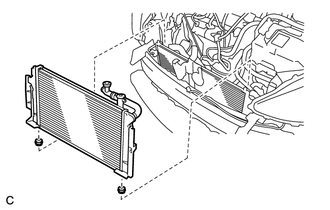
Remove the radiator assembly with the fan shroud.
- NOTICE:
-
Do not apply any excessive force to the cooler condenser assembly or pipe when removing the radiator assembly.
Remove the 2 lower radiator supports.
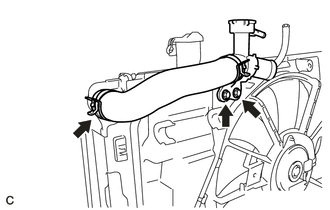
Remove the 2 bolts and No. 3 radiator hose.
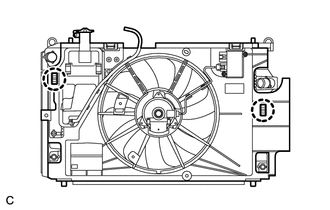
Remove the 2 claws and radiator assembly.