3ZR-FAE ENGINE MECHANICAL ENGINE UNIT REMOVAL
PROCEDURE

 1.REMOVE ENGINE WIRE
22210
2.REMOVE THROTTLE BODY ASSEMBLY
17361M
3.REMOVE AIR TUBE
87246A
4.REMOVE HEATER WATER OUTLET HOSE
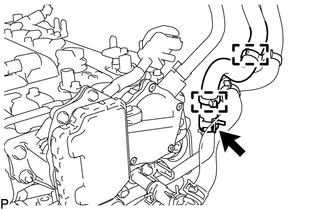
Detach the 2 hose clamps to disconnect the heater water outlet hose from the heater water inlet hose.
Slide the clamp and disconnect the heater water outlet hose from the No. 1 water by-pass pipe.
87245A
5.REMOVE HEATER WATER INLET HOSE
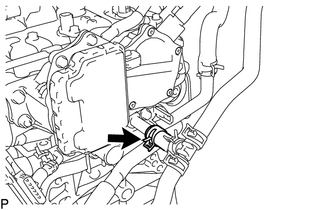
Slide the clamp and disconnect the heater water inlet hose from the cylinder head sub-assembly.
17111
6.REMOVE INTAKE MANIFOLD
7.REMOVE WIRE HARNESS CLAMP BRACKET
23901
8.REMOVE FUEL TUBE SUB-ASSEMBLY
23807
9.REMOVE FUEL DELIVERY PIPE SUB-ASSEMBLY
23250
10.REMOVE FUEL INJECTOR ASSEMBLY
11452
11.REMOVE ENGINE OIL LEVEL DIPSTICK GUIDE
Remove the engine oil level dipstick.
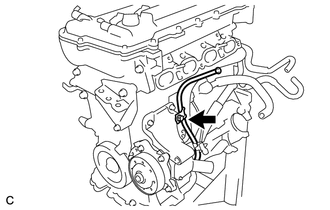
Remove the bolt and engine oil level dipstick guide.
Remove the O-ring from the engine oil level dipstick guide.
17167
12.REMOVE NO. 1 EXHAUST MANIFOLD HEAT INSULATOR
17118
13.REMOVE MANIFOLD STAY
17141
14.REMOVE EXHAUST MANIFOLD
16279
15.REMOVE NO. 3 WATER BY-PASS PIPE (for CVT)
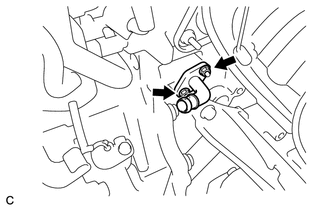
Remove the 2 nuts, No. 3 water by-pass pipe and gasket.
11492D
16.REMOVE NO. 1 SEAL PLATE (for Manual Transaxle)
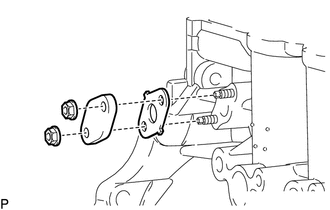
Remove the 2 nuts, No. 1 seal plate and gasket.
12261
17.REMOVE PCV HOSE
Remove the PCV hose from the PCV valve.
16267
18.DISCONNECT NO. 3 WATER BY-PASS HOSE
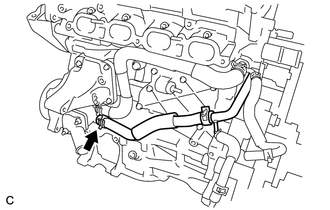
Slide the clamp and disconnect the No. 3 water by-pass hose from the water inlet housing.
16261
19.REMOVE WATER BY-PASS HOSE
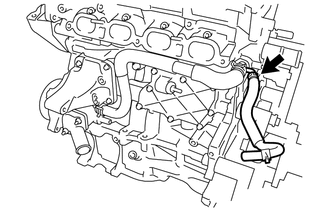
Slide the clamp and remove the water by-pass hose.
16262
20.REMOVE WATER INLET HOSE
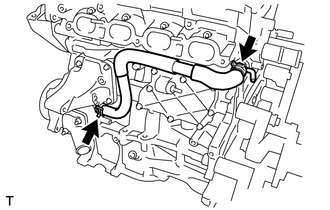
Slide the 2 clamps and remove the water inlet hose.
16268
21.REMOVE NO. 1 WATER BY-PASS PIPE
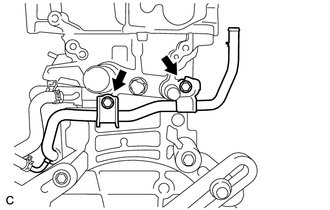
Remove the 2 bolts and No. 1 water by-pass pipe.
16321
22.REMOVE WATER INLET
16331A
23.REMOVE THERMOSTAT
19500
24.REMOVE IGNITION COIL ASSEMBLY
44773F
25.DISCONNECT UNION TO CHECK VALVE HOSE
29300
26.REMOVE VACUUM PUMP ASSEMBLY
12551A
27.REMOVE NO. 1 VACUUM PUMP BRACKET
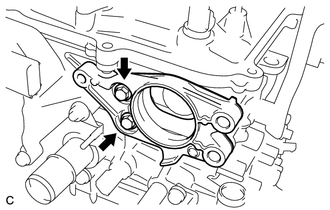
Remove the 2 bolts, No. 1 vacuum pump bracket and gasket.
89429F
28.REMOVE ENGINE OIL TEMPERATURE SENSOR
16620
29.REMOVE V-RIBBED BELT TENSIONER ASSEMBLY
Rotate the V-ribbed belt tensioner assembly clockwise and remove the 5 mm bi-hexagon wrench that was used to secure the V-ribbed belt tensioner assembly when removing the V-ribbed belt.
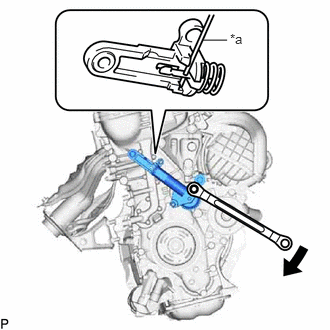
| *a | Pin with a Diameter of 3.0 mm (0.118 in.) |
Rotate the V-ribbed belt tensioner assembly slightly clockwise and secure it using a pin with a diameter of 3.0 mm (0.118 in.) as shown in the illustration.
- HINT:
-
It is difficult to install the V-ribbed belt tensioner assembly when it is fully extended. When reusing the V-ribbed belt tensioner assembly, compress and secure the V-ribbed belt tensioner assembly before removing it.
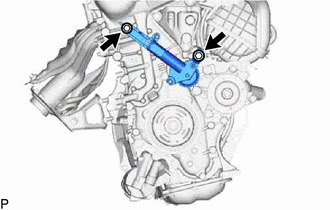
Remove the 2 bolts and V-ribbed belt tensioner assembly from the engine assembly.