PARK ASSIST / MONITORING CLEARANCE WARNING ECU(for LHD) REMOVAL
CAUTION / NOTICE / HINT
The necessary procedures (adjustment, calibration, initialization or registration) that must be performed after parts are removed and installed, or replaced during clearance warning ECU assembly removal/installation are shown below.
| Replaced Part or Performed Procedure | Necessary Procedure | Effect/Inoperative Function when Necessary Procedure not Performed | Link |
|---|---|---|---|
|
*: When performing learning using the GTS. Click here( |
|||
| Disconnect cable from negative (-) auxiliary battery terminal | Drive the vehicle until stop and start control is permitted (approximately 5 to 60 minutes) | Stop and start system | for A25A-FKS:( ) for M20A-FKS:( )
|
| Perform steering sensor zero point calibration | Lane control system | ()
|
|
| Parking support brake system (for Gasoline model)* | |||
| Pre-collision system | |||
| Memorize steering angle neutral point | Parking assist monitor system | ()
|
|
| Panoramic view monitor system (for Gasoline model) | ()
|
||
| Reset back door close position | Power back door system (for Gasoline model) | ()
|
|
| Power back door initialization | Power door lock control system | ()
|
|
| Clearance warning ECU assembly | ·
Ultrasonic sensor detection angle ·
Steering angle neutral point ·
Bumper type registration ·
Ultrasonic sensor detection angle registration |
·
TOYOTA parking assist-sensor system (for Gasoline model with parking support brake system) ·
Parking support brake system (for Gasoline model) |
()
|
- NOTICE:
-
After the ignition switch is turned off, the navigation system requires approximately a minute to record various types of memory and settings. As a result, after turning the ignition switch off, wait a minute or more before disconnecting the cable from the negative (-) auxiliary battery terminal.
PROCEDURE

 1. PRECAUTION (for Manual Transaxle)
- CAUTION:
-
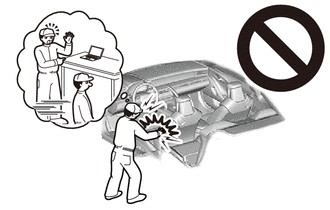
-
Be sure to read precaution thoroughly before servicing.
- NOTICE:
-
After turning the ignition switch off, waiting time may be required before disconnecting the cable from the negative (-) auxiliary battery terminal. Therefore, make sure to read the disconnecting the cable from the negative (-) auxiliary battery terminal notices before proceeding with work.
-
Click hereGeneral>INTRODUCTION>REPAIR INSTRUCTION>PRECAUTION
2.DISCONNECT CABLE FROM NEGATIVE AUXILIARY BATTERY TERMINAL (for Manual Transaxle)
Disconnect the cable from the negative (-) auxiliary battery terminal.
Click hereGeneral>MAINTENANCE>M20A-FKS BATTERY>REMOVAL
- CAUTION:
-
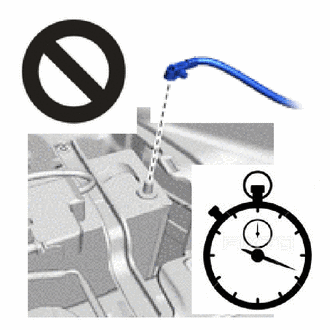
- ·
Wait at least 90 seconds after disconnecting the cable from the negative (-) auxiliary battery terminal to disable the SRS system.
·If the airbag deploys for any reason, it may cause a serious accident.
- NOTICE:
-
When disconnecting the cable, some systems need to be initialized after the cable is reconnected.
-
Click hereGeneral>INTRODUCTION>REPAIR INSTRUCTION>INITIALIZATION
58810J
3.REMOVE CONSOLE BOX ASSEMBLY
67913B
4.REMOVE FRONT DOOR SCUFF PLATE RH
- HINT:
-
Use the same procedure described for the LH side.
-
Click hereVehicle Interior>INTERIOR PANELS / TRIM>ROOF HEADLINING>REMOVAL
62111C
5.REMOVE COWL SIDE TRIM BOARD RH
55607
6.REMOVE NO. 2 INSTRUMENT PANEL UNDER COVER SUB-ASSEMBLY
55550
7.REMOVE GLOVE COMPARTMENT DOOR ASSEMBLY
55433B
8.REMOVE LOWER NO. 2 INSTRUMENT PANEL FINISH PANEL
89340A
9.REMOVE CLEARANCE WARNING ECU ASSEMBLY (except Manual Transaxle)
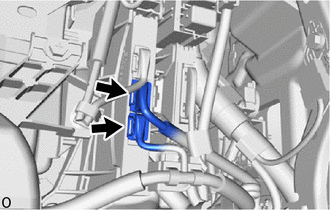
Disconnect the 2 connectors.
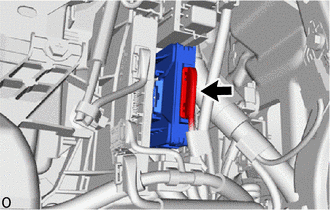
Disconnect the connector.
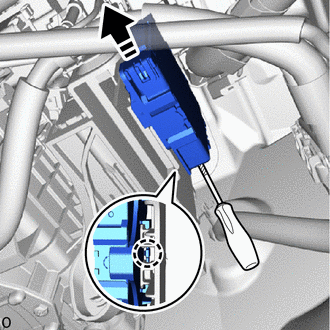

|
Remove in this Direction |

|
Protective Tape |
Using a screwdriver, detach the claw and remove the clearance warning ECU assembly as shown in the illustration.
- HINT:
-
Tape the screwdriver tip before use.
10.REMOVE INSTRUMENT PANEL JUNCTION BLOCK ASSEMBLY WITH MAIN BODY ECU (for Manual Transaxle)
82877
11.REMOVE ECU INTEGRATION BOX RH (for Manual Transaxle)
89340A
12.REMOVE CLEARANCE WARNING ECU ASSEMBLY (for Manual Transaxle)
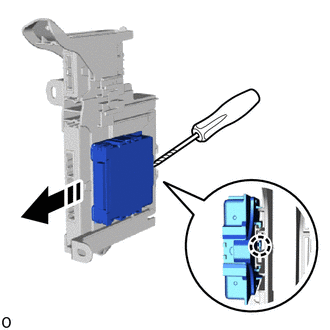
|
|
Remove in this Direction |
|
|
Protective Tape |
Using a screwdriver, detach the claw and remove the clearance warning ECU assembly as shown in the illustration.
- HINT:
-
Tape the screwdriver tip before use.