BRAKE SYSTEM (OTHER) BRAKE BOOSTER(for Gasoline Model RHD) REMOVAL
CAUTION / NOTICE / HINT
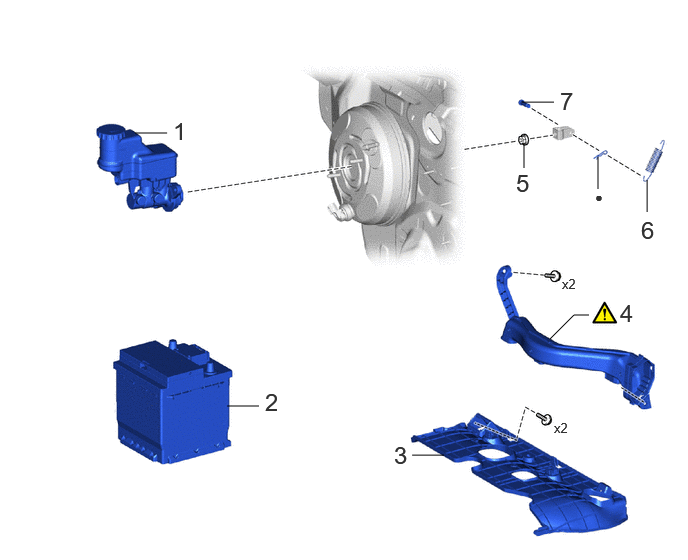
| Procedure | Part Name Code | 
|

|

|
|
|---|---|---|---|---|---|
| 1 | BRAKE MASTER CYLINDER SUB-ASSEMBLY | 47201 | - | - | - |
| 2 | BATTERY | - | - | - | - |
| 3 | NO. 1 INSTRUMENT PANEL UNDER COVER SUB-ASSEMBLY | 55606 | - | - | - |
| 4 | NO. 1 AIR DUCT | 87211 | ( ) |
- | - |
| 5 | CLEVIS LOCK NUT | - | - | - | - |
| 6 | BRAKE PEDAL RETURN SPRING | 47101A | - | - | - |
| 7 | PUSH ROD PIN | 47264A | - | - | - |
| ● | Non-reusable part | - | - |
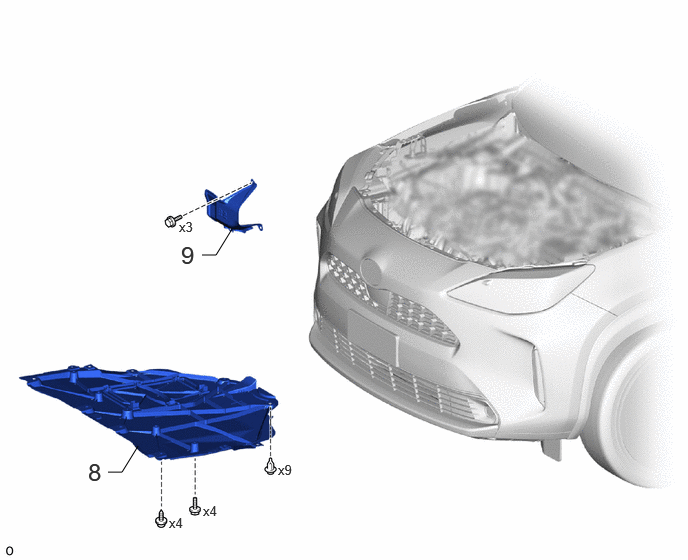
| Procedure | Part Name Code |
|
|
|
|
|---|---|---|---|---|---|
| 8 | NO. 1 ENGINE UNDER COVER ASSEMBLY | 51410 | - | - | - |
| 9 | DASH PANEL HEAT INSULATOR | 55225C | - | - | - |
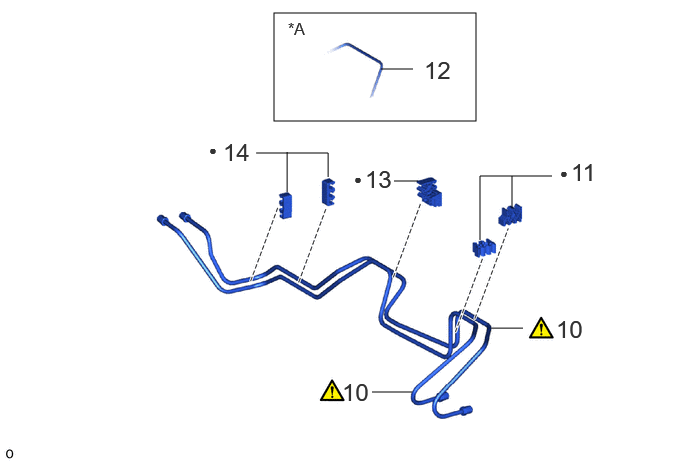
| Procedure | Part Name Code |
|
|
|
|
|---|---|---|---|---|---|
| 10 | BRAKE LINE | - | ()
|
- | - |
| 11 | NO. 4 BRAKE TUBE CLAMP | 47374B | - | - | - |
| 12 | CLUTCH MASTER CYLINDER TO FLEXIBLE HOSE TUBE | 31481 | - | - | - |
| 13 | NO. 2 BRAKE TUBE CLAMP | 47372 | - | - | - |
| 14 | NO. 1 BRAKE TUBE CLAMP | 47371A | - | - | - |
| *A | for Manual Transaxle | - | - |
| ● | Non-reusable part | - | - |
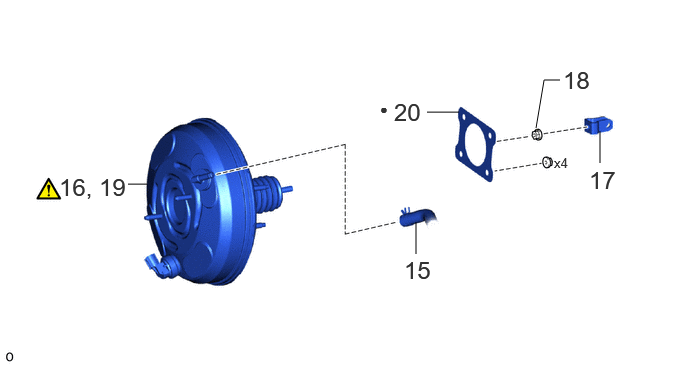
| Procedure | Part Name Code |
|
|
|
|
|---|---|---|---|---|---|
| 15 | CHECK VALVE TO CONNECTOR TUBE HOSE | - | - | - | - |
| 16 | SEPARATE BRAKE BOOSTER ASSEMBLY | 44610 | ()
|
- | - |
| 17 | BRAKE MASTER CYLINDER PUSH ROD CLEVIS | 47264D | - | - | - |
| 18 | CLEVIS LOCK NUT | - | - | - | - |
| 19 | BRAKE BOOSTER ASSEMBLY | 44610 | ()
|
- | - |
| 20 | BRAKE BOOSTER GASKET | 44785 | - | - | - |
| ● | Non-reusable part | - | - |
CAUTION / NOTICE / HINT
The necessary procedures (adjustment, calibration, initialization or registration) that must be performed after parts are removed and installed, or replaced during brake booster assembly removal/installation are shown below.
| Replaced Part or Performed Procedure | Necessary Procedure | Effect/Inoperative Function when Necessary Procedure not Performed | Link |
|---|---|---|---|
| Auxiliary battery terminal is disconnected/reconnected | Memorize steering angle neutral point | Parking assist monitor system | ()
|
| Panoramic view monitor system (w/o Advanced Park) | ()
|
- NOTICE:
-
Make sure to release vacuum from the brake booster assembly before removing the brake master cylinder sub-assembly from the brake booster assembly.
- HINT:
-
When the cable is disconnected / reconnected to the auxiliary battery terminal, systems temporarily stop operating. However, each system has a function that completes learning the first time the system is used.
- ·
Learning completes when vehicle is driven
Effect/Inoperative Function When Necessary Procedures are not Performed Necessary Procedures Link Lane tracing assist system Drive the vehicle straight ahead at 35 km/h (22 mph) or more for 5 second or more. ( )
Pre-collision system Parking support brake system Stop and start system Drive the vehicle until stop and start control is permitted (approximately 5 to 60 minutes) ( )
·Learning completes when vehicle is operated normally
Effect/Inoperative Function When Necessary Procedures are not Performed Necessary Procedures Link Power door lock control system
·Back door opener
Perform door unlock operation with door control switch or electrical key transmitter sub-assembly switch. ( )
Power back door system Fully close the back door by hand.
- HINT:
-
Initialization is not necessary if the above procedures are performed while the back door is closed.
( )
Air conditioning system After the ignition switch is turned to ON, the servo motor standard position is recognized. -
PROCEDURE

 47201
1.REMOVE BRAKE MASTER CYLINDER SUB-ASSEMBLY
for TMC Made:
Click hereBrake>BRAKE SYSTEM (OTHER)>BRAKE MASTER CYLINDER (for Gasoline Model TMC Made RHD)>REMOVAL
for TMMF Made:
Click hereBrake>BRAKE SYSTEM (OTHER)>BRAKE MASTER CYLINDER (for Gasoline Model TMMF Made RHD)>REMOVAL
2.REMOVE BATTERY
55606
3.REMOVE NO. 1 INSTRUMENT PANEL UNDER COVER SUB-ASSEMBLY
87211
4.REMOVE NO. 1 AIR DUCT
|
|
Click here()
|
5.LOOSEN CLEVIS LOCK NUT

| *1 | Clevis Lock Nut | *2 | Brake Master Cylinder Push Rod Clevis |
47101A
6.REMOVE BRAKE PEDAL RETURN SPRING
47264A
7.REMOVE PUSH ROD PIN
51410
8.REMOVE NO. 1 ENGINE UNDER COVER ASSEMBLY
55225C
9.REMOVE DASH PANEL HEAT INSULATOR
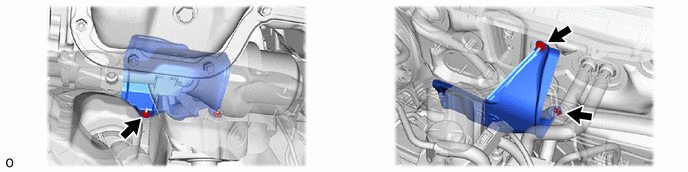
10.SEPARATE BRAKE LINE
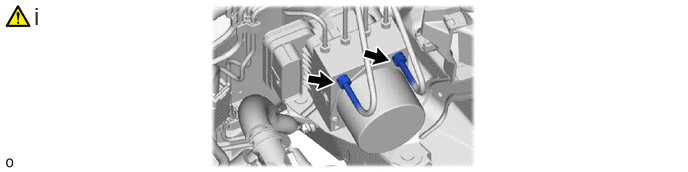
Using a union nut wrench, disconnect the front No. 1 brake tube and front No. 2 brake tube from the brake actuator assembly.
47374B
11.REMOVE NO. 4 BRAKE TUBE CLAMP
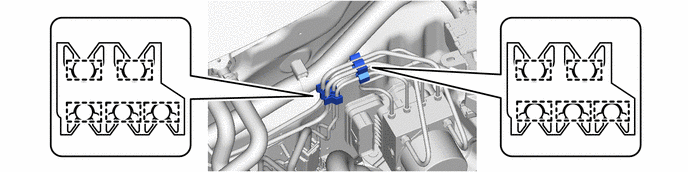
31481
12.SEPARATE CLUTCH MASTER CYLINDER TO FLEXIBLE HOSE TUBE (for Manual Transaxle)

47372
13.REMOVE NO. 2 BRAKE TUBE CLAMP

47371A
14.REMOVE NO. 1 BRAKE TUBE CLAMP

15.DISCONNECT CHECK VALVE TO CONNECTOR TUBE HOSE

44610
16.SEPARATE BRAKE BOOSTER ASSEMBLY
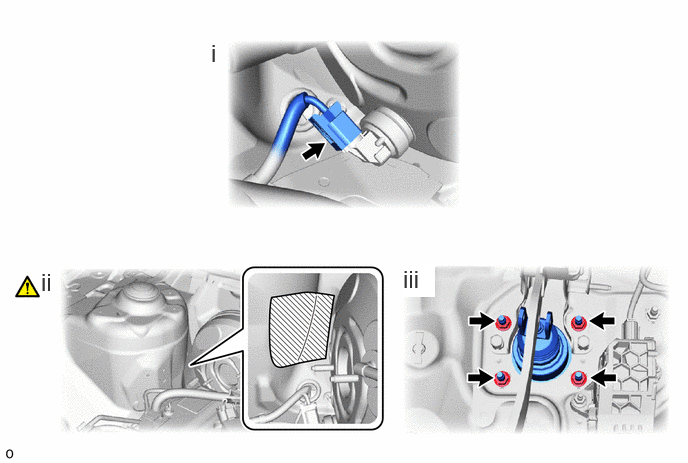

|
Protective Tape | - | - |
Disconnect the connector.
Apply protective tape around the vehicle body.
Remove the 4 nuts.
47264D
17.REMOVE BRAKE MASTER CYLINDER PUSH ROD CLEVIS

18.REMOVE CLEVIS LOCK NUT

44610
19.REMOVE BRAKE BOOSTER ASSEMBLY
|
|
|
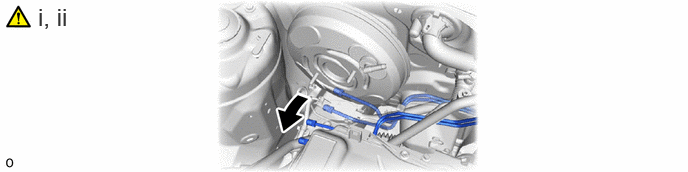
Move aside the front No. 1 brake tube and front No. 2 brake tube as shown in the illustration.
Remove the brake booster assembly.
44785
20.REMOVE BRAKE BOOSTER GASKET