Rear Axle Removal and Installation
Precautions: Precautions for Handling of Rear Shock Absorber · Precautions for Suspension · General safety (00)
 CAUTION:
•Brake fluid is extremely damaging to painted surfaces. If brake fluid contacts painted surfaces, immediately wipe it off and flush the surfaces with water thoroughly.
•The rear axle bolts are pre-coated with friction stabilizer. If these bolts are reused, they may work loose.
Never reuse the rear axle bolts.
•The rear axle bolts are pre-coated with friction stabilizer. If these bolts are reused, they may work loose.
Never reuse the rear axle bolts.
Removal
1)Hoist vehicle and remove rear wheels.
2)Remove rear fender linings.
3)Remove exhaust center pipe.
4)Remove rear drive shaft assemblies from vehicle (4WD model). 
5)Remove rear differential from vehicle (4WD model).
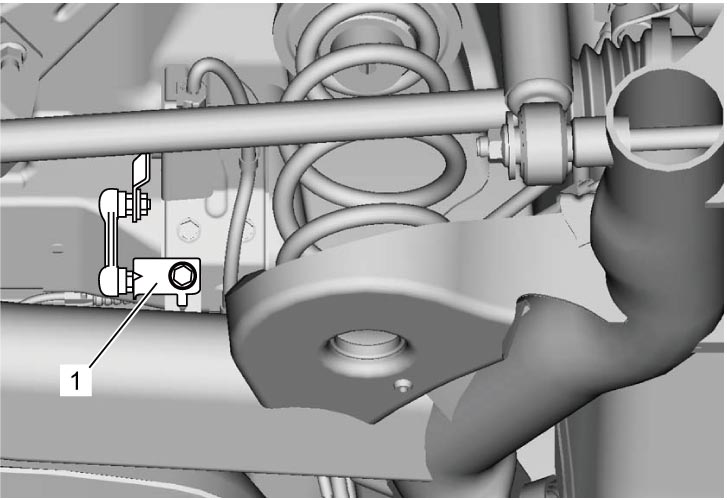
6)Remove rear vehicle height sensor bracket (1) from rear axle (Discharge headlight model).

7)Remove wheel speed sensors from rear axle (2WD model).
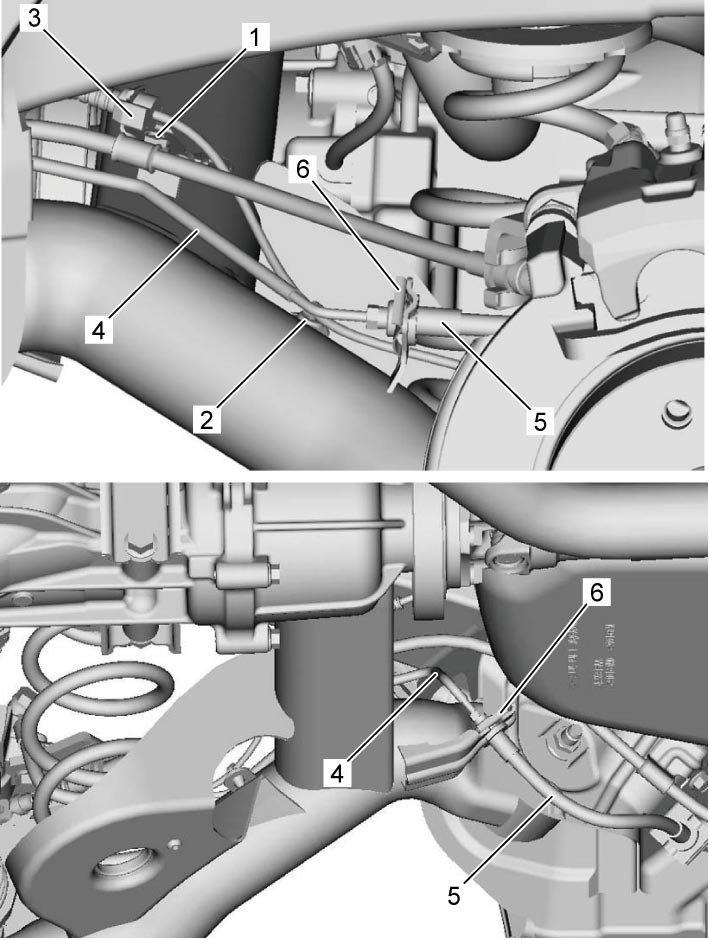
8)Disconnect parking brake cable clamp (1), rear wheel speed sensor clamp (2) and rear wheel speed sensor harness (3) from rear axle at each of right and left sides.
9)Disconnect brake pipe (4) from brake hoses (5), and then remove E-rings (6) as shown, at each of right and left sides.
10)Remove rear brake caliper carrier bolts and then remove rear brake caliper assemblies from rear axle for each of right and left rear wheels.
Then, hang the removed rear brake caliper assemblies with a wire hook or a rope.
Then, hang the removed rear brake caliper assemblies with a wire hook or a rope.
11)Remove rear wheel hub and rear brake disc dust cover for each of right and left rear wheels.
12)Remove right and left rear shock absorber lower nuts and lower washers, and then remove rear coil springs from axle.
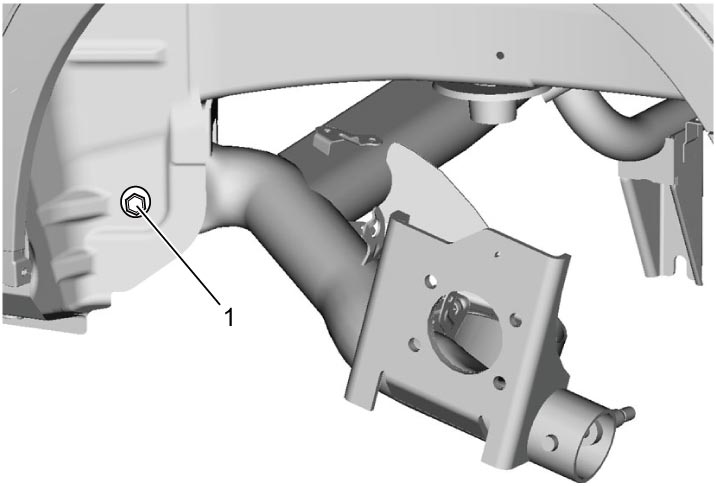
13)While supporting rear axle at both ends using floor jacks, remove right and left rear axle bolts (1), and then remove rear axle from vehicle by lowering the jacks gradually.
Installation
1)Place rear axle on floor jacks.
Then install rear axle with new right and left rear axle bolts (1). Tighten bolts temporarily by hand.
Then install rear axle with new right and left rear axle bolts (1). Tighten bolts temporarily by hand.
2)Install coil springs and connect shock absorber lower ends to rear axle. Tighten new shock absorber lower nuts temporarily by hand.
3)Install rear wheel hub and rear brake disc dust cover for each of right and left rear wheels.
4)Install rear brake caliper assemblies to rear axle for each of right and left rear wheels.
5)Connect brake pipe (4) to brake hoses (5), and then install E-rings (6), at each of right and left sides.
6)Connect rear wheel speed sensor clamp (2) and rear wheel speed sensor harness (3) to rear axle at each of right and left sides.
7)Tighten parking brake cable clamp bolts (1) at each of right and left sides.
8)Install wheel speed sensors to rear axle (2WD model).
9)Install rear vehicle height sensor bracket (1) to rear axle (Discharge headlight model).
10)Install rear differential (4WD model).
11)Install rear drive shaft assemblies (4WD model).
12)Install exhaust center pipe.
13)Fill reservoir with brake fluid and bleed brake system.
14)Install rear wheels.
15)Lower hoist and bounce vehicle up and down several times to stabilize suspension.
16)Tighten rear shock absorber lower nuts to specified torque.
17)Tighten rear axle bolts to specified torque.
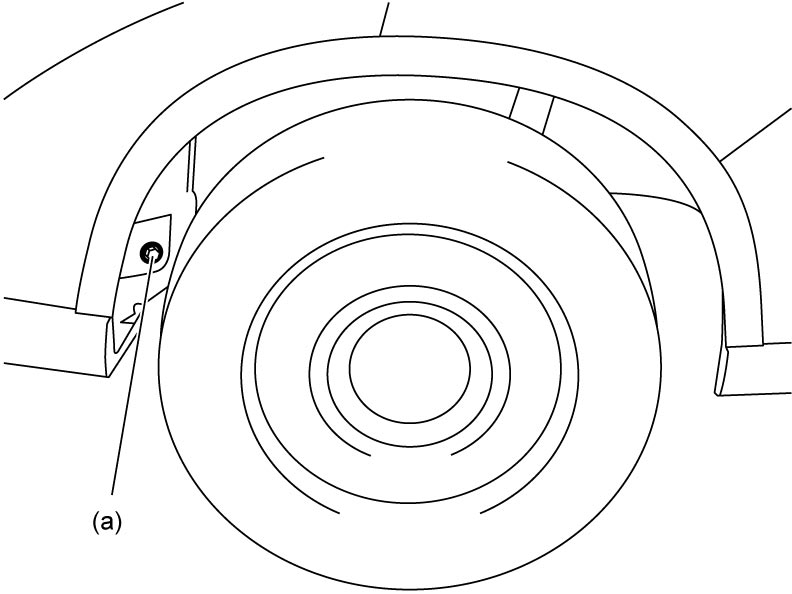
18)Install rear fender linings.
19)Check all installed parts for brake fluid leakage.