Windshield Removal and Installation
Precautions: Precautions for Working on Glass · Precautions for Working on Power Window · Precautions for Body, Cab and Accessories · General safety (00)
Preparation
| Item to be prepared | Usage |
|---|---|
| Eyeleteer | To drill hole in adhesive |
| Piano string and wood stick (or commercial windshield knife) | To cut adhesive |
| Knife | To cut off adhesive for finishing |
| White gasoline and gauze | To degrease and clean adhesive surface |
| Caulking gun | To apply adhesive |
| Rubber sucker grip | To hold glass |
| Adhesive (YOKOHAMA rubber WS-212 or equivalent) | To bond glass |
| Primer for glass (YOKOHAMA rubber MS-90S or equivalent) | To pretreat adhesive surface |
| Primer for adhesive surface (YOKOHAMA rubber RC-50E or equivalent) | To pretreat adhesive surface |
| Masking tape | To protect against scratch |
| Alcohol | To degrease knife |
| Adhesive tape | To secure windshield molding |
Removal
1)Clean inside, outside and around windshield.
2)Remove wiper arms. 
3)Remove cowl top garnish.
4)Using masking tape, cover body surface around windshield to prevent any damage when cutting the adhesive.
5)Remove inner rear view mirror.
6)Remove rain / light sensor, if equipped.
7)Remove instrument panel, if necessary.
8)Remove head lining, if necessary.
9)Remove or cut windshield molding.
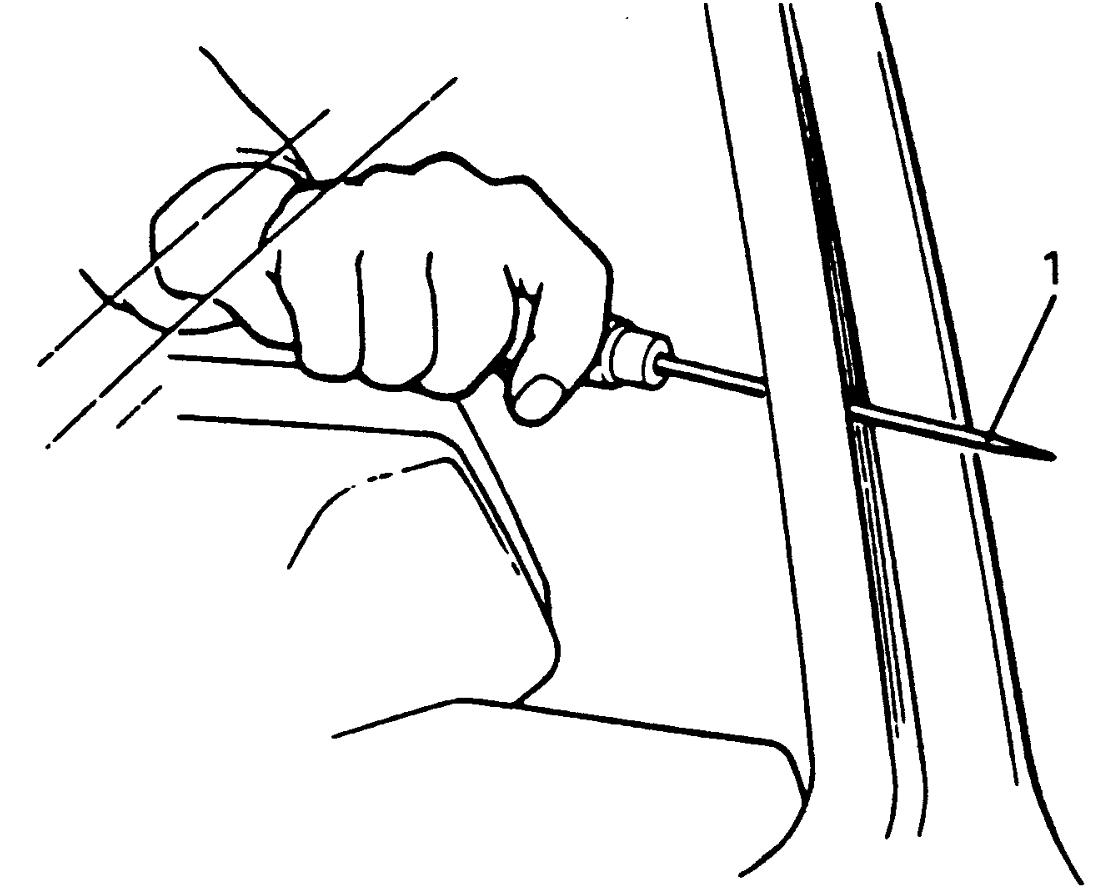
10)Make hole into adhesive with eyeleteer (1) and pass piano string through it.

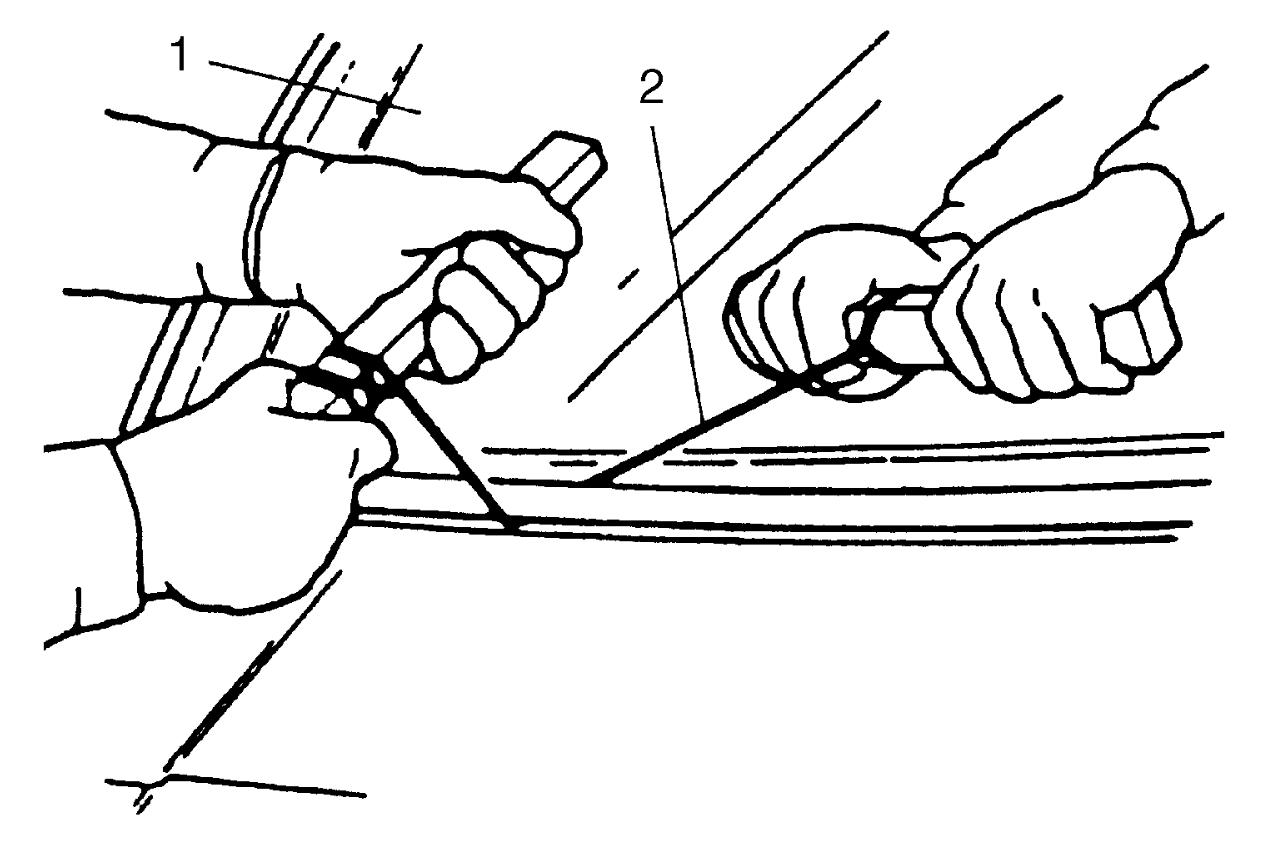
11)Cut all adhesives of windshield (1) with piano string (2).
NOTICE:
Using the piano string separated from the front windshield glass can damage the body or the instrument panel.
Use the piano string as close to the front windshield glass as possible.
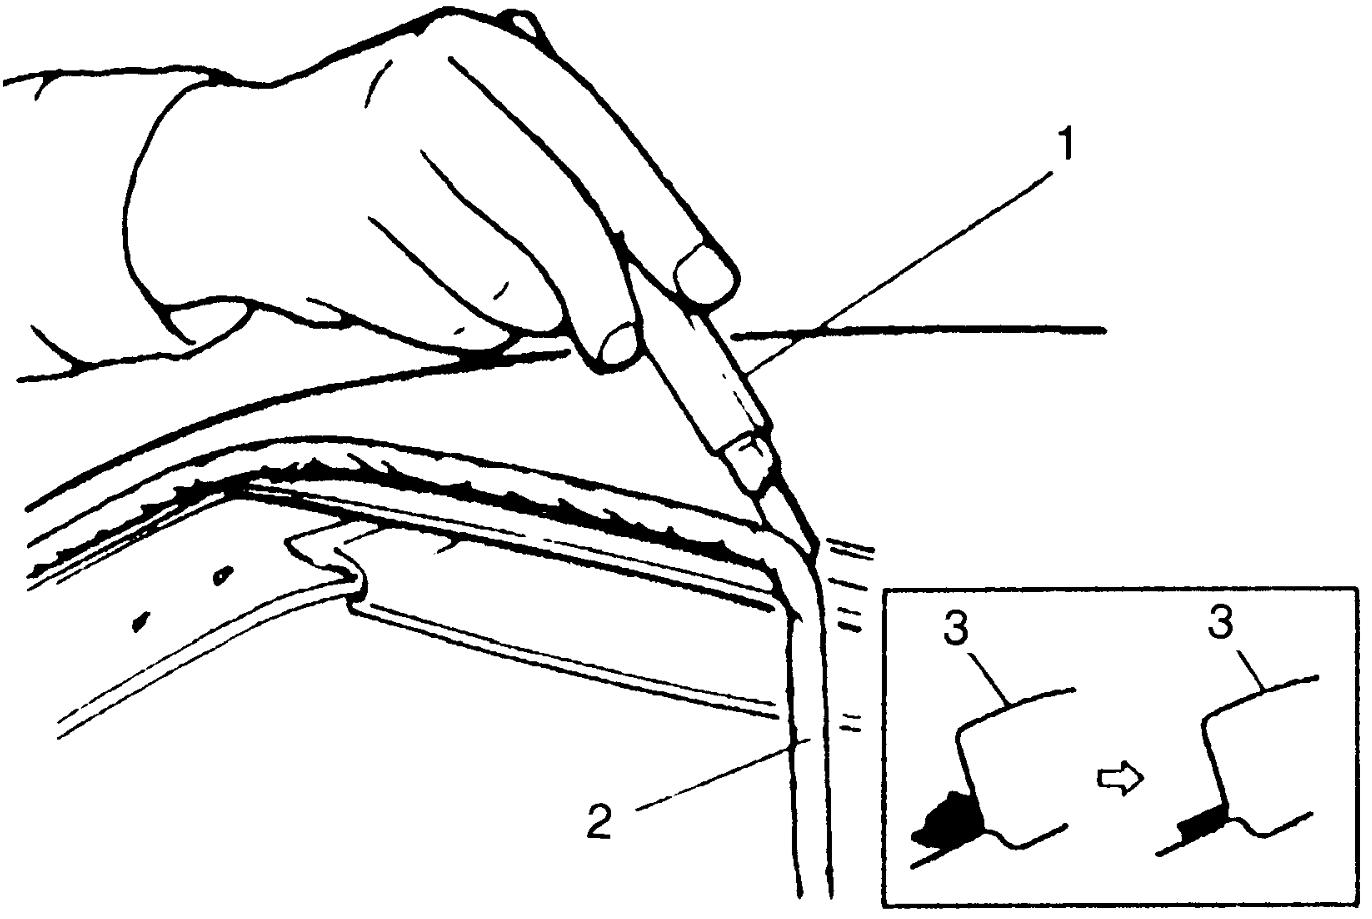
12)Using knife (1), smoothen adhesive remaining (2) on body side (3) and thickness of adhesive should be 1 to 2 mm (0.04 to 0.08 in.).
NOTE:
Before using knife, degrease it with alcohol or the like.
Installation
NOTE:
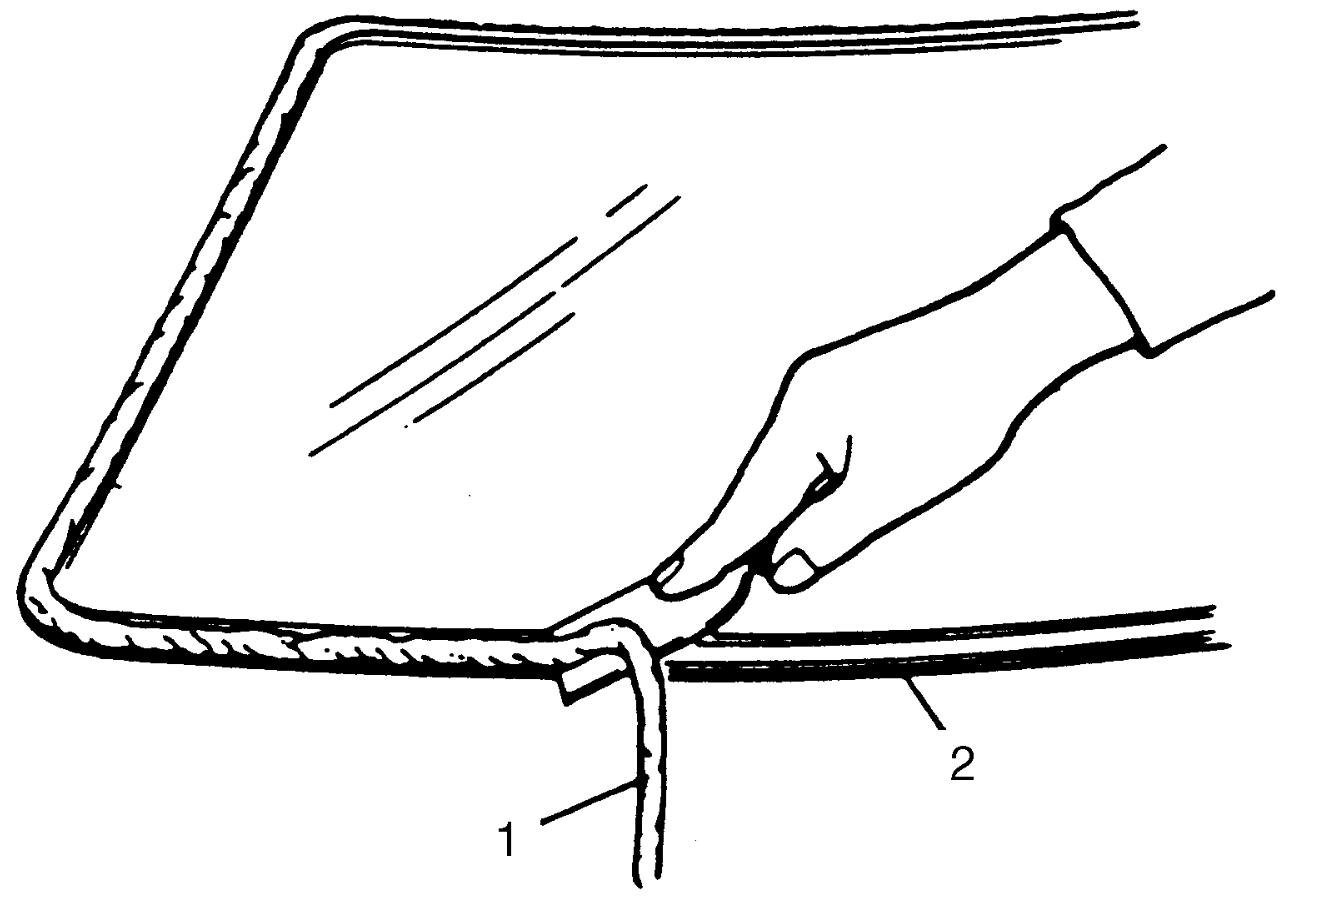
•If windshield is to be reused, be careful to remove adhesive (1) not to damage primer application surface (2).
 •For proper handling and drying time of primer and adhesive, refer to their maker’s instruction.
1)To determine installing position of windshield (1) to body (2), position windshield against body so that clearance between upper end of windshield and body is approximately 4.5 to 6.5 mm (0.17 to 0.25 in.) and clearances between each side end (right & left) of windshield and body are even.
Then put alignment marks (3) on windshield and body.
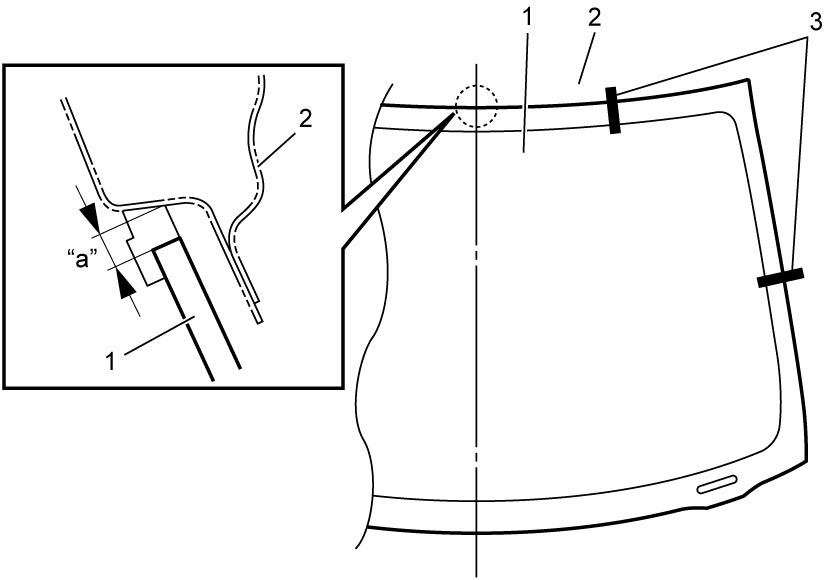
Then put alignment marks (3) on windshield and body.
Windshield clearance
“a”: Approx. 4.5 to 6.5 mm (0.17 to 0.25 in.)
2)Clean contact surfaces of old adhesive (4) left on body. Apply primer (2) where paint or bare metal is exposed (3).
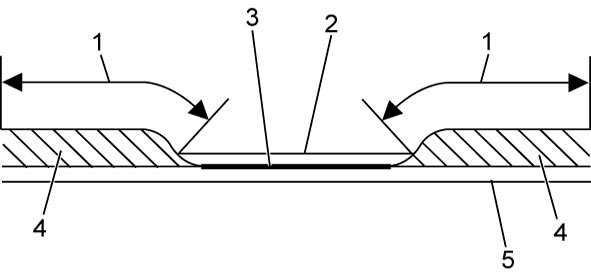
NOTICE:
Applying primer on remaining old adhesive can reduce adhesion effect of adhesive.
Do not apply primer on remaining old adhesive.
| 1. | Do not apply primer. | 5. | Body panel |
3)Clean area about 30 to 50 mm (1.19 to 1.96 in.) from the edge of windshield with gauze and white gasoline. Dry white gasoline for 10 minutes or more.
4)Install new windshield molding (3) to windshield (2).
5)Install new spacers (1) and fasteners (4) to windshield.
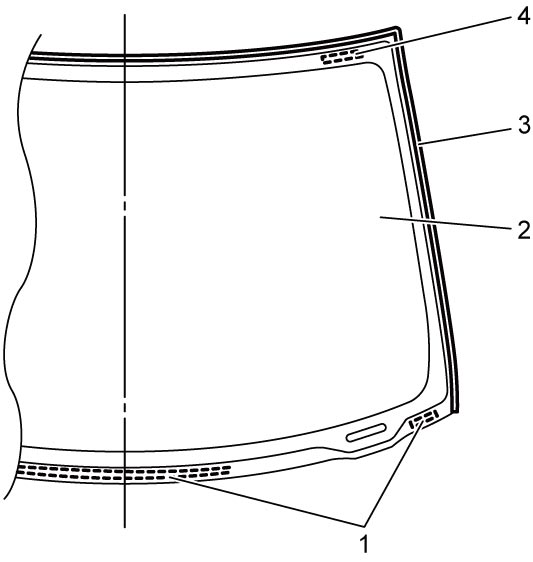
6)Apply primer to adhesive application area on windshield.
NOTICE:
Oil or foreign material adhering to the primer coating can reduce the effectiveness of the adhesive.
Do not allow oil or foreign material to adhere to the primer coating.
7)Apply adhesive (1) as shown in figure.
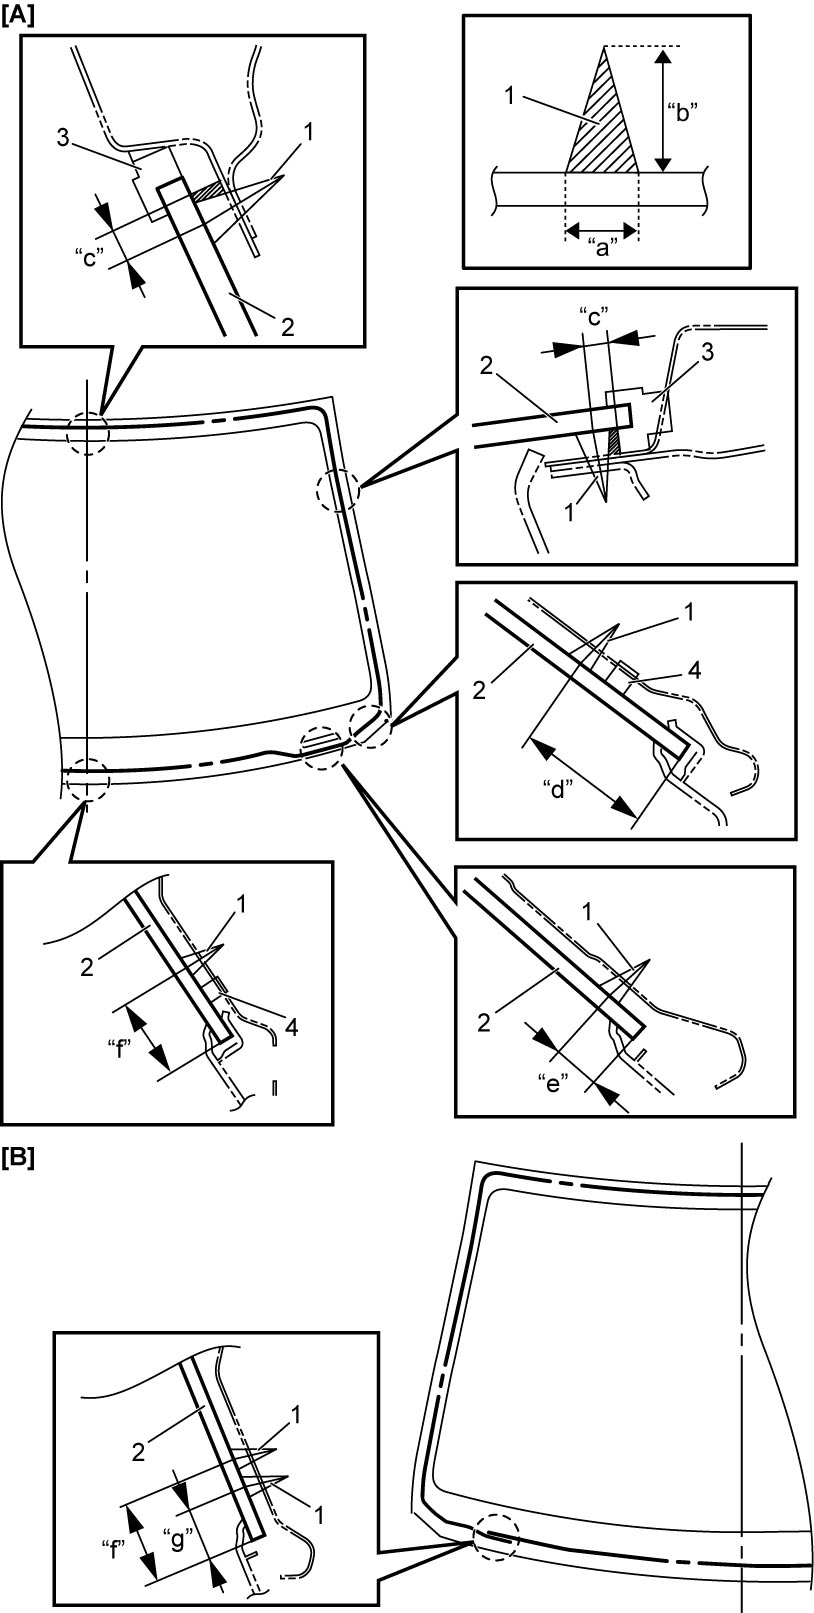
NOTICE:
If more than 5 minutes elapse after applying adhesive to the front windshield glass (2), the adhesive can harden, preventing the front windshield glass from being attached firmly.
Attach the front windshield glass to the body within 5 minutes of applying adhesive.
NOTE:
Use rubber sucker grip to carry glass after adhesive is applied.
Adhesive amount specifications and positions for windshield
Adhesive width “a”: Approx. 7.0 mm (0.28 in.)
Adhesive height “b”: Approx. 15.0 mm (0.59 in.)
Application position “c”: Approx. 5.0 mm (0.20 in.), “d”: Approx. 36.5 mm (1.43 in.), “e”: Approx. 13.0 mm (0.51 in.), “f”: Approx. 27.5 mm (1.08 in.), “g”: Approx. 17.5 mm (0.68 in.)
| [A]: | Left side | 3. | Windshield molding |
| [B]: | Right side | 4. | Spacer |
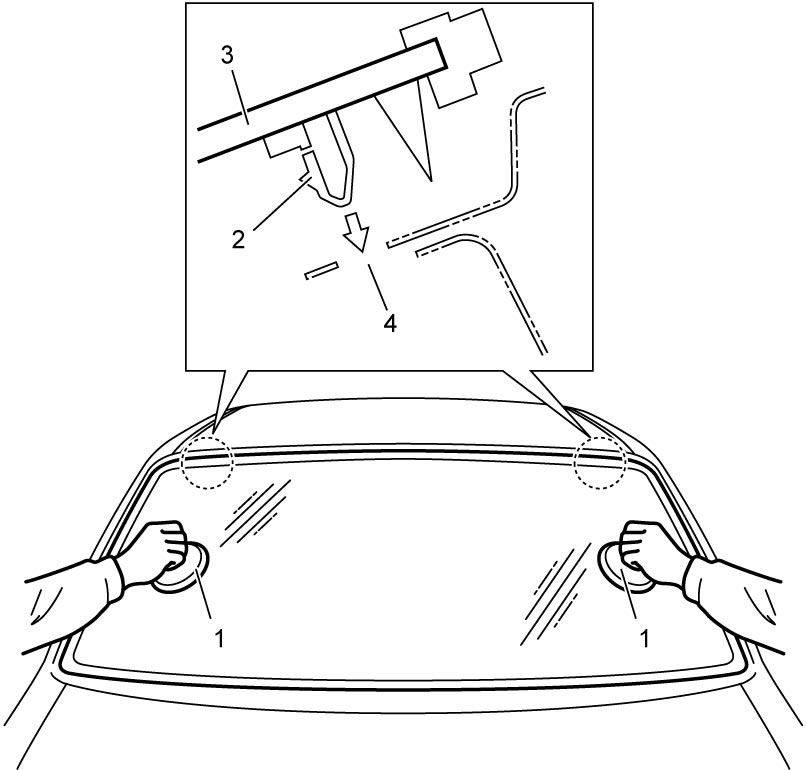
8)Holding windshield (3) with rubber sucker grips (1), align fasteners (2) with holes (4) of body and install windshield.
NOTE:
While installing windshield, pay enough attention to fit the windshield molding to roof panel end and side body panels at right and left sides.
9)Dry adhesive.
NOTICE:
If the following precautions are not taken when drying the adhesive, the front windshield glass may slip, preventing it from being attached firmly.
Take the following precautions when drying adhesive.
•Avoid quickly closing a door before complete hardening of the adhesive. Closing a door quickly could cause the windshield to become loose or even come off. If a door must be closed before the adhesive hardens completely, open all side windows first and then gently close the door.
•If molding is not securely in place, hold it down with tape until the adhesive completely hardens.
•Refrain from driving until the adhesive completely hardens.
•Do not use infrared light or the like for drying.
•If molding is not securely in place, hold it down with tape until the adhesive completely hardens.
•Refrain from driving until the adhesive completely hardens.
•Do not use infrared light or the like for drying.
10)Check for water leakage 1 or 2 hours after installing windshield. If leakage is found, remove and install windshield again.
NOTICE:
If the following precautions are not taken when checking for water leakage, the windshield glass may not attach properly.
Take the following precautions when checking for water leakage.
•Do not apply excessive water pressure.
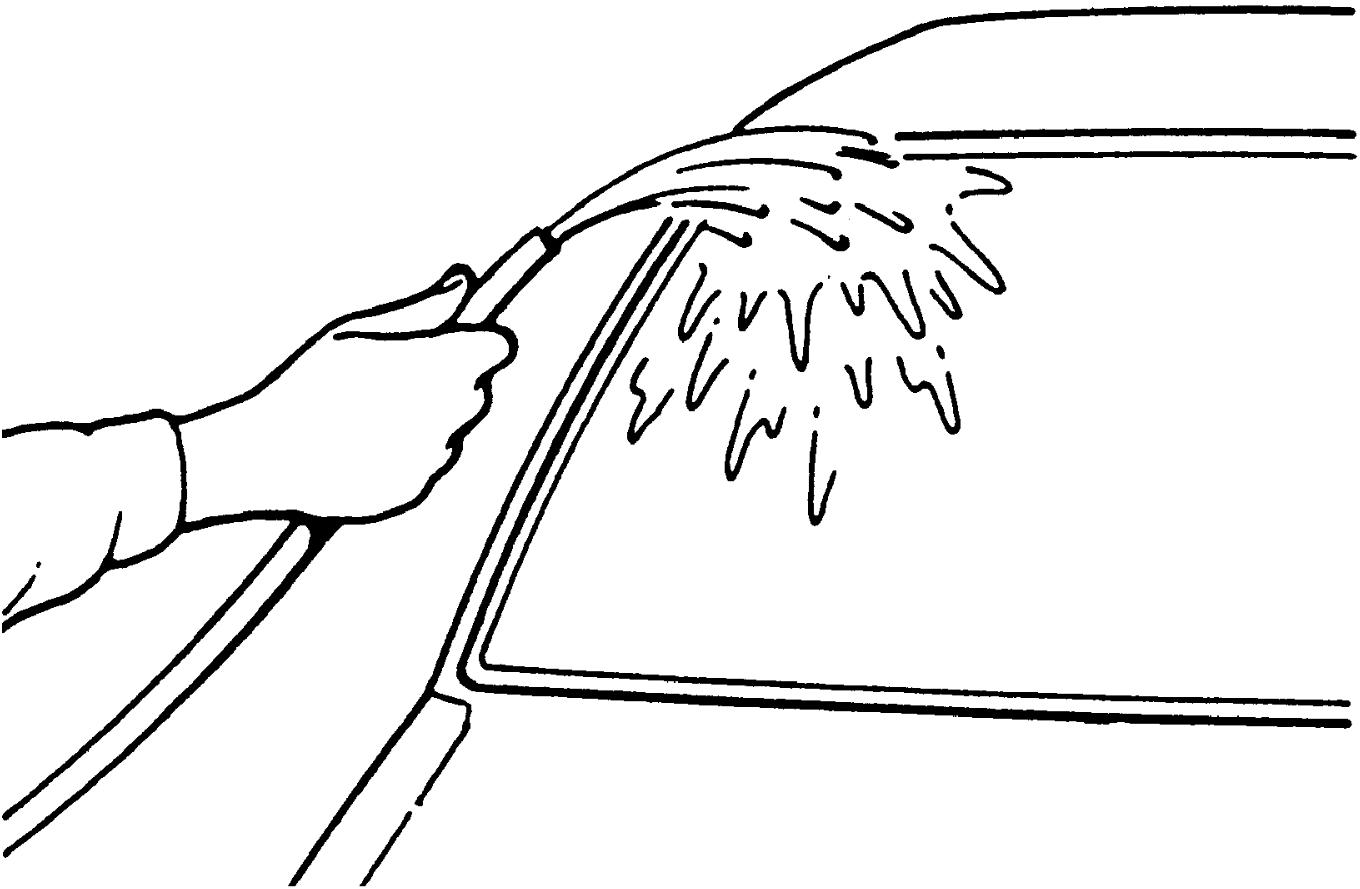 •Do not blow compressed air directly at adhesive applied part when drying.
11)Install head lining if it has been removed.
12)Install instrument panel if it has been removed.
13)Install rain / light sensor, if equipped.
14)Install inner rear view mirror.
15)Install cowl top garnish.
16)Install wiper arms.
17)Initialize rain / light sensor, if equipped.