M20A-FXS ENGINE MECHANICAL ENGINE UNIT REMOVAL
CAUTION / NOTICE / HINT
The necessary procedures (adjustment, calibration, initialization or registration) that must be performed after parts are removed and installed, or replaced during engine unit removal/installation are shown below.
| Replaced Part or Performed Procedure | Necessary Procedure | Effect/Inoperative Function when Necessary Procedure not Performed | Link |
|---|---|---|---|
| Replacement of inverter with converter assembly | Resolver learning | ·
DTCs are stored ·
Slight vibration at a vehicle speed of 5 km/h (3 mph) or less ·
Shock or vibration during acceleration |
( ) |
for SFI system
Replacement of ECM |
Perform Vehicle Identification Number (VIN) registration | MIL comes on | ()
|
for SFI system
·
Replacement of throttle body assembly ·
Replacement of engine assembly ·
Replacement of cylinder head sub-assembly ·
Replacement of camshaft (for intake or exhaust camshaft) ·
Replacement of camshaft timing gear assembly ·
Replacement of fuel injector assembly ·
Replacement of spark plug ·
Replacement of ignition coil assembly ·
Replacement of EGR valve assembly ·
Gas leak from exhaust system is repaired ·
Replacement of knock sensor |
Inspection After Repair | ·
Poor idle, etc. ·
Engine start function, etc. |
()
|
| Suspension, tires, etc.
(The vehicle height changes because of suspension or tire replacement) |
Initialize No. 1 headlight ECU sub-assembly LH | Automatic headlight beam level control system | ()
|
| Front wheel alignment adjustment | 1.
Clear zero point calibration data. 2.
Perform yaw rate and acceleration sensor zero point calibration. |
·
DTCs are stored ·
ABS warning light illuminates ·
Brake warning light/yellow (minor malfunction) illuminates ·
Slip indicator light illuminates ·
VSC disabled or malfunctions |
for Initialization:
( )
for Calibration: ( )
|
| Replacement of hybrid vehicle transaxle assembly | ·
Resolver learning ·
Initialize resolver |
·
DTCs are stored ·
Slight vibration at a vehicle speed of 5 km/h (3 mph) or less ·
Shock or vibration during acceleration |
()
|
PROCEDURE

 16572D
1.DISCONNECT NO. 2 RADIATOR HOSE
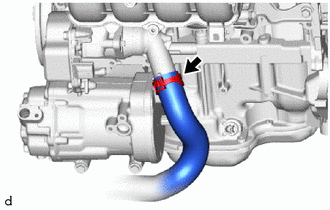
Slide the clip and disconnect the No. 2 radiator hose from the water inlet.
25760
2.REMOVE NO. 1 VACUUM PIPE
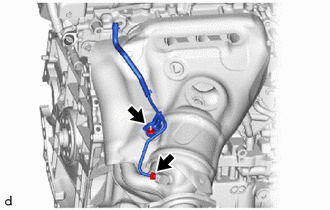
Using a 14 mm union nut wrench, disconnect the No. 1 vacuum pipe from the exhaust manifold (TWC: Front Catalyst).
Remove the nut and No. 1 vacuum pipe from the exhaust manifold (TWC: Front Catalyst).
23881E
3.REMOVE FUEL HOSE BRACKET
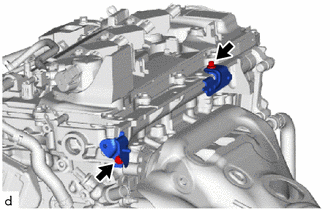
Remove the 2 bolts and 2 fuel hose brackets from the cylinder head sub-assembly.
17167
4.REMOVE NO. 1 EXHAUST MANIFOLD HEAT INSULATOR
17141
5.REMOVE EXHAUST MANIFOLD
22030
6.REMOVE THROTTLE BODY WITH MOTOR ASSEMBLY
22271
7.REMOVE THROTTLE BODY GASKET
25680
8.REMOVE EGR COOLER ASSEMBLY
25601
9.REMOVE NO. 1 EGR PIPE SUB-ASSEMBLY
25620
10.REMOVE EGR VALVE ASSEMBLY
16279
11.REMOVE NO. 3 WATER BY-PASS PIPE
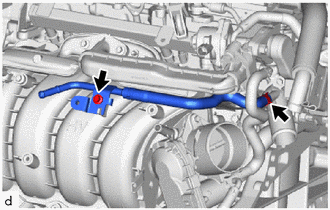
Using an 8 mm socket wrench, remove the bolt and No. 3 water by-pass pipe from the intake manifold.
Slide the clip and disconnect the No. 3 water by-pass pipe from the water outlet sub-assembly.
17138B
12.REMOVE INTAKE MANIFOLD STAY
17111
13.REMOVE INTAKE MANIFOLD
17177
14.REMOVE NO. 1 INTAKE MANIFOLD TO HEAD GASKET
23910A
15.DISCONNECT FUEL TUBE SUB-ASSEMBLY
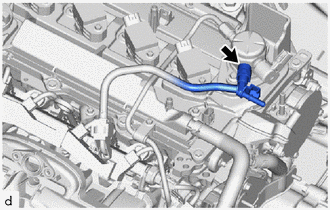
Disconnect the fuel tube sub-assembly from the fuel pump assembly.
Click hereEngine / Hybrid System>M20A-FXS (FUEL)>FUEL SYSTEM>PRECAUTION
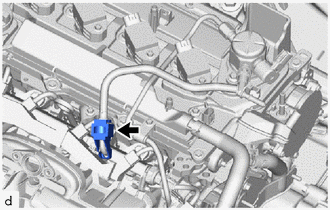
Remove the fuel pipe clamp from the fuel tube connector.
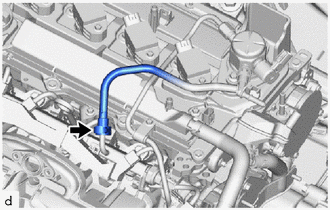
Disconnect the fuel tube sub-assembly from the fuel delivery pipe with sensor assembly.
Click hereEngine / Hybrid System>M20A-FXS (FUEL)>FUEL SYSTEM>PRECAUTION
23801P
16.REMOVE NO. 1 FUEL PIPE SUB-ASSEMBLY
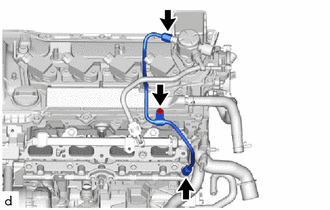
Remove the bolt.
Using a 17 mm union nut wrench, loosen the 2 union nuts of the No. 1 fuel pipe sub-assembly.
23100X
17.REMOVE FUEL PUMP ASSEMBLY (for High Pressure)
18.REMOVE WATER BY-PASS HOSE ASSEMBLY
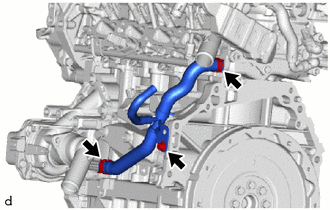
Remove the bolt.
Slide the 2 clips and remove the water by-pass hose assembly from the water inlet with thermostat sub-assembly and cylinder head sub-assembly.
82219A
19.REMOVE SENSOR WIRE
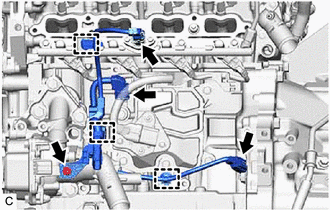
Disconnect the 3 connectors.
Disengage the 3 clamps.
Remove the bolt and sensor wire from the water inlet with thermostat sub-assembly.
82126A
20.REMOVE NO.6 ENGINE WIRE
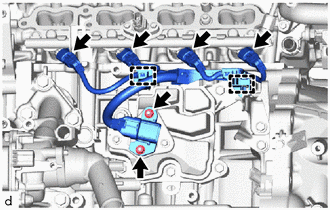
Disconnect the 4 connectors.
Disengage the 2 clamps.
Remove the 2 nuts and No. 6 engine wire from the wire harness clamp bracket.
23807
21.REMOVE FUEL DELIVERY PIPE SUB-ASSEMBLY
23891
22.REMOVE FUEL DELIVERY SPACER
23291
23.REMOVE INJECTOR VIBRATION INSULATOR
82125N
24.REMOVE NO. 5 ENGINE WIRE
23250F
25.REMOVE PORT FUEL INJECTOR ASSEMBLY
23814B
26.REMOVE FUEL DELIVERY PIPE
23250E
27.REMOVE DIRECT FUEL INJECTOR ASSEMBLY
23255A
28.REMOVE FUEL INJECTOR SEAL
19500
29.REMOVE IGNITION COIL ASSEMBLY
11452D
30.REMOVE ENGINE OIL LEVEL DIPSTICK GUIDE
Remove the engine oil level dipstick.
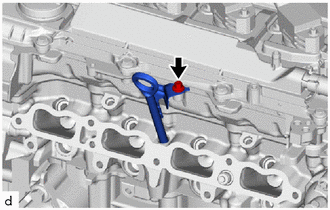
Using an 8 mm socket wrench, remove the bolt and engine oil level dipstick guide from the cylinder head sub-assembly.
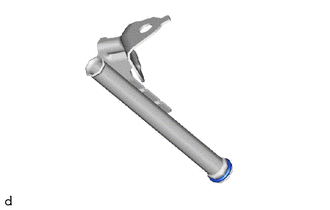
Remove the O-ring from the engine oil level dipstick guide.
16031
31.REMOVE WATER INLET WITH THERMOSTAT SUB-ASSEMBLY
16032
32.REMOVE ENGINE WATER PUMP ASSEMBLY (WATER INLET HOUSING)
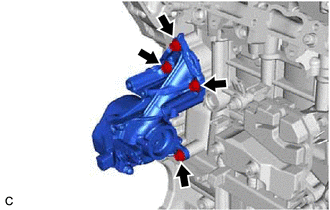
Remove the 4 bolts, engine water pump assembly (water inlet housing) and gasket from the cylinder block sub-assembly.
17169A
33.REMOVE NO. 3 EXHAUST MANIFOLD HEAT INSULATOR
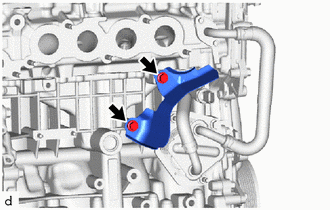
Remove the 2 bolts and No. 3 exhaust manifold heat insulator from the cylinder block sub-assembly.
34.REMOVE WIRE HARNESS CLAMP BRACKET
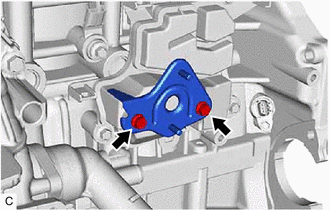
Using an 8 mm socket wrench, remove the 2 bolts and wire harness clamp bracket from the No. 1 ventilation case.
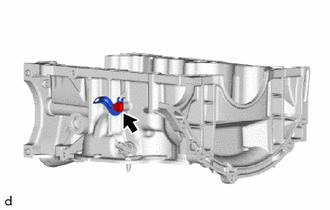
Remove the bolt and wire harness clamp bracket from the stiffening crankcase assembly.