FC CONTROL FC CONTROL SYSTEM P1DDA9E FC Converter Phase U Fail Signal Stuck On P1DDB9E FC Converter Phase V Fail Signal Stuck On P1DDC9E FC Converter Phase W Fail Signal Stuck On P1DDD9E FC Converter Phase X Fail Signal Stuck On
DESCRIPTION
For the description of the FC converter assembly, refer to the wiring diagram for DTC P1D1C16.
Click hereEngine / Hybrid System>FC CONTROL>FC CONTROL SYSTEM>P1D1C16
If a malfunction occurs in the FC converter assembly internal circuits, the FC boost control ECU detects a malfunction.
| DTC No. | Detection Item | DTC Detection Condition | Trouble Area | Warning Indicate | DTC Output from | Priority |
|---|---|---|---|---|---|---|
| P1DDA9E | FC Converter Phase U Fail Signal Stuck On | Phase U fail signal is detected. (Malfunction in circuit)
(1 trip detection logic) |
·
FC converter assembly ·
Inverter with converter assembly ·
FC air compressor with motor assembly ·
FCV transaxle with motor assembly ·
Inverter cooling system ·
Cooling fan system ·
Wire harness or connector |
Master Warning: Comes on | FCDC | B |
| P1DDB9E | FC Converter Phase V Fail Signal Stuck On | Phase V fail signal is detected. (Malfunction in circuit)
(1 trip detection logic) |
·
FC converter assembly ·
Inverter with converter assembly ·
FC air compressor with motor assembly ·
FCV transaxle with motor assembly ·
Inverter cooling system ·
Cooling fan system ·
Wire harness or connector |
Master Warning: Comes on | FCDC | B |
| P1DDC9E | FC Converter Phase W Fail Signal Stuck On | Phase W fail signal is detected. (Malfunction in circuit)
(1 trip detection logic) |
·
FC converter assembly ·
Inverter with converter assembly ·
FC air compressor with motor assembly ·
FCV transaxle with motor assembly ·
Inverter cooling system ·
Cooling fan system ·
Wire harness or connector |
Master Warning: Comes on | FCDC | B |
| P1DDD9E | FC Converter Phase X Fail Signal Stuck On | Phase X fail signal is detected. (Malfunction in circuit)
(1 trip detection logic) |
·
FC converter assembly ·
Inverter with converter assembly ·
FC air compressor with motor assembly ·
FCV transaxle with motor assembly ·
Inverter cooling system ·
Cooling fan system ·
Wire harness or connector |
Master Warning: Comes on | FCDC | B |
- HINT:
-
These DTCs will be stored due to a malfunction in the detection circuit inside the FC converter assembly.
| DTC No. | Data List |
|---|---|
| P1DDA9E | ·
Phase U Temperature 1 ·
Phase U Temperature 2 ·
Phase U Current |
| P1DDB9E | ·
Phase V Temperature 1 ·
Phase V Temperature 2 ·
Phase V Current |
| P1DDC9E | ·
Phase W Temperature 1 ·
Phase W Temperature 2 ·
Phase W Current |
| P1DDD9E | ·
Phase X Temperature 1 ·
Phase X Temperature 2 ·
Phase X Current |
CAUTION / NOTICE / HINT
- CAUTION:
- ·
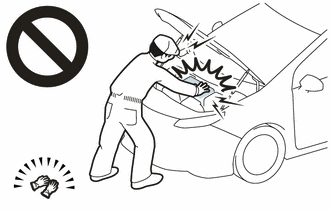
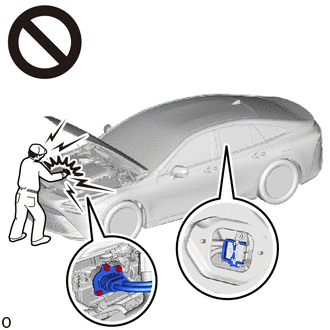
Before the following operations are conducted, take precautions to prevent electric shock by turning the ignition switch off, wearing insulated gloves, and removing the EV supply battery assembly service plug grip and FC converter power outlet cable (inverter with converter assembly) on FC converter side.
Make sure to remove the EV supply battery assembly service plug grip first.
-Inspecting the high-voltage system
-Disconnecting the low voltage connector of the inverter with converter assembly
-Disconnecting the low voltage connector of the EV supply battery assembly
-Disconnecting the low voltage connector of the FC converter assembly
-Disconnecting the low voltage connector of the voltage inverter (w/ 1500W Type Voltage Inverter)
·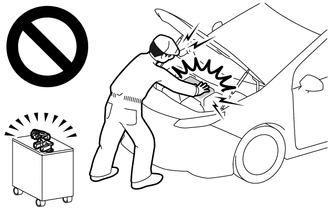
After removing the service plug grip from the EV supply battery assembly, put it in your pocket to prevent other technicians from accidentally reconnecting it while you are working on the high-voltage system. After removing the FC converter power outlet cable (inverter with converter assembly) on FC converter side and use the "HIGH-VOLTAGE, DO NOT TOUCH" sign to notify other technicians that you are working on the high-voltage system.
·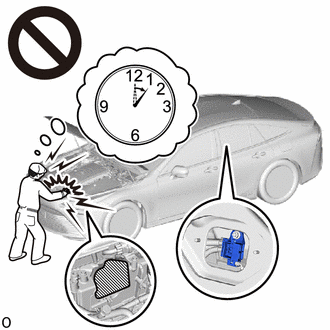
After removal of the EV supply battery assembly service plug grip and FC converter power outlet cable (inverter with converter assembly) on FC converter side, wait for at least 10 minutes before touching the high-voltage connectors and terminals. After waiting for 10 minutes, check the voltage at the terminals in the inspection point in the inverter with converter assembly. The voltage should be 0 V before beginning work.
- HINT:
-
At least 10 minutes are necessary to discharge the high-voltage capacitors inside the inverter with converter assembly and FC stack assembly.
·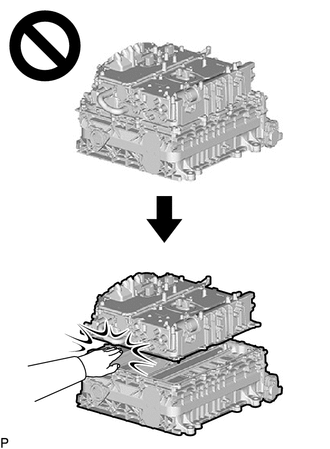
Since high voltage accumulates within the FC stack assembly with FC converter, never perform the work of separating the FC stack assembly with FC converter into the FC converter assembly and FC stack assembly without first performing electrical charge discharge (forced electrical charge discharge or electrical charge self-discharge), because doing so is dangerous.
Click hereEngine / Hybrid System>FC CONTROL>FC STACK>REMOVAL
·Removing and installing the FC stack assembly without first discharging the electrical charge may result in an electric shock due to the high voltage circuit.
- NOTICE:
- ·
When reinstalling the service plug grip to the EV supply battery assembly, after lowering the EV supply battery assembly service plug grip 90°, securely slide it until a "click" sound is heard.
Click hereEngine / Hybrid System>FC CONTROL>FC CONTROL SYSTEM>PRECAUTION
·This vehicle performs FC system shutdown process after turning the ignition switch off from ON (READY). Therefore, after the ignition switch is turned off from ON (READY), do not perform any work on the electrical system for at least 10 minutes including removing connectors or disconnecting the negative (-) auxiliary battery terminal.
·When the EV control ECU determines that the temperature of FC system components is below 0°C (32°F) when the vehicle is parked with the ignition switch off, it operates the FC air compressor, hydrogen pump and FC cooling water pump for a maximum of 180 seconds to drain the FC stack assembly. When performing inspection or repairs with the ignition switch off (not ON or ON (READY)), disconnect the cable from the negative (-) auxiliary battery terminal before performing work. (If the auxiliary battery voltage is needed to conduct inspection, perform the inspection in an environment with an ambient temperature of 10°C (50°F) or higher.)
·After the inspection is complete, be sure to replace the FC converter assembly (The FC converter may have been damaged due to circuit malfunction).
- HINT:
-
After the repair, clear the DTCs and perform the following procedure to check that DTCs are not output.
- 1.
Turn the ignition switch to ON.
2.Enter the following menus: Powertrain / EV / Data List / FC Work Mode, FC Intermittent Operation.
3.Put the state in park (P), turn the ignition switch to ON (READY) and wait until the FC system is activated (Waiting for at least 2 minutes is required after turning the ignition switch to ON (READY)).
-FC system is activated: Data List shows that "FC Work Mode" is "Working" and "FC Intermittent Operation" is "OFF".
4.Wait at least 15 seconds with the FC system activated.
PROCEDURE
Pre-procedure1
None
Procedure1
Check for DTCs.
- Powertrain > FCDC > Trouble Codes
- 50001 493
- Result:
Result Proceed to Only P1DDA9E, P1DDB9E, P1DDC9E or P1DDD9E is output A P1DDA9E, P1DDB9E, P1DDC9E or P1DDD9E is output and DTCs other than the DTCs in the table below are output B P1DDA9E, P1DDB9E, P1DDC9E or P1DDD9E is output and any DTCs in the table below are output C
Malfunction Content Relevant DTC Microcomputer malfunction P060B16 Internal Control Module A/D Processing Performance Circuit Voltage Below Threshold P060B1C Internal Control Module A/D Processing Performance Circuit Voltage Out of Range P060B49 Internal Control Module A/D Processing Performance Internal Electronic Failure P060B71 Internal Control Module A/D Processing Performance Actuator Stuck P1F451F FC Converter Control Module Power Relay Sense Circuit Intermittent Sensor and actuator circuit malfunction P1D1C16 FC Converter Output Voltage Sensor Circuit Voltage Below Threshold P1D1C17 FC Converter Output Voltage Sensor Circuit Voltage Above Threshold P1D2017 FC Converter Input Voltage Sensor Circuit Voltage Above Threshold System malfunction P1D0619 FC Converter Phase U Current Circuit Current Above Threshold P1D0719 FC Converter Phase V Current Circuit Current Above Threshold P1D0819 FC Converter Phase W Current Circuit Current Above Threshold P1D0919 FC Converter Phase X Current Circuit Current Above Threshold P1D0E62 Inverter Output Voltage/FC Converter Output Voltage Signal Compare Failure P1D0F62 Cell Monitor Voltage/FC Converter Input Voltage Signal Compare Failure
- HINT:
DTC P1DDA9E, P1DDB9E, P1DDC9E or P1DDD9E may be output as a result of the malfunction indicated by the DTCs above.
(a)The chart above is listed in inspection order of priority.
(b)Check DTCs that are output at the same time by following the listed order. (The main cause of the malfunction can be determined without performing unnecessary inspections.)
Post-procedure1
Turn the ignition switch off.
A
B
C
Pre-procedure1
None
Procedure1
Check for DTCs.
- Powertrain > EV > Trouble Codes
- 50001 397
- Result:
Result Proceed to No DTCs in the table below are output A Any of the DTCs in the table below are output B
Malfunction Content Relevant DTC Sensor and actuator circuit malfunction P0A9300 Inverter "A" Cooling System Performance P0C7396 Motor Electronics Coolant Pump "A" Component Internal Failure P314A31 Motor Electronics Coolant Pump "A" No Signal System malfunction P0AA649 Hybrid/EV Battery Voltage System Isolation Internal Electronic Failure P0C7600 Hybrid/EV Battery System Discharge Time Too Long
- HINT:
DTC P1DDA9E, P1DDB9E, P1DDC9E or P1DDD9E may be output as a result of the malfunction indicated by the DTCs above.
(a)The chart above is listed in inspection order of priority.
(b)Check DTCs that are output at the same time by following the listed order. (The main cause of the malfunction can be determined without performing unnecessary inspections.)
Post-procedure1
Turn the ignition switch off.
A
B
Click hereEngine / Hybrid System>HYBRID / BATTERY CONTROL>HYBRID CONTROL SYSTEM>DIAGNOSTIC TROUBLE CODE CHART
Click hereEngine / Hybrid System>FC CONTROL>FC CONTROL SYSTEM>P1D0619
- Result:
Result Proceed to OK A NG (The connector is not connected securely) B NG (The terminals are not making secure contact or are deformed, or water or foreign matter exists in the connector) C
A
B
C
Click hereEngine / Hybrid System>FC CONTROL>FC CONTROL SYSTEM>P1D0619
- Result:
Result Proceed to OK A NG (The connector is not connected securely) B NG (The terminals are not making secure contact or are deformed, or water or foreign matter exists in the connector) C
A
B
C
Click hereEngine / Hybrid System>FC CONTROL>FC CONTROL SYSTEM>Cooling System
- Result:
Proceed to NEXT
NEXT
- Result:
Proceed to NEXT
NEXT
Click hereEngine / Hybrid System>HYBRID / BATTERY CONTROL>HYBRID CONTROL SYSTEM>Motor Resolver Circuit
- Result:
Proceed to NEXT
NEXT
- Result:
Proceed to NEXT
NEXT
Click hereEngine / Hybrid System>HYBRID / BATTERY CONTROL>HYBRID CONTROL SYSTEM>Motor High-voltage Circuit
- Result:
Proceed to NEXT
NEXT
- HINT:
-
Click hereEngine / Hybrid System>FC CONTROL>CONVERTER ASSEMBLY>REMOVAL
- Result:
Proceed to NEXT
NEXT
Pre-procedure1
None
Procedure1
Clear the DTCs.
- Powertrain > FCDC > Clear DTCs
- 50002 493
- Result:
Proceed to NEXT
Post-procedure1
Turn the ignition switch off and wait for 10 minutes or more.
NEXT
Put the state in park (P), turn the ignition switch to ON (READY) and wait until the FC system is activated (Waiting for at least 2 minutes is required after turning the ignition switch to ON (READY)).
- Powertrain > EV > Data List
-
Tester Display FC Work Mode FC Intermittent Operation - 50003 397 962,872
- HINT:
-
FC system is activated: Data List shows that "FC Work Mode" is "Working" and "FC Intermittent Operation" is "OFF".
Wait at least 15 seconds with the FC system activated.
Drive the vehicle forward with the shift state in drive (D) for 5 m (16 ft.) or more.
Drive the vehicle backward with the shift state in reverse (R) for 5 m (16 ft.) or more.
- Result:
Proceed to NEXT
NEXT
Pre-procedure1
None
Procedure1
Check for DTCs.
- Powertrain > FCDC > Trouble Codes
- 50001 493
- Result:
Result Proceed to DTCs are not output A DTCs are output B
Post-procedure1
Turn the ignition switch off.
A
B