EA64 MANUAL TRANSMISSION / TRANSAXLE MANUAL TRANSAXLE ASSEMBLY REMOVAL
PROCEDURE

 1. PRECAUTION
- NOTICE:
-
After turning the ignition switch off, waiting time may be required before disconnecting the cable from battery terminal. Therefore, make sure to read the disconnecting the cable from the battery terminal notice before proceeding with work.
-
Click hereGeneral>INTRODUCTION>REPAIR INSTRUCTION>PRECAUTION
2.DISCONNECT CABLE FROM NEGATIVE BATTERY TERMINAL
- NOTICE:
-
When disconnecting the cable, some systems need to be initialized after the cable is reconnected.
-
Click hereGeneral>INTRODUCTION>REPAIR INSTRUCTION>INITIALIZATION
51441
3.REMOVE NO. 1 ENGINE UNDER COVER
51442
4.REMOVE NO. 2 ENGINE UNDER COVER
28100
5.REMOVE STARTER ASSEMBLY
6.REMOVE EXHAUST PIPE ASSEMBLY
51444
7.REMOVE REAR ENGINE UNDER COVER LH
51443
8.REMOVE REAR ENGINE UNDER COVER RH
9.DRAIN MANUAL TRANSAXLE OIL
10.REMOVE DRIVE SHAFT ASSEMBLY
11.DRAIN ENGINE COOLANT
12612A
12.REMOVE NO. 1 ENGINE COVER
13.REMOVE AIR CLEANER CAP SUB-ASSEMBLY WITH AIR CLEANER HOSE ASSEMBLY
14.REMOVE AIR CLEANER CASE SUB-ASSEMBLY
17771A
15.REMOVE AIR CLEANER BRACKET
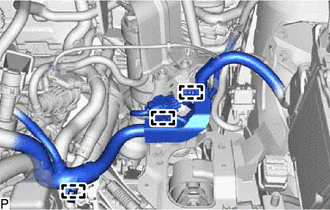
Disconnect the 3 clamps and wire harness.
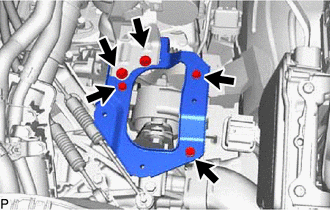
Remove the 5 bolts and air cleaner bracket.
16.DISCONNECT ENGINE WIRE
17.REMOVE NO. 4 WATER BY-PASS HOSE
18.DISCONNECT COMPRESSOR OUTLET ELBOW
17342D
19.DISCONNECT NO. 2 AIR HOSE
17360A
20.REMOVE NO. 1 AIR TUBE ASSEMBLY
33820B
21.DISCONNECT TRANSAXLE CONTROL CABLE ASSEMBLY
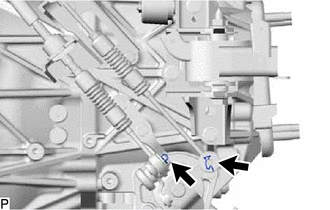
Remove the 2 clips and disconnect the transaxle control cable assembly from the manual transaxle assembly.
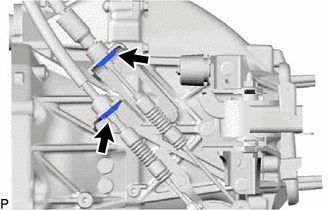
Remove the 2 clips and disconnect the transaxle control cable assembly from the control cable bracket.
31121
22.REMOVE NO. 1 CLUTCH HOUSING COVER
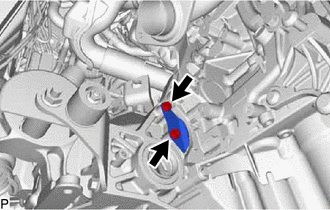
Remove the 2 bolts and No. 1 clutch housing cover.
17119
23.REMOVE NO. 2 MANIFOLD STAY
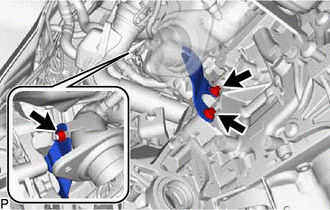
Using an E14 "TORX" socket wrench, remove the 2 bolts from the manual transaxle assembly.
Remove the nut and No. 2 manifold stay.
24.DISCONNECT GROUND CABLE
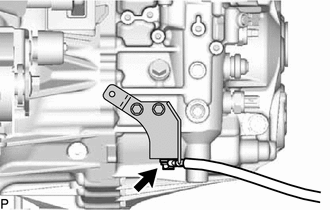
Remove the bolt and disconnect the ground cable.
31470
25.DISCONNECT CLUTCH RELEASE CYLINDER ASSEMBLY
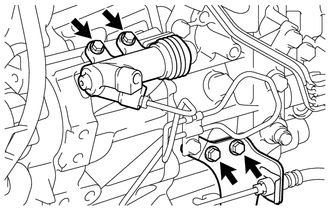
Remove the 4 bolts to disconnect the clutch release cylinder assembly and clutch flexible hose bracket.
26.DISCONNECT WIRE HARNESS
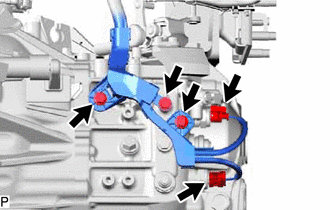
Remove the 3 bolts and disconnect the 2 connectors.
27.LOOSEN ENGINE AND TRANSAXLE CONNECTING BOLT
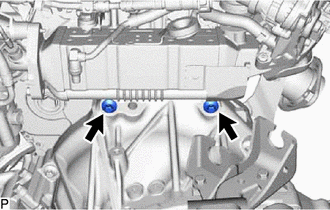
Using an E14 "TORX" socket wrench, loosen the 2 bolts.
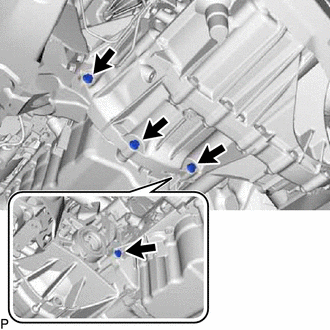
Loosen the 4 bolts.
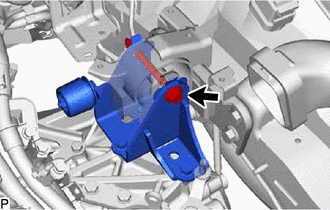
Loosen the through bolt.
28.REMOVE FRONT SUSPENSION MEMBER
30300
29.SUPPORT MANUAL TRANSAXLE ASSEMBLY
Support the manual transaxle assembly with a transmission jack and tie down band so that it is stable.
57104E
30.REMOVE FRONT CROSSMEMBER SUB-ASSEMBLY
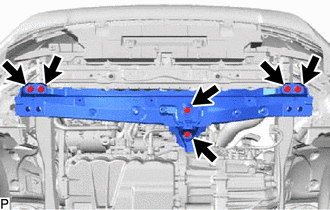
Remove the 6 bolts and front crossmember sub-assembly.
12361A
31.REMOVE FRONT ENGINE MOUNTING INSULATOR
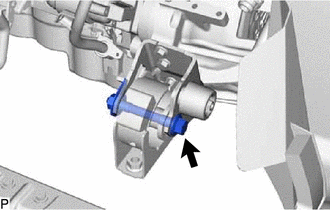
Remove the through bolt, nut and front engine mounting insulator.
30300
32.REMOVE MANUAL TRANSAXLE ASSEMBLY
- NOTICE:
- ·
As there is very little space around the manual transaxle assembly, be extremely careful that the body, clutch pipe line and radiator cooling fan do not interfere with the manual transaxle assembly when removing the manual transaxle assembly.
·When removing the manual transaxle assembly, it is necessary to move the engine assembly and manual transaxle assembly up and down, and back and forth. Therefore, continually confirm that the parts are properly supported and stable while performing this step.
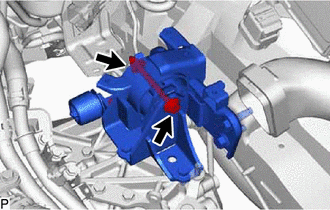
Remove the nut and through bolt, and then disconnect the engine mounting insulator LH from the engine mounting bracket LH.
Lower the transmission jack a little at a time. Slightly tilt the engine assembly and manual transaxle assembly.
- HINT:
-
Lower the engine assembly and manual transaxle assembly to a position where the engine mounting insulator LH can be removed.
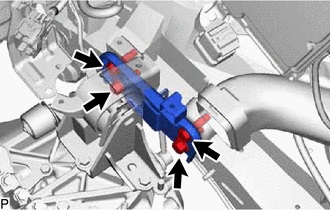
Remove the 4 bolts and engine mounting insulator LH.
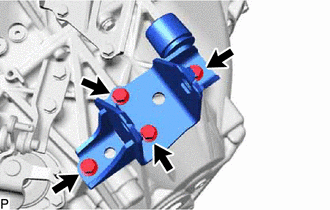
Remove the 4 bolts and engine mounting bracket LH.
- NOTICE:
-
Make sure to clean the bolts and bolt holes after removing the manual transaxle assembly.
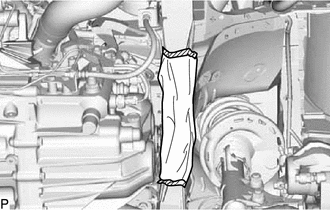
Use a cloth, etc. to protect the clutch pipe line in the area indicated in the illustration.
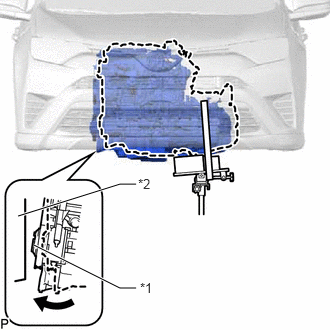
| *1 | Crankshaft Damper Sub-assembly |
| *2 | Body |
Lower the transmission jack a little at a time. Slightly tilt the engine assembly and manual transaxle assembly.
- NOTICE:
-
Be careful that the body and crankshaft damper sub-assembly do not interfere with each other.
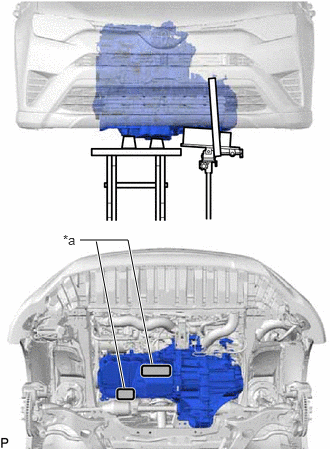
| *a | Engine Support Point |
Support the engine assembly with an engine lifter as shown in the illustration so that it is stable.
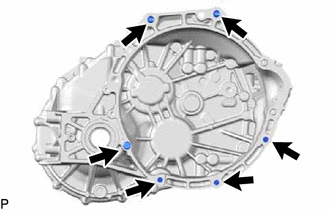
Remove the 6 bolts shown in the illustration.
While making sure that the clutch pipe line does not interfere with the manual transaxle assembly, slowly disconnect the manual transaxle assembly from the engine assembly until the input shaft is clear of the diaphragm spring of the clutch cover.
Slowly lower the transmission jack and remove the manual transaxle assembly.
12371A
33.REMOVE REAR ENGINE MOUNTING INSULATOR
12311A
34.REMOVE FRONT ENGINE MOUNTING BRACKET
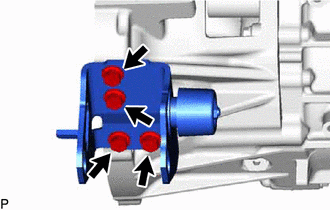
Remove the 4 bolts and front engine mounting bracket.
12321A
35.REMOVE REAR ENGINE MOUNTING BRACKET
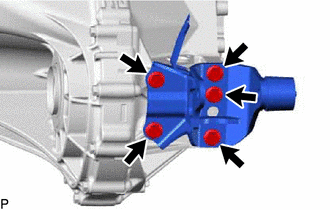
Remove the 5 bolts and rear engine mounting bracket.