B58 ENGINE MECHANICAL CYLINDER HEAD REASSEMBLY
PROCEDURE

 13711
1.INSTALL INTAKE VALVE
13715
2.INSTALL EXHAUST VALVE
3.INSTALL VALVE STEM OIL SEAL
4.INSTALL EXHAUST VALVE COMPRESSION SPRING
5.INSTALL INTAKE VALVE COMPRESSION SPRING
13750
6.INSTALL VALVE LASH ADJUSTER ASSEMBLY
13801
7.INSTALL NO. 1 VALVE ROCKER ARM SUB-ASSEMBLY
13502B
8.INSTALL EXHAUST CAMSHAFT SUB-ASSEMBLY
13053
9.INSTALL NO. 3 CAMSHAFT SUB-ASSEMBLY
13501A
10.INSTALL INTAKE CAMSHAFT SUB-ASSEMBLY
13800
11.INSPECT INTERMEDIATE LEVER
13801
12.INSPECT NO.1 VALVE ROCKER ARM SUB-ASSEMBLY
13800
13.INSTALL INTERMEDIATE LEVER
13908A
14.INSTALL GATE
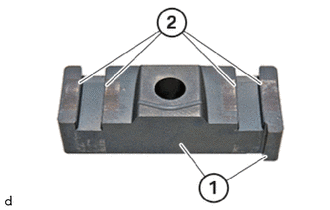
Clean contact surfaces (1) and (2) off oil, grease and dirt.
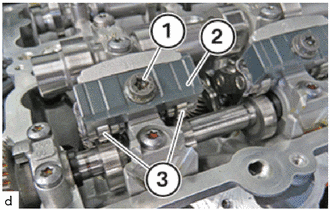
Position the gate (2) and hand-tighten the bolt (1).
Check that the intermediate lever (3) is in the correct mounting orientation.
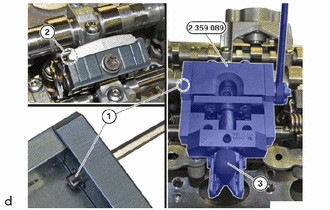
Position the special tool 2 359 089 on the cylinder head sub-assembly.
- SST
- 09200-WA420
Pre-tension the gate with the lever (3).
Move bolt (1) against contact surface (2).
Make sure that the special tool 2 359 089 does not rotate during this process.
- SST
- 09200-WA420
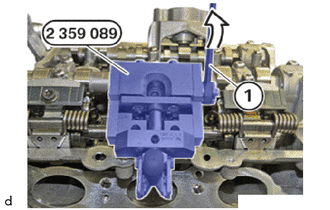
Secure the gate with the lever (1).
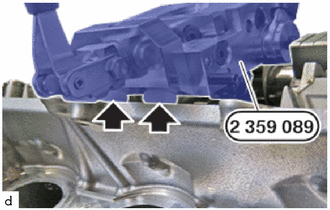
Ensure that the special tool 2 359 089 lies flat on the cylinder head sub-assembly.
- SST
- 09200-WA420
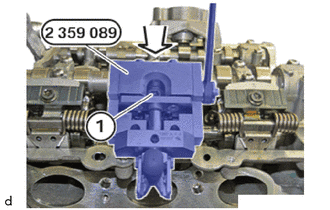
Press the special tool 2 359 089 onto the cylinder head sub-assembly.
- SST
- 09200-WA420
Tighten the T40 bolt (1) at the same time.
- Torque:
- 20.5 N*m (209 kgf*cm, 15 ft.*lbf)
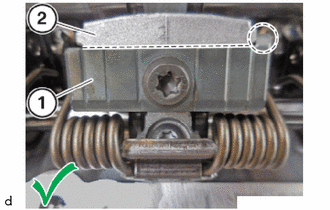
Make sure that gate (1) rests correctly against bearing bracket (2).
Gate (1) is installed correctly in the marked area.
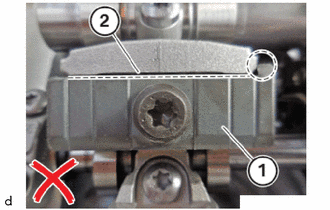
Make sure that gate (1) rests correctly against bearing bracket (2).
Gate (1) is installed incorrectly in the marked area.
Repeat the step for all the gates.
15.INSPECT AND ADJUST CAMSHAFT (CYLINDERS 3 AND 4)
16.INSTALL TORSION SPRING
- CAUTION:
- ·
Spring preload.
Danger of injury!
-The use of the specified special tool (tool) is mandatory.
-The described operation must be carried out properly.
- HINT:
-
Wear safety goggles.
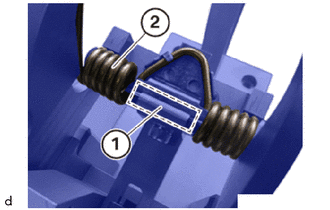
Insert the torsion spring (2) in the clamping lever of the special tool 2 359 088 .
- SST
- 09200-WA410
Make sure that the torsion spring (2) is correctly positioned in the marked area (1) of the special tool 2 359 088 .
- SST
- 09200-WA410
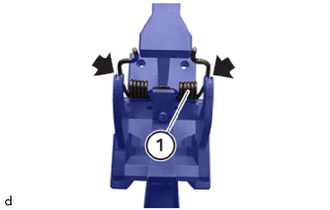
Carefully close the clamping lever of the special tool 2 359 088 in the accompanying fixture until the retaining hook engages.
- SST
- 09200-WA410
Ensure that the torsion spring (1) lies correctly in the lateral guides (arrows) of the special tool 2 359 088 during tensioning.
- SST
- 09200-WA410
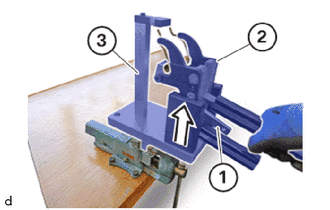
Carefully close the clamping lever (2) of the special tool 2 359 088 in the fixture (3) until the retaining hook (1) audibly engages.
- SST
- 09200-WA410
The torsion spring is tensioned.
Carefully take the clamping lever (2) of the special tool 2 359 088 with the stretched torsion spring out of the fixture (3) of the special tool 2 359 088 in the direction of arrow.
- SST
- 09200-WA410
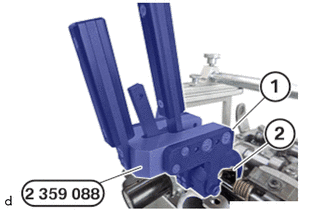
Feed in clamping lever (1) from the special tool 2 359 088 with the pre-tensioned torsion spring (2) and position it.
- SST
- 09200-WA410
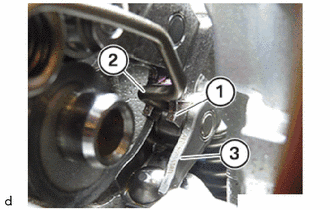
Ensure that the torsion spring (2) is positioned correctly in the intermediate lever (1).
Check all No. 1 valve rocker arm sub-assembly (3) for correct installation position.
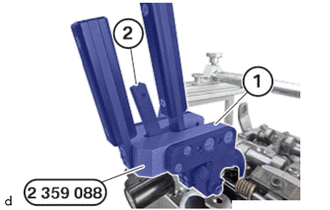
Press the clamping lever (1) of the special tool 2 359 088 together until the retaining hook (2) unlocks.
- SST
- 09200-WA410
Carefully open the clamping lever (1) of the special tool 2 359 088 until the torsion spring is completely relaxed.
- SST
- 09200-WA410
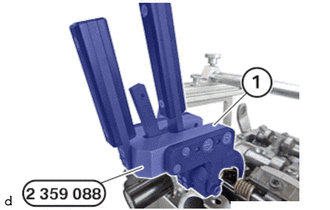
Guide out and remove the clamping lever (1) of the special tool 2 359 088 .
- SST
- 09200-WA410
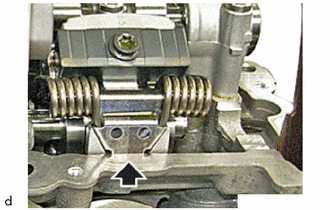
Check for correct mounting orientation of the torsion spring (arrow) at the cylinder head sub-assembly.
Repeat the operations for the remaining torsion spring.
15330G
17.INSTALL SERVO MOTOR
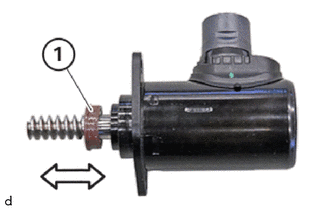
Pull off O-ring (1) and replace.
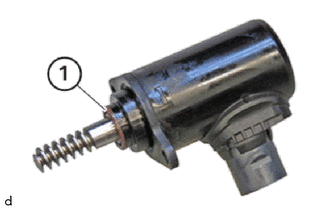
Push the O-ring (1) onto the servo motor housing to the limit position.
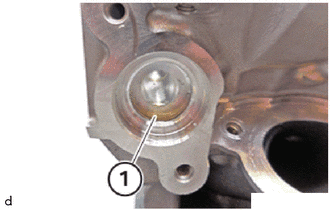
Clean sealing surface (1).
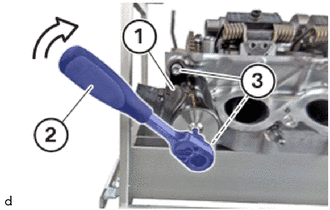
Slide servo motor for eccentric shaft (1) up to the limit position.
Turn screw on the servo motor for the No. 3 camshaft sub-assembly (1) to the right with a 4 mm hexagon wrench (2) until the servo motor for the eccentric shaft rests against the cylinder head.
Tighten the T30 bolts (1).
- Torque:
- 10 N*m (102 kgf*cm, 7 ft.*lbf)
17201
18.INSTALL TURBOCHARGER SUB-ASSEMBLY
11115
19.INSTALL CYLINDER HEAD GASKET