POWER DISTRIBUTION MAIN BODY ECU(for LHD) REMOVAL
CAUTION / NOTICE / HINT
- CAUTION:
- ·
Working on 12 V vehicle electrical system.
Risk of short circuits! Risk of fire!
-Detach the cable from the negative (-) battery terminal.
- ·
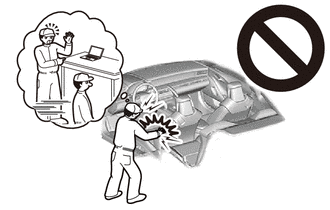
Pyrotechnic components.
Danger! Life-threatening injuries!
-All work on pyrotechnic parts may be carried out by technically experienced and appropriately trained personnel only.
-Replace any damaged part or ones that have been dropped.
-For additional information see:
Click hereVehicle Interior>SUPPLEMENTAL RESTRAINT SYSTEMS>AIRBAG SYSTEM>PRECAUTION
- NOTICE:
- ·
Electrostatic discharge.
Damage to or destruction of electrical components.
-Only touch the housings of electrical components. Do not touch pins or multi-pin connectors directly.
-For additional information see:
Click hereGeneral>INTRODUCTION>REPAIR INSTRUCTION>PRECAUTION
·Before performing work on electronic components, disconnect the cable from the negative (-) battery terminal to prevent damage to the electrical system or components.
·When disconnecting the cable, turn the START-STOP button (engine switch) and headlight switch off and loosen the cable nut completely. Perform these operations without twisting or prying on the cable. Then disconnect the cable.
·Clock settings, radio settings, audio system memory, DTCs and other data will be cleared when the cable is disconnected from the negative (-) battery terminal. Write down any necessary data before disconnecting the cable.
PROCEDURE

 1.DISCONNECT CABLE FROM NEGATIVE BATTERY TERMINAL
for B48:
Click hereGeneral>MAINTENANCE>B48 BATTERY>REMOVAL
for B58:
Click hereGeneral>MAINTENANCE>B58 BATTERY>REMOVAL
- CAUTION:
-
- ·
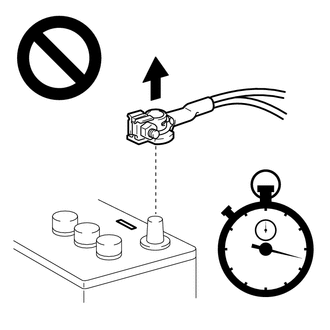
Wait at least 60 seconds after disconnecting the cable from the negative (-) battery terminal to disable the SRS system.
·If the airbag deploys for any reason, it may cause a serious accident.
58920C
2.REMOVE FRONT CONSOLE ARMREST ASSEMBLY
58822
3.REMOVE CONSOLE SIDE PANEL
4.REMOVE CONSOLE PANEL AND CONSOLE PANEL RETAINER
55432B
5.REMOVE INSTRUMENT PANEL FINISH LOWER PANEL
55317E
6.REMOVE NO. 1 INSTRUMENT SIDE PANEL
55011A
7.REMOVE NO. 1 INSTRUMENT PANEL GARNISH SUB-ASSEMBLY
55550
8.REMOVE GLOVE COMPARTMENT DOOR ASSEMBLY
55607
9.REMOVE NO.2 INSTRUMENT PANEL UNDER COVER SUB-ASSEMBLY
73900
10.REMOVE LOWER NO. 1 INSTRUMENT PANEL AIRBAG ASSEMBLY (w/ Knee Airbag)
87211A
11.REMOVE NO. 2 AIR DUCT
58510H
12.REMOVE FLOOR MAT ASSEMBLY
- HINT:
-
Use the same procedure as for the LH side.
-
Click hereVehicle Interior>INTERIOR PANELS / TRIM>FRONT CONSOLE BOX>REMOVAL
67913
13.REMOVE FRONT DOOR SCUFF PLATE RH
- HINT:
-
Use the same procedure as for the LH side.
-
Click hereVehicle Interior>INTERIOR PANELS / TRIM>INSTRUMENT PANEL SAFETY PAD>REMOVAL
62111C
14.REMOVE COWL SIDE TRIM BOARD RH
89221
15.REMOVE MAIN BODY ECU (MULTIPLEX NETWORK BODY ECU)
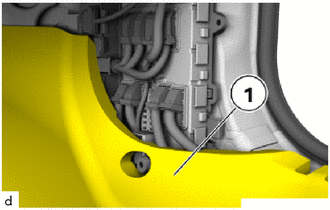
Fold the front floor carpet assembly (1) to the side.
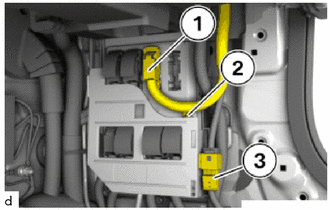
Disconnect the connector (1).
Detach the clamp (2).
Detach the connector housing (3).
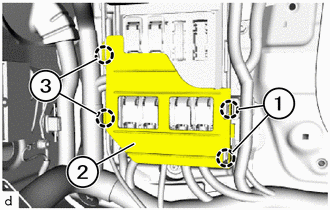
Detach the claws (1).
Feed out the cover (2) of main body ECU (multiplex network body ECU) at the guides (3).
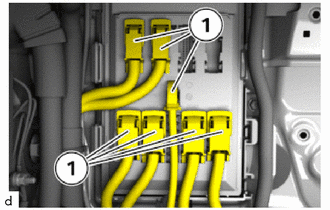
Disconnect all the connectors (1).
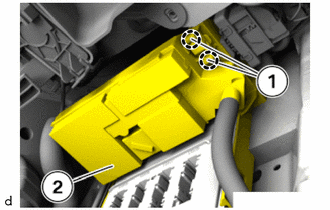
Release the claws (1) to feed out the fuse box (2) from the holder.
- HINT:
-
Fuse box (2) remains in the vehicle.
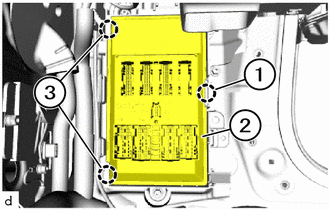
Detach the claw (1).
Feed out and remove the main body ECU (multiplex network body ECU) (2) from the guides (3).