2AR-FE ENGINE MECHANICAL ENGINE UNIT DISASSEMBLY
PROCEDURE

 1.REMOVE ENGINE COVER JOINT
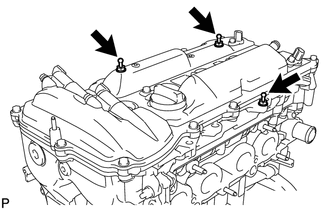
Remove the 3 engine cover joints.
19100P
2.REMOVE SPARK PLUG
11101J
3.REMOVE CAMSHAFT TIMING OIL CONTROL VALVE ASSEMBLY (for Exhaust Side)
11101J
4.REMOVE CAMSHAFT TIMING OIL CONTROL VALVE ASSEMBLY (for Intake Side)
11102A
5.REMOVE CAMSHAFT POSITION SENSOR (for Exhaust Side)
11102A
6.REMOVE CAMSHAFT POSITION SENSOR (for Intake Side)
12108
7.REMOVE OIL FILLER CAP SUB-ASSEMBLY
Remove the oil filler cap sub-assembly from the cylinder head cover sub-assembly.
12108A
8.REMOVE OIL FILLER CAP GASKET
Remove the oil filler cap gasket from the oil filler cap sub-assembly.
11301K
9.REMOVE CRANKSHAFT POSITION SENSOR
12204
10.REMOVE PCV VALVE (VENTILATION VALVE SUB-ASSEMBLY)
12205
11.REMOVE VENTILATION CASE SUB-ASSEMBLY
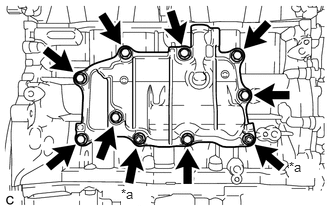
| *a | Nut |
Remove the 8 bolts and 2 nuts.
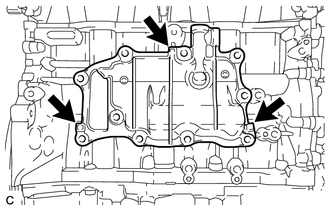
Using a screwdriver with its tip wrapped with protective tape, remove the ventilation case sub-assembly by prying between the ventilation case sub-assembly and cylinder block sub-assembly.
- NOTICE:
-
Be careful not to damage the contact surfaces of the cylinder block sub-assembly and ventilation case sub-assembly.
- HINT:
-
Tape the screwdriver tip before use.
12215
12.REMOVE SEPARATOR CASE
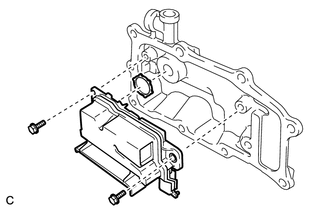
Remove the 2 bolts, separator case and gasket from the ventilation case sub-assembly.
16268
13.REMOVE NO. 1 WATER BY-PASS PIPE
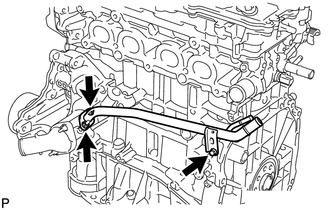
Remove the bolt, 2 nuts, No. 1 water by-pass pipe and gasket.
16321
14.REMOVE WATER INLET
16331A
15.REMOVE THERMOSTAT
15710
16.REMOVE OIL COOLER ASSEMBLY (w/ Oil Cooler)
16620
17.REMOVE V-RIBBED BELT TENSIONER ASSEMBLY
Type A:
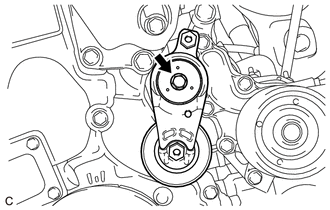
Remove the bolt and V-ribbed belt tensioner assembly.
Type B:
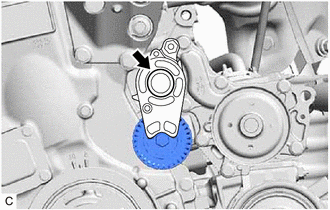
Remove the dust cover from the V-ribbed belt tensioner assembly.
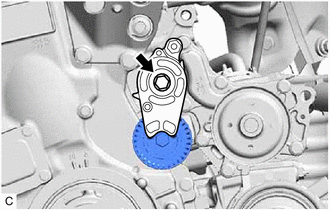
Remove the bolt and V-ribbed belt tensioner assembly.
18.REMOVE WIRE HARNESS CLAMP BRACKET
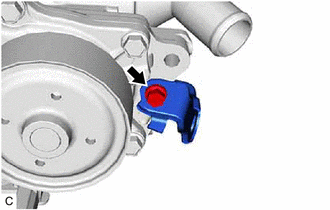
Remove the bolt and wire harness clamp bracket.
16100
19.REMOVE ENGINE WATER PUMP ASSEMBLY
16323
20.REMOVE WATER INLET HOUSING
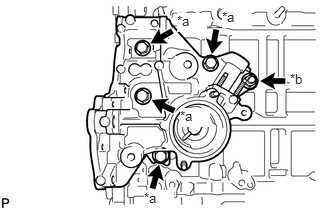
| *a | Bolt |
| *b | Nut |
Remove the 4 bolts, nut and water inlet housing from the cylinder block sub-assembly.
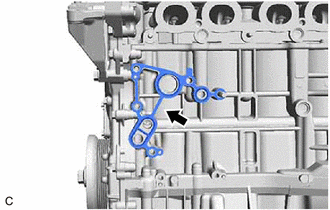
Remove the gasket from the cylinder block sub-assembly.
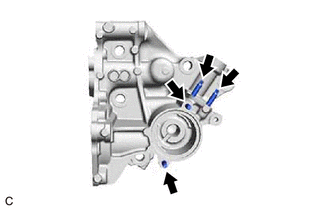
w/o Oil Cooler:
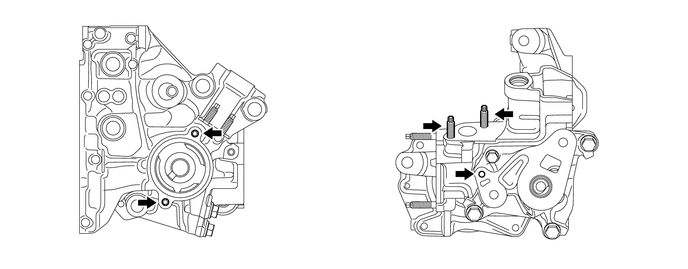
Using an E6 "TORX" socket wrench, remove the 4 stud bolts from the water inlet housing.
- NOTICE:
-
If a stud bolt is deformed or its threads are damaged, replace it.
w/ Oil Cooler:
Using an E6 "TORX" socket wrench, remove the 5 stud bolts from the water inlet housing.
- NOTICE:
-
If a stud bolt is deformed or its threads are damaged, replace it.
13471
21.REMOVE CRANKSHAFT PULLEY
11201
22.REMOVE CYLINDER HEAD COVER SUB-ASSEMBLY
| *a | Seal Washer |
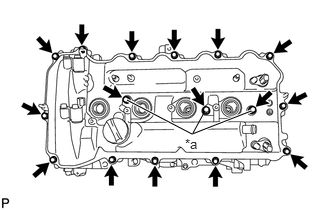
Remove the 16 bolts, 3 seal washers, cylinder head cover sub-assembly and cylinder head cover gasket.
| *1 | Camshaft Bearing Cap Oil Hole Gasket |
| *a | Gasket |
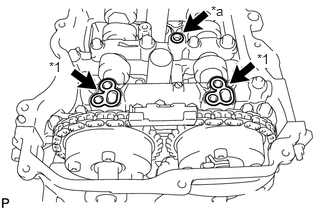
Remove the 2 camshaft bearing cap oil hole gaskets from the No. 1 camshaft bearing cap.
Remove the gasket from the No. 2 camshaft bearing cap.
11193
23.REMOVE SPARK PLUG TUBE GASKET
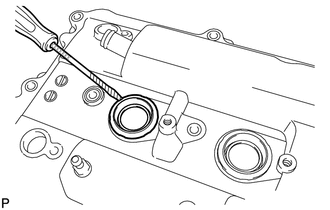
Using a screwdriver, pry out the 4 spark plug tube gaskets.
- NOTICE:
-
Be careful not to damage the cylinder head cover sub-assembly.
- HINT:
-
Tape the screwdriver tip before use.
12315A
24.REMOVE ENGINE MOUNTING BRACKET RH
11310
25.REMOVE TIMING CHAIN COVER SUB-ASSEMBLY
26.REMOVE OIL PUMP RELIEF VALVE PLUG
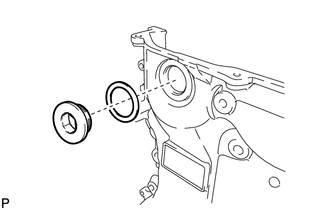
Using a 14 mm hexagon wrench, remove the oil pump relief valve plug and gasket.
11324
27.REMOVE TIMING CHAIN COVER PLATE
11301C
28.REMOVE TIMING CHAIN COVER OIL SEAL
29.SET NO. 1 CYLINDER TO TDC/COMPRESSION
Temporarily install the crankshaft pulley bolt.
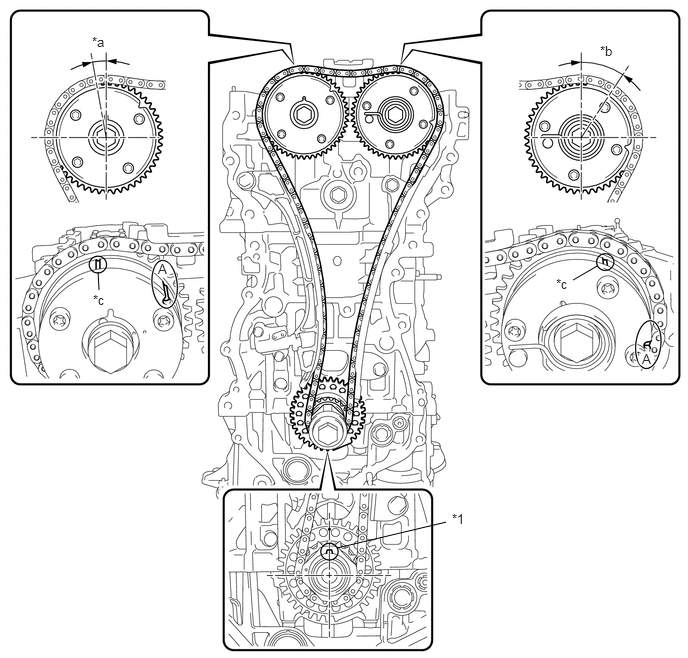
| *1 | Crankshaft Pulley Key | - | - |
| *a | Approximately 7° | *b | Approximately 32° |
| *c | Timing Mark | - | - |
Rotate the crankshaft clockwise and align the crankshaft pulley key as shown in the illustration.
Check that the timing marks on the camshaft timing exhaust gear assembly and camshaft timing gear assembly are as shown in the illustration.
- HINT:
-
"A" is not a timing mark.
Remove the crankshaft pulley bolt.
13566B
30.REMOVE TIMING CHAIN GUIDE
13540
31.REMOVE NO. 1 CHAIN TENSIONER ASSEMBLY
13559
32.REMOVE CHAIN TENSIONER SLIPPER
13506
33.REMOVE CHAIN SUB-ASSEMBLY
13561
34.REMOVE NO. 1 CHAIN VIBRATION DAMPER
13521
35.REMOVE CRANKSHAFT TIMING SPROCKET
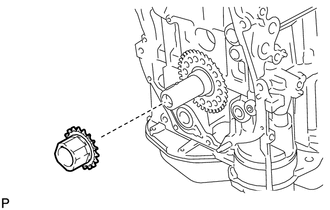
Remove the crankshaft timing sprocket from the crankshaft.
13050
36.REMOVE CAMSHAFT TIMING GEAR ASSEMBLY
13070A
37.REMOVE CAMSHAFT TIMING EXHAUST GEAR ASSEMBLY
11103
38.REMOVE CAMSHAFT HOUSING SUB-ASSEMBLY
39.REMOVE CAMSHAFT BEARING CAP
15678A
40.REMOVE OIL CONTROL VALVE FILTER
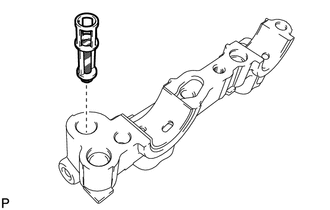
Remove the oil control valve filter from the No. 1 camshaft bearing cap.
13511
41.REMOVE CAMSHAFT
13512
42.REMOVE NO. 2 CAMSHAFT
11811
43.REMOVE NO. 1 CAMSHAFT BEARING
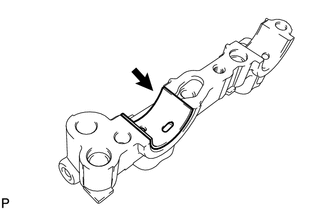
Remove the No. 1 camshaft bearing from the No. 1 camshaft bearing cap.
11821
44.REMOVE NO. 2 CAMSHAFT BEARING
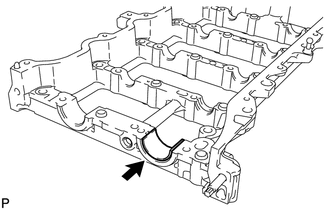
Remove the No. 2 camshaft bearing from the camshaft housing sub-assembly.
11151A
45.REMOVE CAMSHAFT BEARING CAP SETTING RING PIN
- NOTICE:
-
It is not necessary to remove the camshaft bearing cap setting ring pins unless they are being replaced.
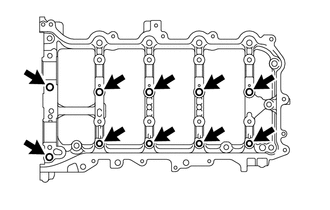
Remove the 10 camshaft bearing cap setting ring pins from the camshaft housing sub-assembly.
11114A
46.REMOVE CAMSHAFT HOUSING STRAIGHT PIN
- NOTICE:
-
It is not necessary to remove the camshaft housing straight pins unless they are being replaced.
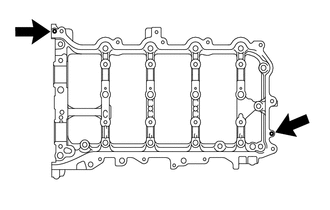
Remove the 2 camshaft housing straight pins from the camshaft housing sub-assembly.
13801
47.REMOVE NO. 1 VALVE ROCKER ARM SUB-ASSEMBLY
13750
48.REMOVE VALVE LASH ADJUSTER ASSEMBLY
13716
49.REMOVE VALVE STEM CAP
11101
50.REMOVE CYLINDER HEAD SUB-ASSEMBLY
11115
51.REMOVE CYLINDER HEAD GASKET
11445
52.REMOVE CYLINDER BLOCK WATER JACKET SPACER
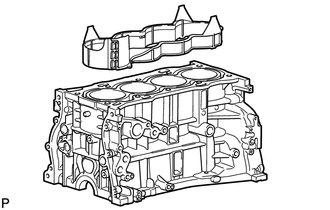
Remove the cylinder block water jacket spacer from the cylinder block sub-assembly.
- NOTICE:
-
Be sure to remove the cylinder block water jacket spacer. If it is not removed, it may fall and become damaged when the cylinder block sub-assembly is inverted.
15620
53.REMOVE OIL FILTER CAP ASSEMBLY
12101A
54.REMOVE OIL PAN DRAIN PLUG
Remove the oil pan drain plug and gasket from the oil pan sub-assembly.
12101
55.REMOVE OIL PAN SUB-ASSEMBLY
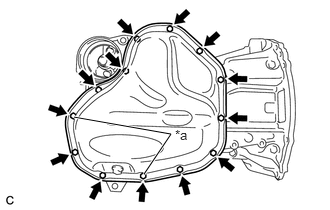
| *a | Nut |
Remove the 11 bolts and 2 nuts.
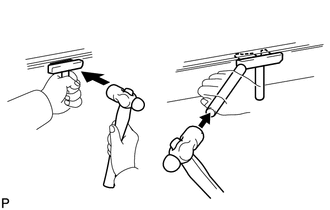
Insert the blade of an oil pan seal cutter between the oil pan sub-assembly and stiffening crankcase assembly, cut through the applied sealer and remove the oil pan sub-assembly.
- NOTICE:
- ·
Be careful not to damage the contact surfaces of the stiffening crankcase assembly and oil pan sub-assembly.
·Be careful not to damage the oil pan sub-assembly flange.
15104
56.REMOVE OIL STRAINER SUB-ASSEMBLY
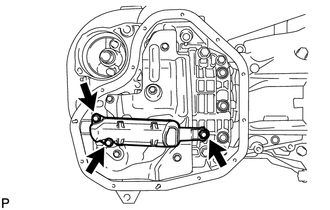
Remove the 3 bolts and oil strainer sub-assembly.
Remove the oil strainer gasket from the oil strainer sub-assembly.
12121
57.REMOVE NO. 1 OIL PAN BAFFLE PLATE
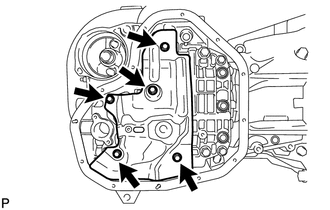
Remove the 5 bolts and No. 1 oil pan baffle plate.
58.INSPECT CRANKSHAFT BACKLASH
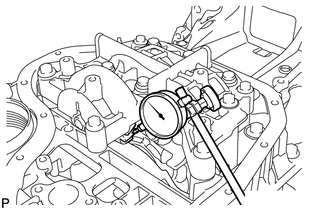
Using a dial indicator, measure the backlash of the crankshaft and balance shaft as shown in the illustration.
- Standard backlash:
0.05 to 0.20 mm (0.00197 to 0.00787 in.)
- Maximum backlash:
0.20 mm (0.00787 in.)
If the backlash is more than the maximum, replace the engine balancer assembly.
13620B
59.REMOVE ENGINE BALANCER ASSEMBLY
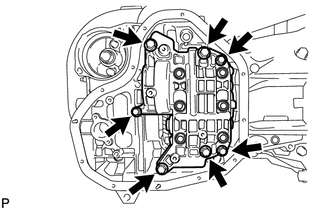
Remove the 7 bolts and engine balancer assembly from the stiffening crankcase assembly.
- NOTICE:
-
Do not disassemble the engine balancer assembly.
11420
60.REMOVE STIFFENING CRANKCASE ASSEMBLY
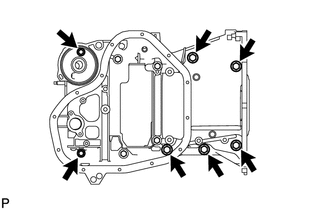
Remove the 7 bolts.
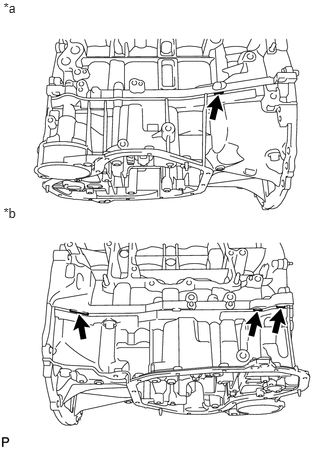
| *a | LH Side |
| *b | RH Side |
Using a screwdriver, remove the stiffening crankcase assembly by prying between the stiffening crankcase assembly and cylinder block sub-assembly at the places shown in the illustration.
- NOTICE:
-
Be careful not to damage the contact surfaces of the cylinder block sub-assembly and stiffening crankcase assembly.
- HINT:
-
Tape the screwdriver tip before use.
61.REMOVE STIFFENING CRANKCASE RING PIN
- NOTICE:
-
It is not necessary to remove the stiffening crankcase ring pins unless they are being replaced.
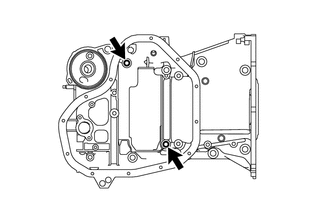
Remove the 2 stiffening crankcase ring pins from the stiffening crankcase assembly.
62.REMOVE STUD BOLT
- NOTICE:
-
If a stud bolt is deformed or its threads are damaged, replace it.
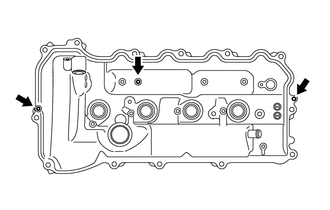
Using an E6 "TORX" socket wrench, remove the 3 stud bolts from the cylinder head cover sub-assembly.
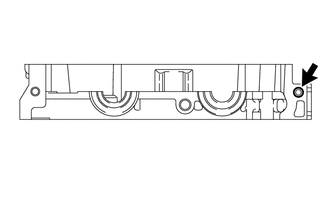
Using an E8 "TORX" socket wrench, remove the stud bolt from the camshaft housing sub-assembly.
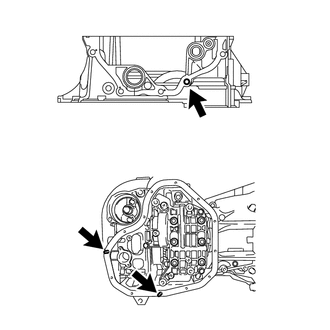
Using E5 and E8 "TORX" socket wrenches, remove the 3 stud bolts from the stiffening crankcase assembly.
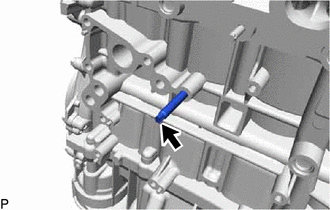
Using an E10 "TORX" socket wrench, remove the stud bolt from the cylinder block sub-assembly.
11401L
63.REMOVE REAR ENGINE OIL SEAL
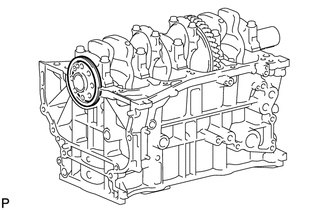
Remove the rear engine oil seal from the cylinder block sub-assembly.