UA80F AUTOMATIC TRANSMISSION / TRANSAXLE AUTOMATIC TRANSAXLE ASSEMBLY REMOVAL
CAUTION / NOTICE / HINT
The necessary procedures (adjustment, calibration, initialization or registration) that must be performed after parts are removed and installed, or replaced during automatic transaxle assembly removal/installation are shown below.
| Replaced Part or Performed Procedure | Necessary Procedure | Effect/Inoperative Function when Necessary Procedure not Performed | Link |
|---|---|---|---|
|
*1: Learning can also be performed using the GTS. Click here( *2: Not necessary when ECM replaced with new one *3: Even when not replacing the part, it is necessary to perform the specified necessary procedures after installation. *4: If the vehicle height has changed due to suspension or tire replacement *5: When the starter assembly is replaced, "ST relay" must be also replaced |
|||
| Battery terminal is disconnected/reconnected | Idle the engine for approximately 5 to 60 minutes or drive the vehicle until stop and start control is permitted | Stop and Start System | ( ) |
| Perform steering sensor zero point calibration | Lane Control System | ()
|
|
| Parking Support Brake System*1 | |||
| Pre-collision System | |||
| Memorize steering angle neutral point | Parking Assist Monitor System | ()
|
|
| Panoramic View Monitor System | ()
|
||
| Initialize back door lock | Power Door Lock Control System | ()
|
|
| Reset back door close position | Power Back Door System | ()
|
|
| Replacement of ECM | Perform Vehicle Identification Number (VIN) or frame number registration | DTC is output | ()
|
| Code registration | Engine start function | See Service Bulletin for the registration method | |
If transaxle compensation code read from ECM
·
Perform reset memory*2 ·
Transfer transaxle compensation code ·
Perform road test to allow ECM to learn |
·
Large shift shock ·
Deterioration of fuel efficiency |
for Initialization:
( )
for Registration: ( )
|
|
If transaxle compensation code not read from ECM
·
Perform reset memory*2 ·
Reset transaxle compensation code ·
Perform road test to allow ECM to learn |
|||
·
Replacement of engine assembly ·
Gas leak from exhaust system is repaired |
Perform Inspection After Repair | ·
Poor idle, etc. ·
Engine start function, etc. |
()
|
| Replacement of starter assembly*5 | Clear the number of starter operations | Stop and Start System | ()
|
| Replacement of battery | ·
Integrated Current Value Initialization ·
Switch Battery Type |
||
| Replacement of automatic transaxle assembly | ·
Perform reset memory ·
Input transaxle compensation code into ECM ·
Perform road test to allow ECM to learn |
·
Large shift shock ·
Deterioration of fuel efficiency |
for Initialization:
( )
for Registration: ( )
|
| Replacement of automatic transaxle fluid | ATF thermal degradation estimate reset | The value of the Data List item "ATF Thermal Degradation Estimate" is not estimated correctly | ()
|
for Dynamic Torque Control AWD System:
Front 4WD linear solenoid (Transfer assembly) |
·
ECU data initialization ·
Disconnect system function check |
Dynamic Torque Control AWD System | ()
|
for Dynamic Torque Vectoring AWD system:
Front 4WD linear solenoid (Transfer assembly) |
·
ECU data initialization ·
Disconnect system function check |
Dynamic Torque Vectoring AWD System | ()
|
| Replacement of front bumper assembly*3 | ·
Measurement of ultrasonic sensor detection angle ·
Ultrasonic sensor detection angle registration |
Parking Support Brake System | ()
|
| Front television camera view adjustment | Panoramic View Monitor System | ()
|
|
| Suspension, tires, etc.*4 | ·
Measurement of ultrasonic sensor detection angle ·
Ultrasonic sensor detection angle registration |
Parking Support Brake System | ()
|
| Rear television camera assembly optical axis (Back camera position setting) | Parking Assist Monitor System | ()
|
|
·
Parking assist ECU initialization ·
Adjust steering angle |
Panoramic View Monitor System | ()
|
|
Replacement or removal and installation of 2 or more parts:
·
Front television camera assembly, radiator grille sub-assembly or front bumper assembly ·
Rear television camera assembly ·
Side television camera assembly LH or outer rear view mirror assembly LH ·
Side television camera assembly RH or outer rear view mirror assembly RH |
Television camera view adjustment | Panoramic View Monitor System | ()
|
| Front wheel alignment adjustment | 1.
Perform "Reset Memory". 2.
Perform "Calibration". |
·
VSC is disabled or malfunctions ·
DTCs are output ·
Slip indicator light illuminates ·
ABS warning light illuminates |
()
|
- CAUTION:
- ·
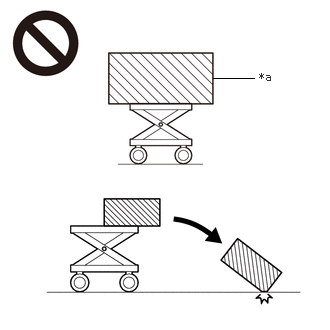 2.219,0.813 2.646,0.813 false 2.698,0.729 3.01,0.927 0.313,0.198 10 false *a
*a An Object Exceeding Weight Limit of Engine Lifter
The engine assembly with transaxle is very heavy. Be sure to follow the procedure described in the repair manual, or the engine lifter may suddenly drop or the engine assembly with transaxle may fall off the engine lifter.
·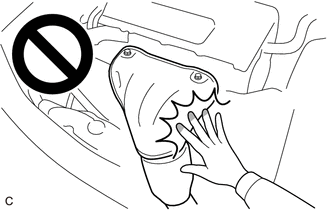
To prevent burns, do not touch the engine, exhaust manifold or other high temperature components while the engine is hot.
·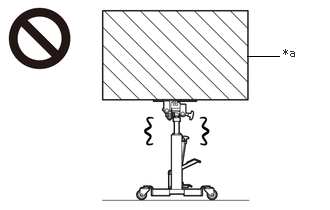 2.573,0.583 2.906,0.583 false 2.948,0.479 3.26,0.677 0.313,0.198 10 false *a
*a An Object Exceeding Weight Limit of Transmission Jack
The automatic transaxle assembly is very heavy. Be sure to follow the procedure described in the repair manual, or the transmission jack may suddenly drop.
- NOTICE:
- ·
After the ignition switch is turned off, the radio and display receiver assembly or the radio receiver assembly records various types of memory and settings. As a result, after turning the ignition switch off, make sure to wait at least 120 seconds before disconnecting the cable from the negative (-) auxiliary battery terminal.
·If the ECM has been struck or dropped, replace it.
·Perform Vehicle Identification Number (VIN) or frame number registration when replacing the ECM.
Click hereEngine / Hybrid System>2GR-FKS (ENGINE CONTROL)>SFI SYSTEM>REGISTRATION
PROCEDURE

 11361J
1.REMOVE FLYWHEEL HOUSING UNDER COVER
32101A
2.REMOVE DRIVE PLATE AND TORQUE CONVERTER ASSEMBLY SETTING BOLT
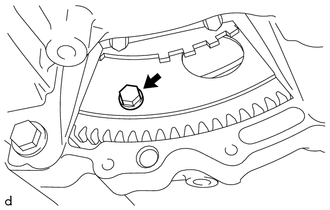
Turn the crankshaft to gain access to the 6 drive plate and torque converter assembly setting bolts and remove each drive plate and torque converter assembly setting bolt while holding the crankshaft pulley set bolt with a wrench.
- HINT:
-
There will be one black colored drive plate and torque converter assembly setting bolt.
52618
3.REMOVE FRONT BUMPER LOWER ABSORBER
52132A
4.REMOVE NO. 2 FRONT BUMPER REINFORCEMENT
5.REMOVE ENGINE ASSEMBLY WITH TRANSAXLE
28100
6.REMOVE STARTER ASSEMBLY
w/o Stop And Start System
Click hereEngine / Hybrid System>2GR-FKS (STARTING)>STARTER (w/o Stop And Start System)>REMOVAL
w/ Stop And Start System
Click hereEngine / Hybrid System>2GR-FKS (STARTING)>STARTER (w/ Stop And Start System)>REMOVAL
82121
7.DISCONNECT ENGINE WIRE
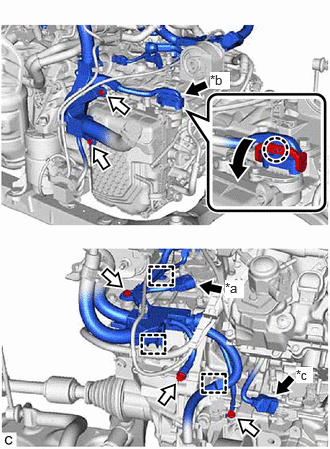
| *a | Park/Neutral Position Switch Assembly Connector |
| *b | Transmission Wire Connector |
| *c | Connector |
Disconnect the park/neutral position switch assembly connector.
Disengage the claw, rotate the lever and disconnect the transmission wire connector.
Disconnect the connector.
Remove the 5 bolts and disengage the 3 clamps to disconnect the engine wire from the automatic transaxle assembly.
8.DISCONNECT VACUUM HOSE
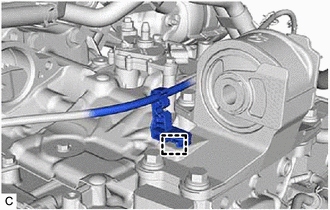
Disengage the clamp to disconnect the vacuum hose from the engine mounting insulator LH.
35104V
9.SEPARATE BREATHER PLUG HOSE
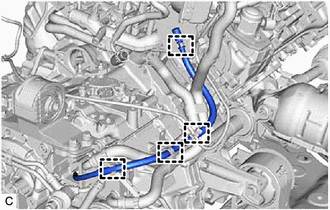
Disengage the 4 hose clamps to separate the breather plug hose.
33197C
10.REMOVE TRANSMISSION BREATHER CLAMP
16260
11.DISCONNECT WATER BY-PASS HOSE ASSEMBLY
12.DISCONNECT HOSE CLAMP
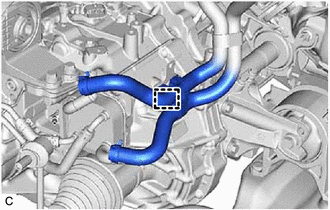
Disengage the clamp to disconnect the hose clamp from the wire harness clamp bracket.
13.INSTALL ENGINE HANGERS
51100G
14.REMOVE FRONT FRAME ASSEMBLY
17118
15.REMOVE MANIFOLD STAY
30500
16.REMOVE AUTOMATIC TRANSAXLE ASSEMBLY
Support the automatic transaxle assembly with a transmission jack.
- NOTICE:
-
Secure the automatic transaxle assembly to the transmission jack using a suitable adapter, such as a rope or attachment.
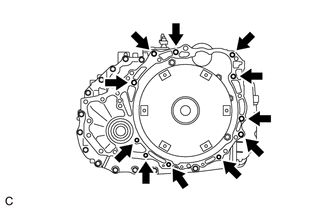
Remove the 11 bolts and automatic transaxle assembly from the engine assembly.
- NOTICE:
-
To prevent damage to the 2 knock pins, do not pry between the automatic transaxle assembly and engine assembly.
17.DISCONNECT INLET NO. 2 OIL COOLER HOSE
18.DISCONNECT OUTLET NO. 3 OIL COOLER HOSE
33493A
19.REMOVE TRANSMISSION OIL COOLER
32907C
20.REMOVE NO. 1 OIL COOLER TUBE SUB-ASSEMBLY WITHOUT HOSE
12311A
21.REMOVE FRONT ENGINE MOUNTING BRACKET
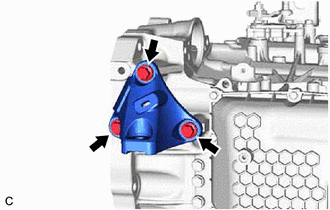
Remove the 3 bolts and front engine mounting bracket from the automatic transaxle assembly.
12372A
22.REMOVE ENGINE MOUNTING INSULATOR LH
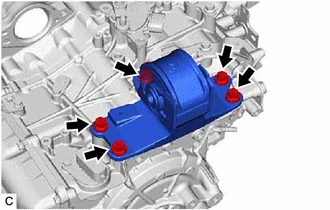
Remove the 5 bolts and engine mounting insulator LH from the automatic transaxle assembly.
12303
23.REMOVE REAR ENGINE MOUNTING BRACKET SUB-ASSEMBLY
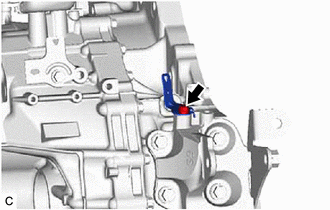
Remove the bolt and wire harness clamp bracket from the rear engine mounting bracket sub-assembly.
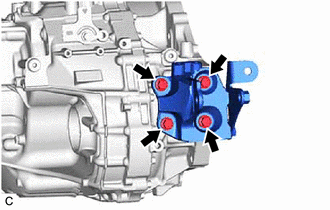
Remove the 4 bolts and rear engine mounting bracket sub-assembly from the automatic transaxle assembly.
36100
24.REMOVE TRANSFER ASSEMBLY
25.REMOVE NO. 1 TRANSMISSION CONTROL CABLE BRACKET
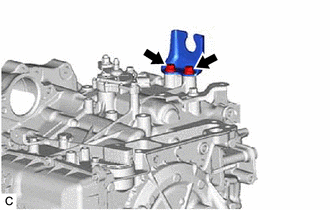
Remove the 2 bolts and No. 1 transmission control cable bracket from the automatic transaxle assembly.
35150
26.REMOVE TRANSMISSION CASE PLUG ASSEMBLY
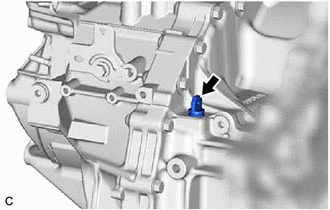
Remove the transmission case plug assembly from the automatic transaxle assembly.
27.REMOVE WIRE HARNESS CLAMP BRACKET
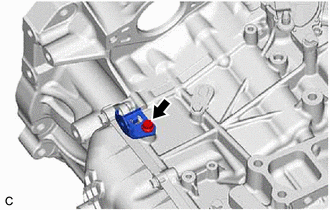
Remove the bolt and wire harness clamp bracket from the automatic transaxle assembly.
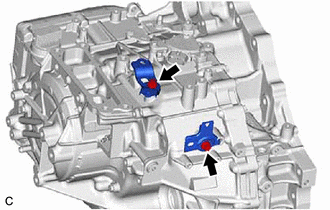
Remove the 2 bolts and 2 wire harness clamp brackets from the automatic transaxle assembly.
35104V
28.REMOVE BREATHER PLUG HOSE
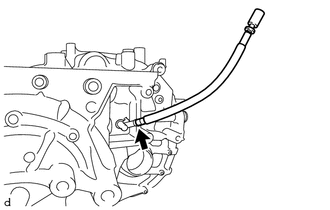
Using a screwdriver, remove the breather plug hose from the No. 1 breather plug (ATM).
- NOTICE:
-
Be careful not to damage the No. 1 breather plug (ATM).
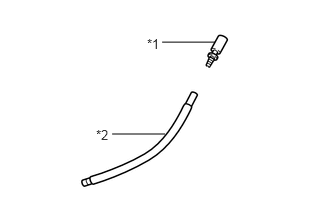
| *1 | Breather Plug Sub-assembly |
| *2 | Breather Plug Hose |
Remove the breather plug sub-assembly from the breather plug hose.
- NOTICE:
-
Be careful not to damage the breather plug sub-assembly.
35151A
29.REMOVE UPPER TRANSAXLE CASE COVER
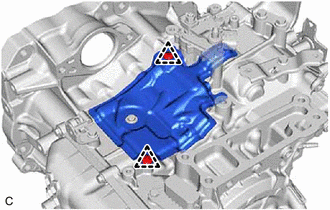
Disengage the 2 clips and remove the upper transaxle case cover from the automatic transaxle assembly.
30.REMOVE TORQUE CONVERTER ASSEMBLY
Remove the torque converter assembly from the automatic transaxle assembly.
36100A
31.REMOVE TRANSFER AND TRANSAXLE SETTING STUD BOLT
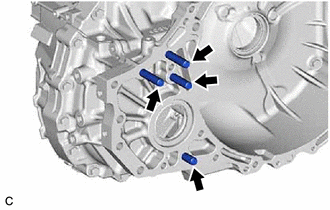
Using 2 nuts, remove the 4 transfer and transaxle setting stud bolts from the automatic transaxle assembly.
32.INSPECT TORQUE CONVERTER ASSEMBLY
32101
33.INSPECT DRIVE PLATE AND RING GEAR SUB-ASSEMBLY