2014 Hilux · Service Manual HEATER & AIR CONDITIONING SYSTEM

REMOVAL

Removal / installation · Vehicles built Jun 2011 – Jul 2012

Versions by build date: Jun 2011 – Jul 2012 Aug 2012 – Jul 2013 from Aug 2013

HINT:
  1. Use the same procedure for RHD and LHD vehicles.
  2. The procedure listed below is for LHD vehicles.


1. RECOVER REFRIGERANT FROM REFRIGERATION SYSTEM
  1. Start up the engine.

  1. A/C switch is ON.

  1. Operate the cooler compressor with an engine speed of approximately 1,000 rpm for 5 to 6 minutes to circulate the refrigerant and collect the compressor oil remaining in each component into the cooler compressor.

  1. Stop the engine.

  1. Using SST, Recover the refrigerant from the A/C system using a refrigerant recovery unit.

    SST
    09985-20010   (09985-02130, 09985-02150, 09985-02090, 09985-02110, 09985-02010, 09985-02050, 09985-02060, 09985-02070)


2. DRAIN ENGINE COOLANT
  1. for 1GR-FE:
    (Click here)

  1. for 1KD-FTV (w/ EGR Cooler):
    (Click here)

  1. for 1KD-FTV (w/o EGR Cooler):
    (Click here)

  1. for 2KD-FTV (w/ EGR Cooler):
    (Click here)

  1. for 2KD-FTV (w/o EGR Cooler):
    (Click here)

  1. for 1TR-FE:
    (Click here)

  1. for 2TR-FE:
    (Click here)


3. PRECAUTION

NOTICE:
After turning the ignition switch off, waiting time may be required before disconnecting the cable from the battery terminal. Therefore, make sure to read the disconnecting the cable from the battery terminal notice before proceeding with work (Click here).


4. DISCONNECT CABLE FROM NEGATIVE BATTERY TERMINAL

CAUTION:
Wait at least 90 seconds after disconnecting the cable from the negative (-) battery terminal to disable the SRS system.

NOTICE:
When disconnecting the cable, some systems need to be initialized after the cable is reconnected (Click here).


5. DISCONNECT SUCTION HOSE SUB-ASSEMBLY

  1. E173197
    E173198E02
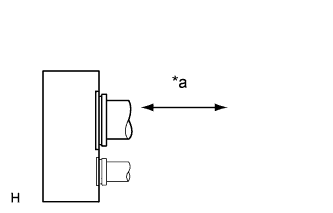
    Remove the bolt and disconnect the suction hose sub-assembly.

    NOTICE:
    1. Do not use a screwdriver or similar tool to disconnect the tube.
    1. Seal the openings of the disconnected parts using vinyl tape to prevent moisture and foreign matter from entering.

    Text in Illustration 
    *a
    Disconnect tube by hand

  1. Remove the O-ring from the suction hose sub-assembly.


6. DISCONNECT AIR CONDITIONING TUBE AND ACCESSORY ASSEMBLY
  1. Disconnect the air conditioning tube and accessory assembly.

    NOTICE:
    1. Do not use a screwdriver or similar tool to disconnect the air conditioning tube and accessory assembly.
    2. Seal the openings of the disconnected parts using vinyl tape to prevent moisture and foreign matter from entering.

  1. Remove the O-ring from the air conditioning tube and accessory assembly.


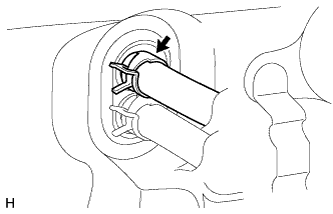
7. DISCONNECT HEATER WATER INLET HOSE

  1. E225468
    Using pliers, grip the claws of the clip and slide the clip to disconnect the heater water inlet hose.

    HINT:
    Collect the engine coolant in a container.


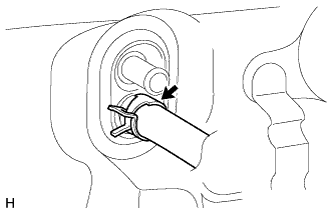
8. DISCONNECT HEATER WATER OUTLET HOSE

  1. E225469
    Using pliers, grip the claws of the clip and slide the clip to disconnect the heater water outlet hose.

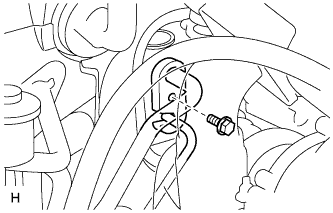
    HINT:
    Collect the engine coolant in a container.


9. REMOVE UPPER INSTRUMENT PANEL SUB-ASSEMBLY
(Click here)

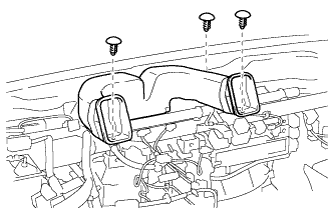
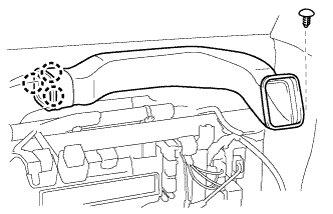
10. REMOVE NO. 2 HEATER TO REGISTER DUCT

  1. E225181
    Remove the 3 clips and No. 2 heater to register duct.


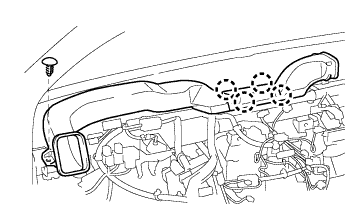
11. REMOVE NO. 1 HEATER TO REGISTER DUCT

  1. E225182
    Remove the clip.

  1. Detach the 3 claws and remove the No. 1 heater to register duct.


12. REMOVE NO. 3 HEATER TO REGISTER DUCT

  1. E225183
    Remove the clip.

  1. Detach the 4 claws and remove the No. 3 heater to register duct.


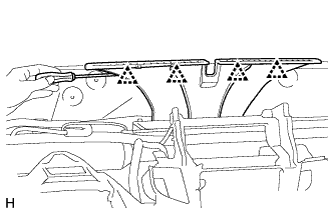
13. REMOVE DEFROSTER NOZZLE ASSEMBLY (w/ Defroster)

  1. E225184
    Using a screwdriver, detach the 4 clips and remove the defroster nozzle assembly.

  1. Remove the defroster nozzle assembly.


14. REMOVE LOWER INSTRUMENT PANEL SUB-ASSEMBLY
(Click here)

15. REMOVE STEERING COLUMN ASSEMBLY
(Click here)

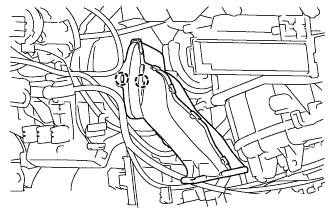
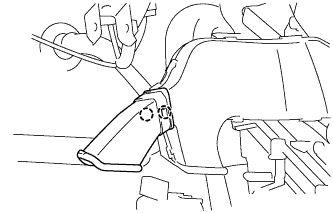
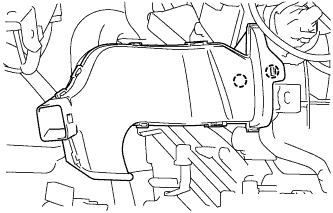
16. REMOVE NO. 1 AIR DUCT

  1. E226311
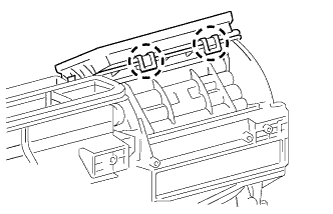
    Detach the 2 claws and remove the No. 1 air duct.


17. REMOVE NO. 2 AIR DUCT

  1. E226312
    Detach the 2 claws and remove the No. 2 air duct.


18. REMOVE NO. 4 AIR DUCT

  1. E226313
    Detach the 2 claws and remove the No. 4 air duct.


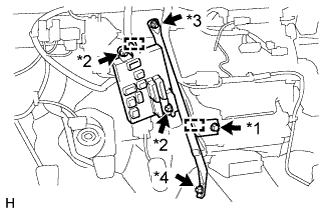
19. REMOVE NO. 1 INSTRUMENT PANEL BRACE SUB-ASSEMBLY

E225185E01
  1. Detach the 2 clamps and remove the 2 nuts labeled A.

  1. Disconnect the connectors and remove the driver side junction block.

  1. Remove the screw.

  1. Remove the bolt, nut labeled B and No. 1 instrument panel brace sub-assembly.

    Text in Illustration 
    *1
    Screw
    *2
    Nut A
    *3
    Nut B
    *4
    Bolt


20. REMOVE ECM
  1. for 1GR-FE:
    (Click here)

  1. for 1TR-FE:
    (Click here)

  1. for 2TR-FE:
    (Click here)

  1. for 1KD-FTV:
    (Click here)

  1. for 1KD-FTV, for DPF:
    (Click here)

  1. for 2KD-FTV:
    (Click here)

  1. for 2KD-FTV, for DPF:
    (Click here)

  1. for 5L-E:
    (Click here)


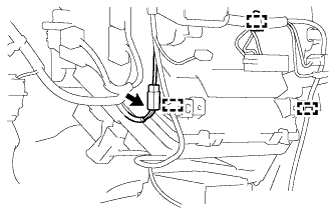
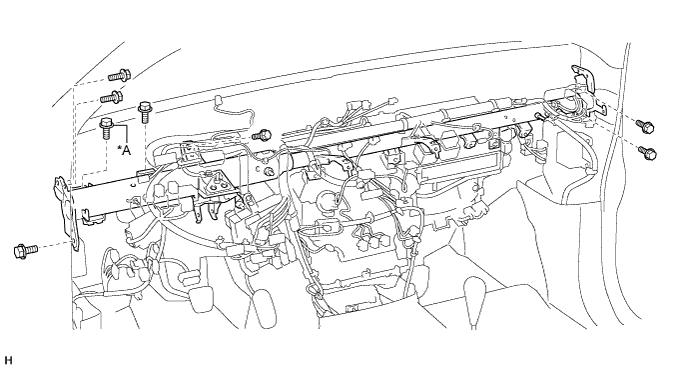
21. REMOVE INSTRUMENT PANEL REINFORCEMENT

  1. E225186
    Disconnect the connector and detach the 3 clamps.

  1. E231428E01
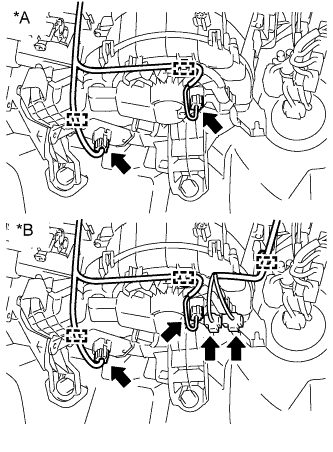
    w/o PTC Heater:
    Disconnect the 2 connectors and detach the 2 clamps and wire harness.

  1. w/ PTC Heater:
    Disconnect the 4 connectors and detach the 3 clamps and wire harness.

    Text in Illustration 
    *A
    w/o PTC Heater
    *B
    w/ PTC Heater

  1. E225188
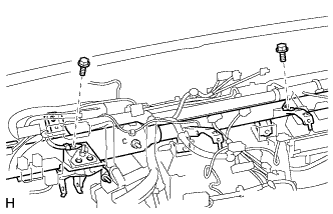
    Remove the 2 bolts and disconnect the ground wires from the instrument panel reinforcement.

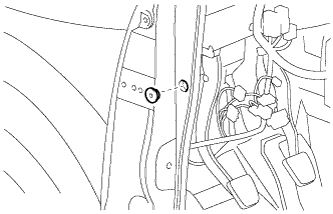
  1. E225885
    Remove the grommet from the vehicle body.

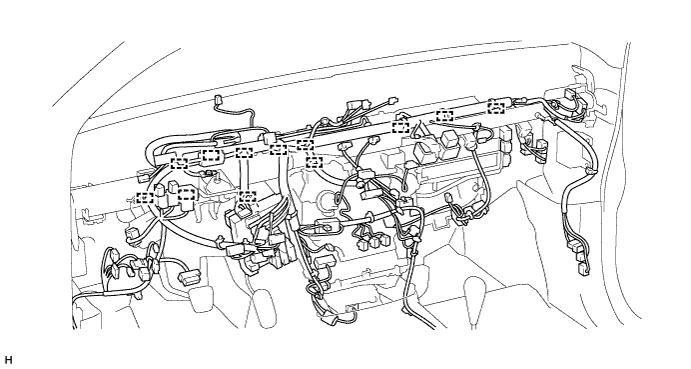
  1. Release the 12 clamps.

    E225189

  1. Disconnect the connectors.

  1. Remove the 3 bolts.

    E225190

  1. for Automatic Transmission:
    Remove the 7 bolts and instrument panel reinforcement.

  1. for Manual Transmission:
    Remove the 8 bolts and instrument panel reinforcement.

    E225191E01

    Text in Illustration 
    *A
    for Manual Transmission
    -
    -


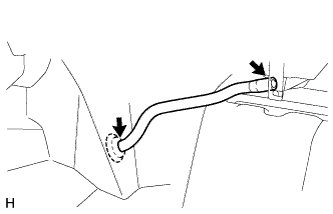
22. REMOVE NO. 1 COOLER UNIT DRAIN HOSE

  1. E225884
    Remove the No. 1 cooler unit drain hose.


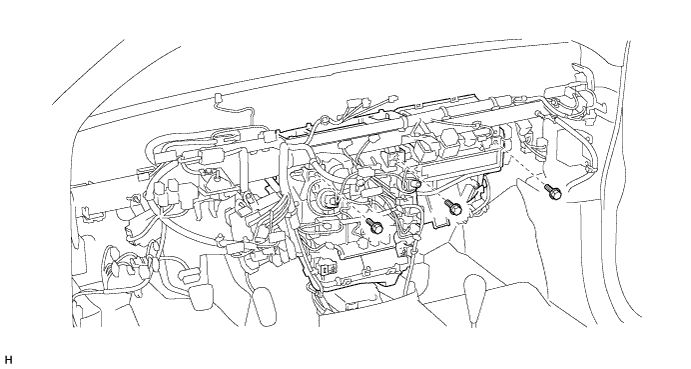
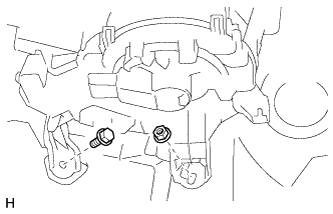
23. REMOVE AIR CONDITIONING UNIT ASSEMBLY

  1. E225192
    Remove the bolt, nut and air conditioning unit assembly.


24. REMOVE NO. 3 AIR DUCT

  1. E226397
    Detach the 2 claws and remove the No. 3 air duct.

← COMPONENTS (from Jun 2011)REMOVAL (Aug 2012 – Jul 2013) →