 |
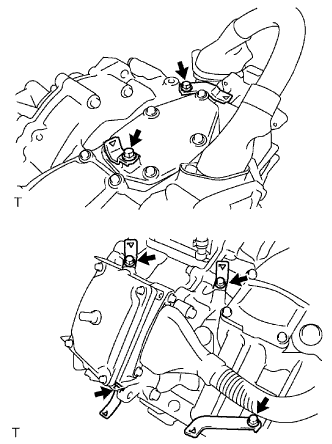
Install the clamp in the position shown in the illustration with the 6 bolts.
- Torque:
- 9.0 N*m{ 92 kgf*cm , 80 in.*lbf }
HYBRID VEHICLE TRANSAXLE > INSTALLATION |
| 1. INSTALL NO. 3 ENGINE MOUNTING BRACKET |
|
Install the clamp in the position shown in the illustration with the 6 bolts.
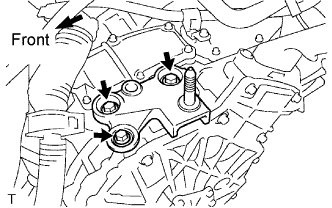 |
Install the No. 3 engine mounting bracket with the 3 bolts.
| 2. INSTALL NO. 6 INVERTER COOLING HOSE |
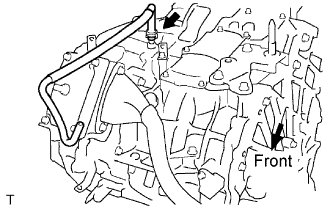 |
Connect the inverter cooling hose and install the clamp.
| 3. INSTALL HYBRID VEHICLE TRANSAXLE ASSEMBLY |
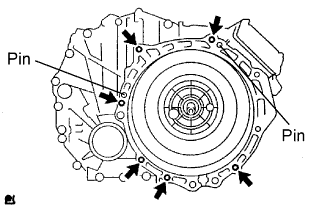 |
Install the hybrid vehicle transaxle with the 6 bolts.
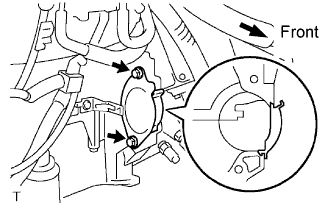 |
Install the housing side cover and starter cover with the 2 bolts.
| 4. INSTALL NO. 3 ENGINE MOUNTING BRACKET |
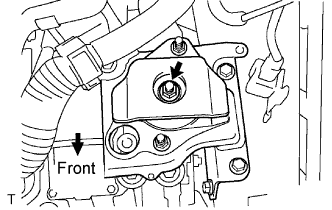 |
Install the engine mounting bracket to the engine mounting insulator with the nut.
| 5. REMOVE NO. 1 ENGINE HANGER |
Remove the bolt and engine hanger.
| 6. INSTALL FRONT SUSPENSION CROSSMEMBER SUB-ASSEMBLY |
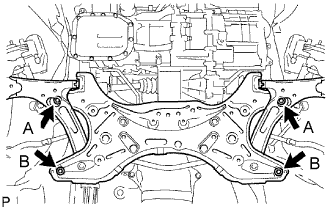 |
Install the front suspension crossmember with power steering gear assembly with the 4 bolts.
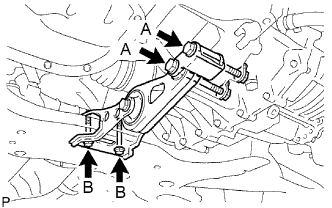 |
Install the engine moving control rod with bracket with the 4 bolts and 2 nuts.
| 7. CONNECT EXHAUST PIPE ASSEMBLY |
Connect the exhaust pipe (Click here).
| 8. INSTALL FRONT DRIVE SHAFT ASSEMBLY |
Install the front drive shaft (Click here).
| 9. CONNECT NO. 4 INVERTER COOLING HOSE |
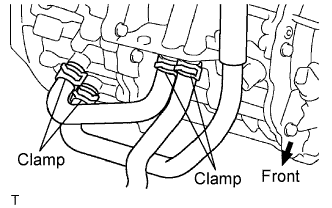 |
Connect the 3 hoses with the 4 clamps.
| 10. CONNECT CONNECTOR |
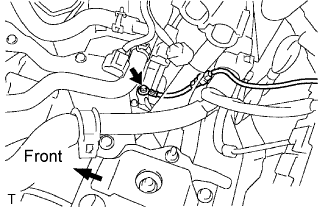 |
Connect the ground wire with the bolt.
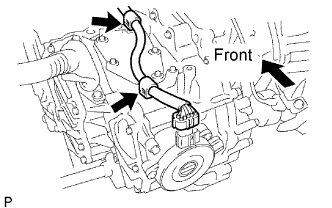 |
Connect the 2 clamps.
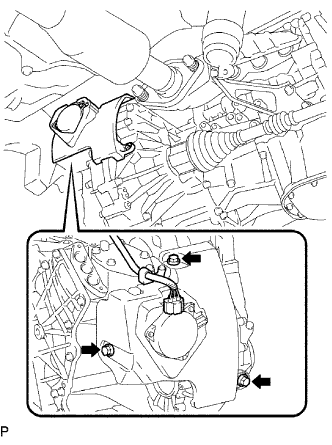 |
Install the transmission case cover to the hybrid vehicle transaxle with the 3 bolts.
Connect the connector.
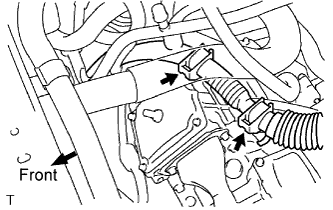 |
Connect the clamps in the 2 locations shown in the illustration.
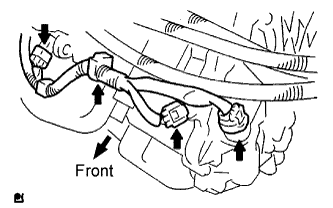 |
Connect the clamp and the 3 connectors shown in the illustration.
| 11. INSTALL AIR CLEANER ASSEMBLY |
Install the air cleaner .
| 12. INSTALL INVERTER WITH CONVERTER ASSEMBLY |
Install with inverter converter (Click here).
| 13. INSTALL COWL TOP FRONT PANEL SUB-ASSEMBLY OUTER |
Install the cowl top front panel (Click here).
| 14. INSTALL FRONT WIPER ARM RH |
Install the front wiper arm .
| 15. INSTALL FRONT WIPER ARM LH |
Install the front wiper arm .
| 16. INSTALL HOOD SUB-ASSEMBLY |
Install the hood (Click here).
| 17. ADJUST HOOD SUB-ASSEMBLY |
Adjust the hood .
| 18. INSTALL ENGINE UNDER COVER RH |
| 19. INSTALL ENGINE UNDER COVER LH |
| 20. INSTALL FRONT WHEEL |
| 21. INSTALL SERVICE PLUG GRIP |
Install the service plug grip (Click here).
| 22. CONNECT CABLE TO NEGATIVE BATTERY TERMINAL |
| 23. ADD TRANSAXLE OIL |
| 24. INSPECT TRANSAXLE OIL |
Inspect the transaxle oil (Click here).
| 25. ADD COOLANT (for Inverter) |
Add the coolant (Click here).
| 26. INSPECT FOR COOLANT LEAK (for Inverter) |
Check for engine coolant leakage .
| 27. INSPECT AND ADJUST FRONT WHEEL ALIGNMENT |
Inspect and adjust the front wheel alignment (Click here).
| 28. PERFORM CALIBRATION |
Perform calibration (Click here).