M15A-FKS LUBRICATION OIL PUMP REMOVAL
CAUTION / NOTICE / HINT
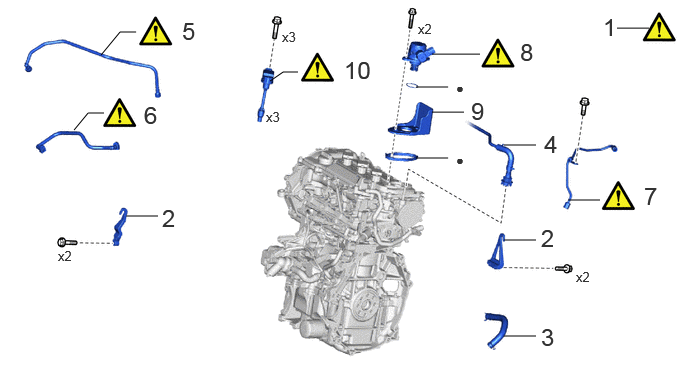
| Procedure | Part Name Code | 
|

|

|
|
|---|---|---|---|---|---|
| 1 | ENGINE TO ENGINE STAND | - | ( ) |
- | - |
| 2 | ENGINE HANGER | - | - | - | - |
| 3 | NO. 2 VENTILATION HOSE | 12262 | - | - | - |
| 4 | VACUUM TUBE CONNECTOR HOSE | 44771 | - | - | - |
| 5 | FUEL TUBE SUB-ASSEMBLY | 23901 | ()
|
- | - |
| 6 | NO. 2 FUEL TUBE SUB-ASSEMBLY | 23902 | ()
|
- | - |
| 7 | NO. 1 FUEL PIPE SUB-ASSEMBLY | 23801P | ()
|
- | - |
| 8 | FUEL(ENGINE ROOM SIDE) PUMP ASSEMBLY | 23100X | ()
|
- | - |
| 9 | FUEL PUMP FLANGE | 23191 | - | - | - |
| 10 | IGNITION COIL ASSEMBLY | 19500 | ()
|
- | - |
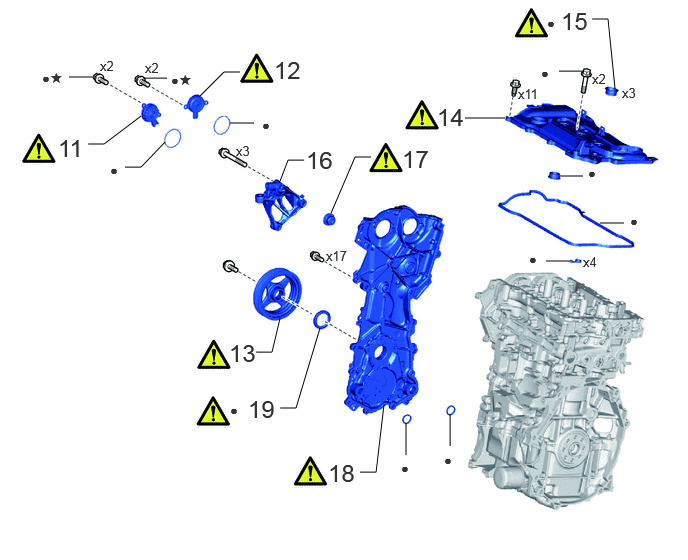
| Procedure | Part Name Code |
|
|
|
|
|---|---|---|---|---|---|
| 11 | CAM TIMING OIL CONTROL SOLENOID ASSEMBLY (for Intake Side) | 15370 | ()
|
- | - |
| 12 | CAM TIMING OIL CONTROL SOLENOID ASSEMBLY (for Exhaust Side) | 15370 | ()
|
- | - |
| 13 | CRANKSHAFT PULLEY ASSEMBLY | 13470 | ()
|
- | - |
| 14 | CYLINDER HEAD COVER SUB-ASSEMBLY | 11201 | ()
|
- | - |
| 15 | SPARK PLUG TUBE GASKET | 11193 | ()
|
- | - |
| 16 | ENGINE MOUNTING BRACKET RH | 12315A | - | - | - |
| 17 | STRAIGHT SCREW PLUG | - | ()
|
- | - |
| 18 | NO. 2 TIMING CHAIN COVER ASSEMBLY | 11320B | ()
|
- | - |
| 19 | TIMING CHAIN COVER OIL SEAL | 11301C | ()
|
- | - |
| ● | Non-reusable part | ★ | Precoated part |
CAUTION / NOTICE / HINT
The necessary procedures (adjustment, calibration, initialization, or registration) that must be performed after parts are removed and installed, or replaced during No. 2 timing chain cover assembly removal/installation are shown below.
| Replaced Part or Performed Procedure | Necessary Procedure | Effect/Inoperative Function when Necessary Procedure not Performed | Link |
|---|---|---|---|
| Fuel pump assembly (for high pressure side) | Inspection after repair | ·
Poor idle, etc. ·
Engine start function, etc. |
()
|
PROCEDURE

 1.INSTALL ENGINE TO ENGINE STAND
2.REMOVE ENGINE HANGER
12262
3.REMOVE NO. 2 VENTILATION HOSE
44771
4.REMOVE VACUUM TUBE CONNECTOR HOSE
23901
5.REMOVE FUEL TUBE SUB-ASSEMBLY
|
|
Click here()
|
23902
6.REMOVE NO. 2 FUEL TUBE SUB-ASSEMBLY
|
|
Click here()
|
23801P
7.REMOVE NO. 1 FUEL PIPE SUB-ASSEMBLY
|
|
Click here()
|
23100X
8.REMOVE FUEL (ENGINE ROOM SIDE) PUMP ASSEMBLY
|
|
()
|
23191
9.REMOVE FUEL PUMP FLANGE
19500
10.REMOVE IGNITION COIL ASSEMBLY
|
|
Click here()
|
15370
11.REMOVE CAM TIMING OIL CONTROL SOLENOID ASSEMBLY (for Intake Side)
|
|
Click here()
|
15370
12.REMOVE CAM TIMING OIL CONTROL SOLENOID ASSEMBLY (for Exhaust Side)
|
|
Click here()
|
13470
13.REMOVE CRANKSHAFT PULLEY ASSEMBLY
|
|
Click here()
|
11201
14.REMOVE CYLINDER HEAD COVER SUB-ASSEMBLY
|
|
Click here()
|
11193
15.REMOVE SPARK PLUG TUBE GASKET
|
|
Click here()
|
12315A
16.REMOVE ENGINE MOUNTING BRACKET RH
17.REMOVE STRAIGHT SCREW PLUG
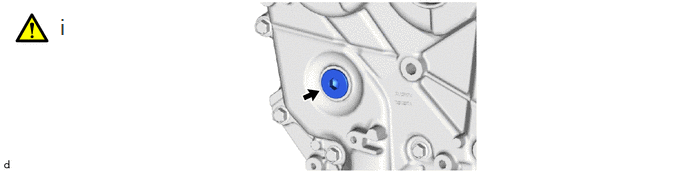
Using a 10 mm hexagon wrench, remove the straight screw plug from the No. 2 timing chain cover assembly.
11320B
18.REMOVE NO. 2 TIMING CHAIN COVER ASSEMBLY
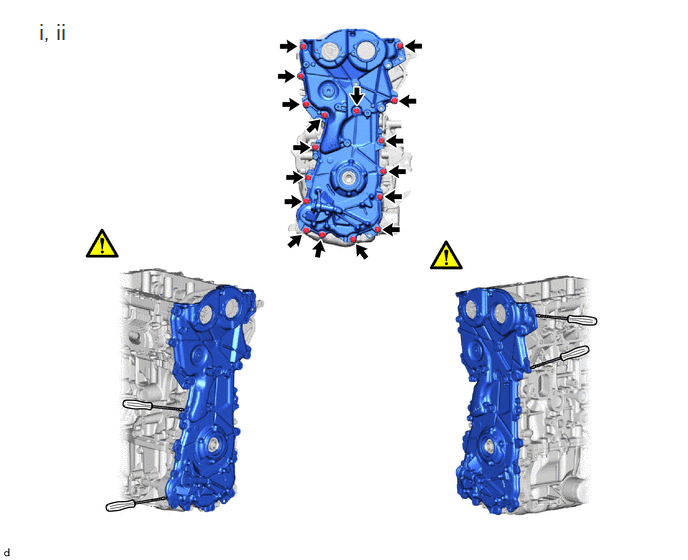
Remove the 17 bolts.
Remove the No. 2 timing chain cover assembly from the timing chain cover assembly by prying the No. 2 timing chain cover assembly with a screwdriver with its tip wrapped with protective tape.
- NOTICE:
-
Be careful not to damage the contact surfaces of the No. 2 timing chain cover assembly and timing chain cover assembly.
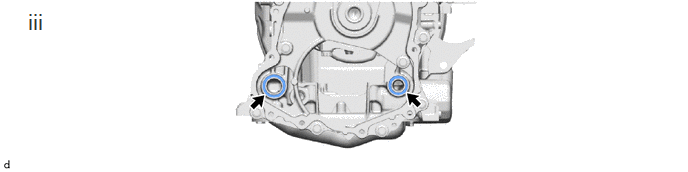
Remove the oil pump gasket from the cylinder block sub-assembly.
11301C
19.REMOVE TIMING CHAIN COVER OIL SEAL
|
|
Click here()
|