1VD-FTV ENGINE MECHANICAL ENGINE UNIT REMOVAL
PROCEDURE

 29300
1.REMOVE VACUUM PUMP ASSEMBLY (w/ Intercooler)
11452
2.REMOVE NO. 1 ENGINE OIL LEVEL DIPSTICK GUIDE
17875
3.REMOVE NO. 1 INTAKE AIR CONNECTOR PIPE
27020
4.REMOVE GENERATOR ASSEMBLY
12262
5.REMOVE NO. 2 VENTILATION HOSE
16285
6.REMOVE NO. 2 TURBO WATER HOSE
7.REMOVE BREATHER PLUG RH
17167
8.REMOVE NO. 1 EXHAUST MANIFOLD HEAT INSULATOR
15474A
9.DISCONNECT NO. 1 OUTLET TURBO OIL HOSE
16027
10.REMOVE NO. 1 TURBO WATER PIPE SUB-ASSEMBLY
17293
11.REMOVE NO. 1 TURBOCHARGER STAY
12201
12.REMOVE NO. 1 VENTILATION TUBE SUB-ASSEMBLY
17201
13.REMOVE NO. 1 TURBOCHARGER SUB-ASSEMBLY WITH EXHAUST MANIFOLD RH
12263
14.REMOVE NO. 3 VENTILATION HOSE
15.REMOVE BREATHER PLUG LH
16287
16.REMOVE NO. 2 TURBO WATER HOSE
17168
17.REMOVE NO. 2 EXHAUST MANIFOLD HEAT INSULATOR
16029
18.REMOVE NO. 3 TURBO WATER PIPE SUB-ASSEMBLY
16355
19.REMOVE FRONT WATER BY-PASS JOINT
16028
20.REMOVE NO. 2 TURBO WATER PIPE SUB-ASSEMBLY
15492
21.DISCONNECT NO. 2 OUTLET TURBO OIL HOSE
17297
22.REMOVE NO. 2 TURBOCHARGER STAY
12202
23.REMOVE NO. 2 VENTILATION TUBE SUB-ASSEMBLY
17208
24.REMOVE NO. 2 TURBOCHARGER SUB-ASSEMBLY WITH EXHAUST MANIFOLD LH
87120G
25.REMOVE VISCOUS HEATER ASSEMBLY WITH MAGNET CLUTCH (w/ Viscous Heater)
26.REMOVE NO. 1 IDLER PULLEY BRACKET (w/ Viscous Heater)
16321
27.REMOVE WATER INLET
16331A
28.REMOVE THERMOSTAT
11336A
29.REMOVE TIMING GEAR COVER INSULATOR (w/ Intercooler)
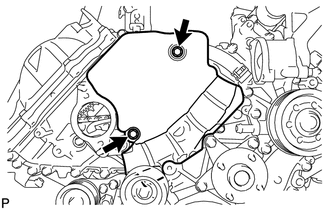
w/o Viscous Heater:
Remove the 2 bolts and timing gear cover insulator.
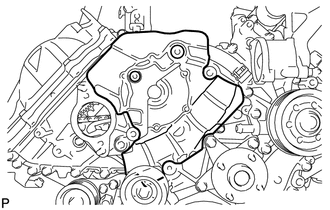
w/ Viscous Heater:
Remove the timing gear cover insulator.
16620D
30.REMOVE V-RIBBED BELT TENSIONER ASSEMBLY
28100
31.REMOVE STARTER ASSEMBLY
32.REMOVE STARTER HOSE BRACKET
16262
33.DISCONNECT INLET WATER HOSE
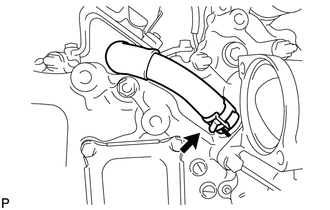
89422C
34.REMOVE DIESEL ENGINE COOLANT TEMPERATURE SENSOR
17946
35.REMOVE NO. 2 INTERCOOLER SUPPORT BRACKET
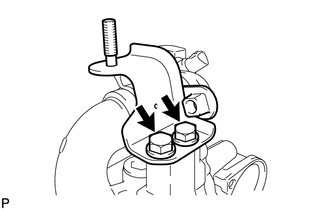
Remove the 2 bolts and No. 2 intercooler support bracket.
16331
36.REMOVE WATER OUTLET
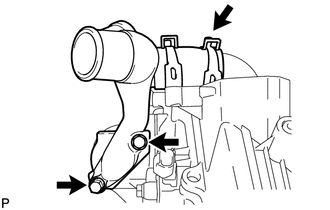
Remove the 2 bolts and gasket and disconnect the water outlet from the No. 2 water hose joint.
37.REMOVE WATER OUTLET PIPE
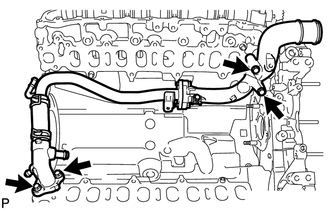
Remove the 4 bolts, water outlet pipe and 2 gaskets.
16332
38.SEPARATE NO. 1 AND NO. 2 WATER OUTLET PIPES AND WATER BY-PASS OUTLET
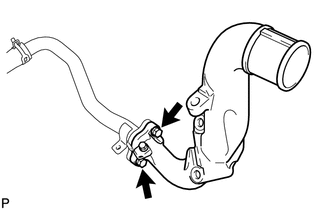
Remove the 2 bolts and No. 1 water outlet pipe from the No. 2 water outlet pipe.
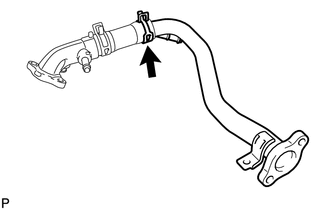
Disconnect the No. 2 water outlet pipe from the No. 1 water hose joint.
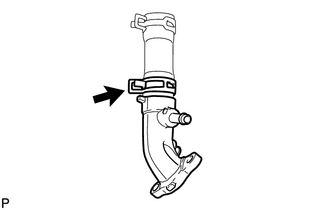
Disconnect the water by-pass outlet from the No. 1 water hose joint.
31484
39.REMOVE CLUTCH FLEXIBLE HOSE BRACKET (for Manual Transmission)
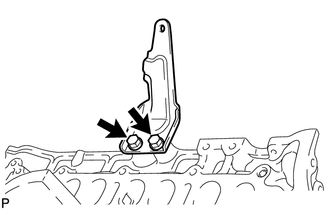
Remove the 2 bolts and clutch flexible hose bracket.
19871
40.REMOVE NO. 1 GLOW PLUG CONNECTOR
19850
41.REMOVE GLOW PLUG ASSEMBLY
23243C
42.REMOVE FUEL PUMP MOTOR WIRE
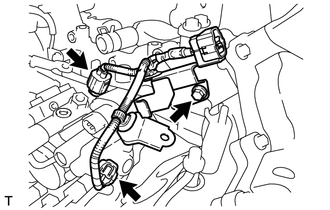
Disconnect the 2 connectors and remove the bolt and fuel pump motor wire.
16630H
43.REMOVE NO. 2 IDLER PULLEY (w/ Viscous Heater)
44.REMOVE NO. 2 IDLER PULLEY BRACKET (w/ Viscous Heater)
16307A
45.REMOVE FAN BRACKET SUB-ASSEMBLY
25860
46.REMOVE NO. 1 VACUUM SWITCHING VALVE ASSEMBLY (w/o DPF)
25706
47.REMOVE NO. 1 VACUUM TRANSMITTING PIPE SUB-ASSEMBLY (w/o DPF)
11224
48.REMOVE CYLINDER HEAD COVER SILENCER RH (w/o DPF)
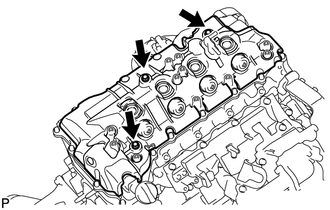
w/ Intercooler:
Remove the 3 bolts and cylinder head cover silencer RH.
11225
49.REMOVE CYLINDER HEAD COVER SILENCER LH (w/o DPF)
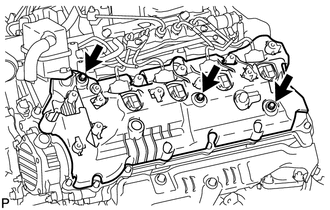
w/ Intercooler:
Remove the 3 bolts and cylinder head cover silencer LH.
50.REMOVE REAR CYLINDER HEAD PLATE RH (w/o EGR System)
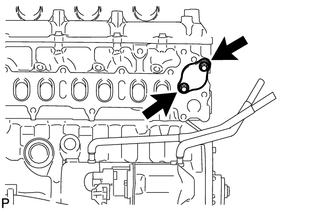
Remove the 2 bolts, rear cylinder head plate RH and gasket.
11181
51.REMOVE REAR CYLINDER HEAD PLATE LH (w/o EGR System)
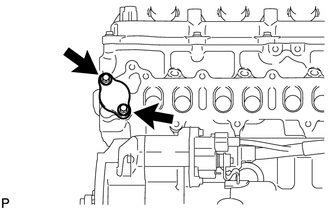
Remove the 2 bolts, rear cylinder head plate LH and gasket.
17872
52.REMOVE NO. 1 INTAKE AIR CONNECTOR BRACKET
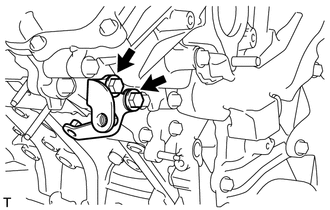
Remove the 2 bolts and No. 1 intake air connector bracket.
17368B
53.REMOVE AIR TUBE SUPPORT
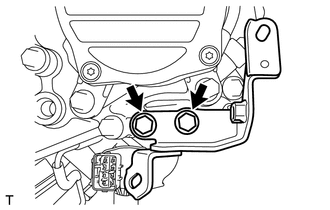
Remove the 2 bolts and air tube support.
16206
54.REMOVE NO. 1 WATER BY-PASS PIPE SUB-ASSEMBLY
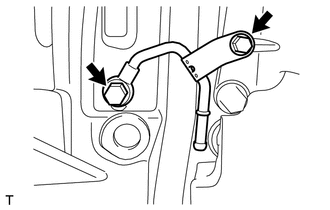
Remove the union bolt, bolt, No. 1 water by-pass pipe and gasket.
25709E
55.REMOVE NO. 4 VACUUM TRANSMITTING PIPE SUB-ASSEMBLY (w/ Intercooler)
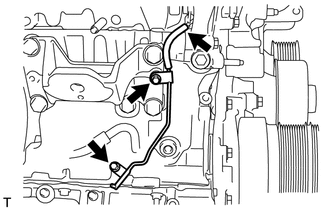
Disconnect the vacuum hose.
Remove the 2 bolts and No. 4 vacuum transmitting pipe.
12315A
56.REMOVE ENGINE MOUNTING BRACKET RH
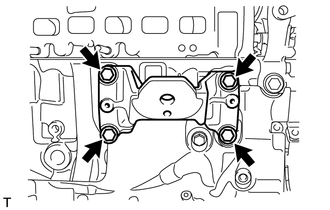
Remove the 4 bolts and engine mounting bracket RH.
12581
57.REMOVE NO. 1 CYLINDER BLOCK INSULATOR
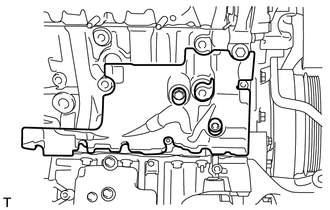
17873
58.REMOVE NO. 2 INTAKE AIR CONNECTOR BRACKET
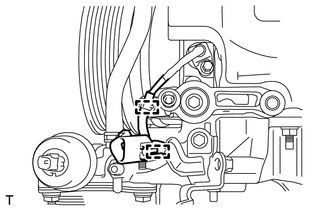
Detach the 2 wire harness clamps.
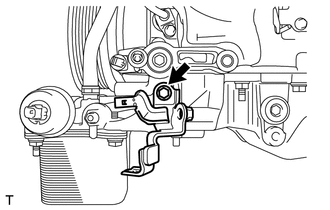
Remove the bolt and No. 2 intake air connector bracket.
1723A
59.REMOVE TURBOCHARGER WIRE
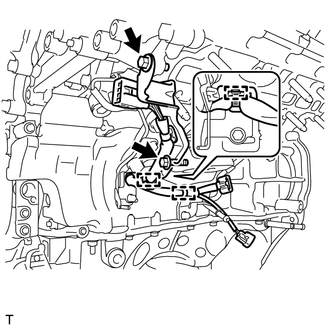
Detach the 3 wire harness clamps.
Remove the 2 bolts and turbocharger wire.
25708
60.REMOVE NO. 3 VACUUM TRANSMITTING PIPE SUB-ASSEMBLY
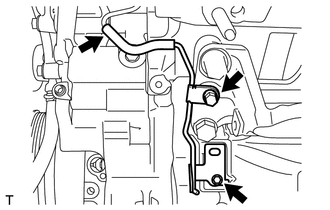
w/ Intercooler:
Disconnect the vacuum hose.
Remove the 2 bolts and No. 3 vacuum transmitting pipe.
16207
61.REMOVE NO. 2 WATER BY-PASS PIPE SUB-ASSEMBLY
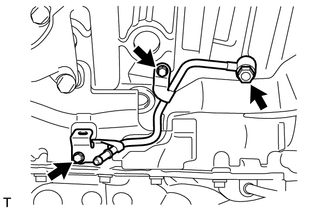
Remove the union bolt, 2 bolts, No. 2 water by-pass pipe and gasket.
12325A
62.REMOVE ENGINE MOUNTING BRACKET LH
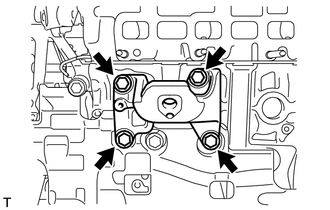
Remove the 4 bolts and engine mounting bracket LH.
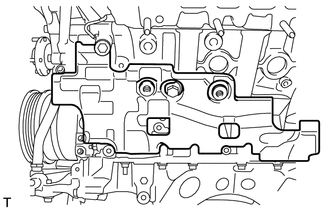
12582
63.REMOVE NO. 2 CYLINDER BLOCK INSULATOR
15387A
64.REMOVE OIL TANK BRACKET
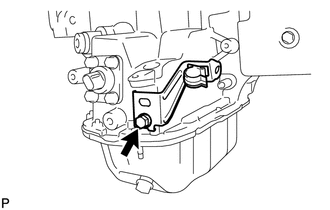
Remove the bolt and oil tank bracket.
17945
65.REMOVE NO. 1 INTERCOOLER SUPPORT BRACKET
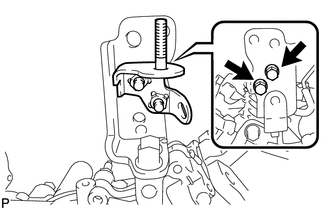
Remove the 2 bolts and No. 1 intercooler support bracket.
66.REMOVE NO. 3 ENGINE HANGER
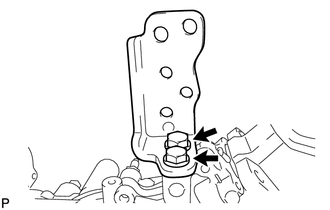
Remove the 2 bolts and No. 3 engine hanger.
15609J
67.REMOVE OIL FILTER BRACKET DRAIN COCK ASSEMBLY
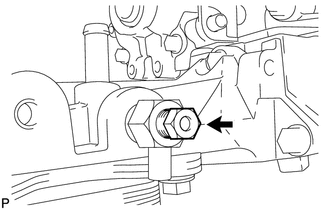
Remove the oil filter drain cock plug.
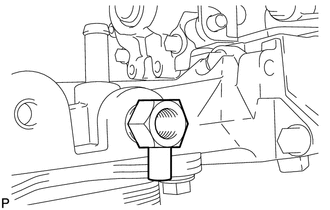
Remove the oil filter drain cock body.
- HINT:
-
If the drain cock is deformed or clogged, replace or repair it.
15320B
68.REMOVE OIL PRESSURE REGULATOR ASSEMBLY
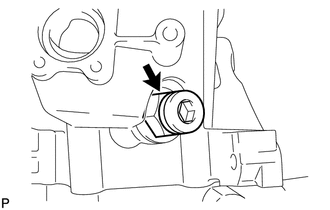
Using a 26 mm wrench, remove the oil pressure regulator and gasket.
Remove the O-ring from the oil pressure regulator body.
Hold the oil pressure regulator body in a vise between aluminum plates.
- NOTICE:
-
Be careful not to damage the oil pressure regulator body.
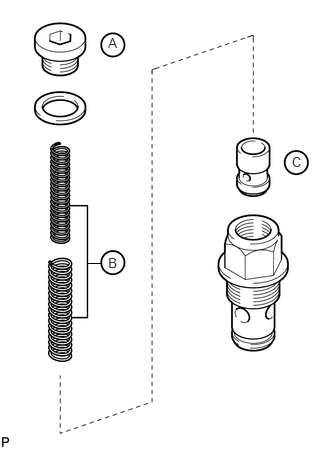
Using a 10 mm hexagon wrench, remove the oil pump relief valve plug labeled A and gasket.
- CAUTION:
-
When removing the plug, be careful as the spring will be jumped out.
Remove the 2 springs labeled B.
Remove the oil pump relief valve labeled C.
12158
69.REMOVE STIFFENER INSULATOR RH (w/ Intercooler)
70.SET NO. 1 CYLINDER TO TDC/COMPRESSION
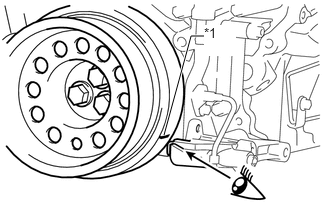
Align the timing mark of the crankshaft pulley and the chain cover and compressor bracket.
| *1 | Timing Mark |
12502
71.REMOVE COMPRESSOR BRACKET
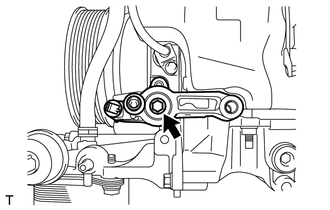
Remove the bolt and compressor bracket.
23710B
72.REMOVE EXHAUST FUEL ADDITION INJECTOR ASSEMBLY (w/ DPF)
23255B
73.REMOVE FUEL INJECTOR SEAL (w/ DPF)
13453
74.REPLACE FLYWHEEL RING GEAR
- CAUTION:
-
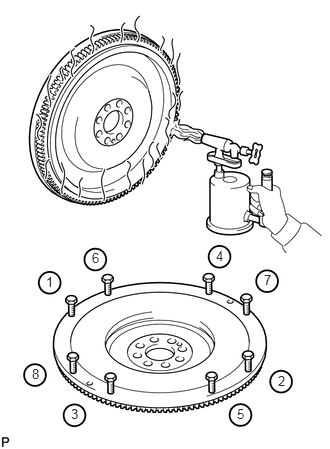 0.479,2.854 0.656,3.021 0.177,0.167 10 false 1 2.896,3.885 3.073,4.052 0.177,0.167 10 false 2 0.74,4.229 0.917,4.396 0.177,0.167 10 false 3 2.25,2.583 2.427,2.75 0.177,0.167 10 false 4 0.958,2.604 1.135,2.771 0.177,0.167 10 false 6 2.469,4.229 2.646,4.396 0.177,0.167 10 false 5 0.333,3.813 0.51,3.979 0.177,0.167 10 false 8 2.75,2.833 2.927,3.01 0.177,0.177 10 false 7
-
When torching the flywheel:
- ·
Wear protective gloves.
·Be careful as the flywheel is hot.
- HINT:
-
If the flywheel ring gear is deformed or the gear teeth are damaged, replace it.
Using a torch, heat the ring gear evenly to approximately 200°C (392°F).
Install 8 10 mm x 1.25 pitch bolts with a length of 70 mm or more to the flywheel.
Uniformly tighten the 8 bolts in the order shown in the illustration.
Remove the ring gear from the flywheel.
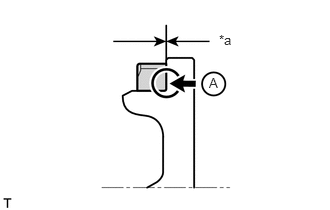
Using a torch, heat a new ring gear evenly to approximately 200°C (392°F).
| *a | No Clearance |
- NOTICE:
-
Be careful not to overheat the ring gear.
Using a brass bar, tap the ring gear onto the flywheel with its chamfered gear teeth facing the block.
- NOTICE:
- ·
Make sure to press in the ring gear until the ring gear contacts the flywheel, as shown in A in the illustration.
·After installing, allow the ring gear to cool before handling.
13405A
75.REPLACE FLYWHEEL STRAIGHT PIN
- HINT:
-
It is not necessary to remove the straight pin unless it is being replaced.
Replace the flywheel straight pin.