2WW ENGINE MECHANICAL ENGINE UNIT DISASSEMBLY
PROCEDURE

 1. PRECAUTION
- NOTICE:
- ·
After the engine has stopped, wait at least 1 minute before releasing the high pressure lines.
·When working on the fuel circuit, protect the generator assembly against contamination. Cover the generator assembly with suitable materials. Failure to comply with this procedure may result in a generator assembly malfunction.
·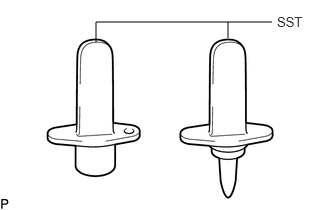 1,0.229 2.833,0.229 false 1,0.438 1,0.229 false 2.375,0.396 2.375,0.229 false 2.885,0.146 3.344,0.344 0.458,0.198 10 false SST
After disconnecting the pressure line, it is absolutely essential to seal the injector assemblies and the common rail assembly with SST.
- SST:
PZ4TB-04941-79
2.REMOVE CAMSHAFT POSITION SENSOR
3.REMOVE CRANKSHAFT POSITION SENSOR
89422C
4.REMOVE ENGINE COOLANT TEMPERATURE SENSOR
83530
5.REMOVE ENGINE OIL PRESSURE SWITCH ASSEMBLY
23760
6.REMOVE NOZZLE LEAKAGE PIPE ASSEMBLY
23670
7.REMOVE INJECTOR ASSEMBLY
16100
8.REMOVE ENGINE WATER PUMP ASSEMBLY
16268L
9.REMOVE WATER BY-PASS PIPE
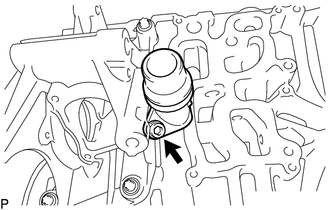
Using a 5 mm hexagon socket wrench, remove the bolt and water by-pass pipe from the water inlet housing.
16321
10.REMOVE WATER INLET
16331A
11.REMOVE THERMOSTAT
16323
12.REMOVE WATER INLET HOUSING
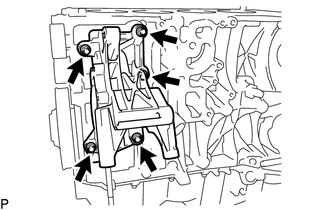
Using an E11 "TORX" socket wrench, remove the 5 bolts and water inlet housing.
16331
13.REMOVE WATER OUTLET
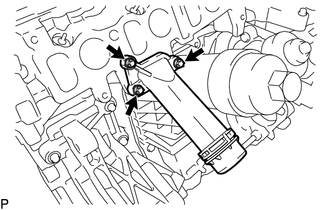
Using an E10 "TORX" socket wrench, remove the 3 bolts and water outlet.
Remove the gasket from the water outlet.
15601
14.REMOVE OIL FILTER SUB-ASSEMBLY
15600
15.REMOVE OIL FILTER ASSEMBLY
16.SET NO. 1 CYLINDER TO TDC/COMPRESSION
12108
17.REMOVE OIL FILLER CAP SUB-ASSEMBLY
Remove the oil filler cap sub-assembly from the cylinder head cover sub-assembly.
11201
18.REMOVE CYLINDER HEAD COVER SUB-ASSEMBLY
13511
19.SECURE CAMSHAFT AND NO. 2 CAMSHAFT
13550
20.REMOVE NO. 2 CHAIN TENSIONER ASSEMBLY
13567A
21.REMOVE NO. 2 TIMING CHAIN GUIDE
13511
22.REMOVE CAMSHAFT AND NO. 2 CAMSHAFT
11103
23.REMOVE CAMSHAFT HOUSING SUB-ASSEMBLY
13801
24.REMOVE NO. 1 VALVE ROCKER ARM SUB-ASSEMBLY
13750
25.REMOVE VALVE LASH ADJUSTER ASSEMBLY
11101
26.REMOVE CYLINDER HEAD SUB-ASSEMBLY
11115
27.REMOVE CYLINDER HEAD GASKET
13471
28.REMOVE CRANKSHAFT PULLEY
11301C
29.REMOVE TIMING GEAR CASE OR TIMING CHAIN CASE OIL SEAL
31210
30.REMOVE CLUTCH COVER ASSEMBLY
31250
31.REMOVE CLUTCH DISC ASSEMBLY
32.REMOVE FLYWHEEL WITH DAMPER ASSEMBLY
22100
33.REMOVE FUEL SUPPLY PUMP ASSEMBLY
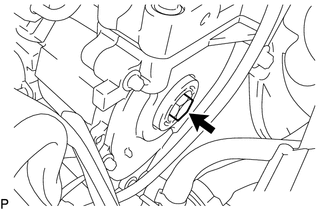
Remove the sealing cap from the timing chain cover plate.
Remove the O-ring from the sealing cap.
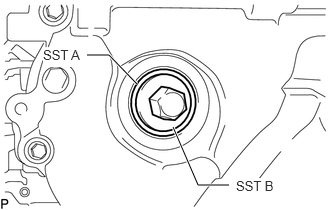
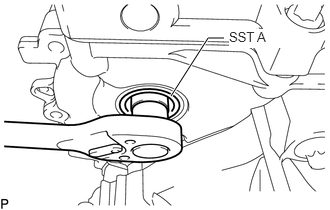
Using SST (B), install SST (A) to position the fuel supply pump assembly. Then remove SST (B).
- SST:
PZ4TB-04967-25
- NOTICE:
-
Do not remove SST (A) from the timing chain cover plate until all repair work has been completed.
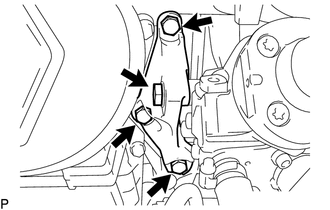
Remove the 4 bolts and fuel supply pump assembly support.
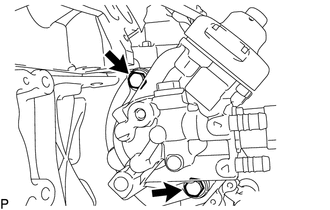
Remove the 2 bolts from the fuel supply pump assembly.
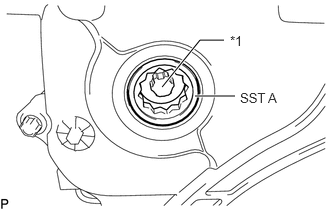
| *1 | Central Bolt |
Loosen the central bolt connection between the fuel supply pump assembly and injection pump drive gear.
- NOTICE:
- ·
Do not remove SST (A) from the timing chain cover plate.
·The central bolt is supported on SST (A) until the fuel supply pump assembly is pressed out.
·Do not remove the central bolt from SST (A) until all repair work has been completed.
Remove the fuel supply pump assembly from the cylinder block.
12101
34.REMOVE OIL PAN SUB-ASSEMBLY
15104
35.REMOVE OIL STRAINER SUB-ASSEMBLY
15100
36.REMOVE OIL PUMP WITH VACUUM PUMP ASSEMBLY
11401L
37.REMOVE REAR ENGINE OIL SEAL
11324
38.REMOVE TIMING CHAIN COVER PLATE
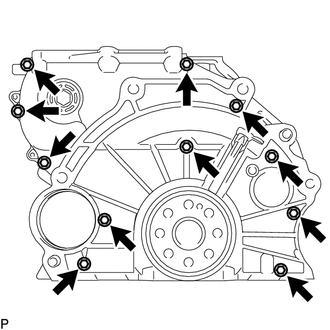
Using an E8 "TORX" socket wrench, remove the 11 bolts and timing chain cover plate.
13507A
39.REMOVE OIL PUMP DRIVE CHAIN SUB-ASSEMBLY
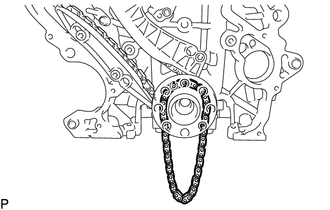
Remove the oil pump drive chain sub-assembly from the crankshaft.
13507
40.REMOVE NO. 2 CHAIN SUB-ASSEMBLY
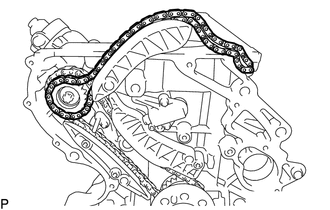
Remove the No. 2 chain sub-assembly from the injection pump drive gear.
13591
41.REMOVE NO. 2 TIMING CHAIN TENSION ARM
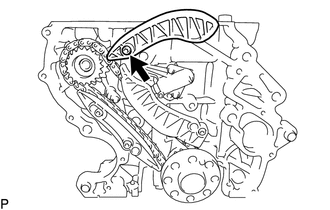
Using a T45 "TORX" socket wrench, remove the bolt and No. 2 timing chain tension arm.
13540
42.REMOVE NO. 1 CHAIN TENSIONER ASSEMBLY
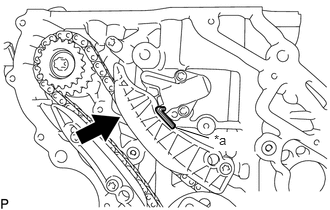
| *a | Hexagon Wrench |
Slowly push the plunger deep into the No. 1 chain tensioner assembly and insert a 3.0 mm hexagon wrench into the No. 1 chain tensioner assembly.
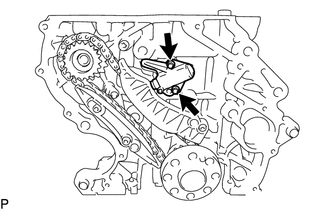
Using an E8 "TORX" socket wrench, remove the 2 bolts and No. 1 chain tensioner assembly.
13591
43.REMOVE TIMING CHAIN TENSION ARM
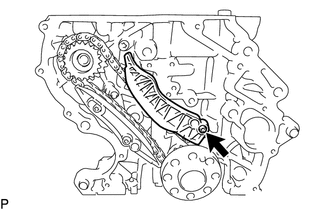
Using a T45 "TORX" socket wrench, remove the bolt and timing chain tension arm.
13566B
44.REMOVE TIMING CHAIN GUIDE
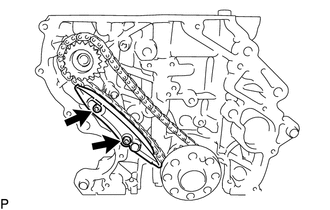
Using a T45 "TORX" socket wrench, remove the 2 bolts and timing chain guide.
13613
45.REMOVE INJECTION PUMP DRIVE GEAR
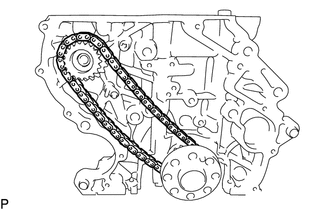
Remove the injection pump drive gear and chain sub-assembly.
15709
46.REMOVE NO. 2 OIL NOZZLE SUB-ASSEMBLY
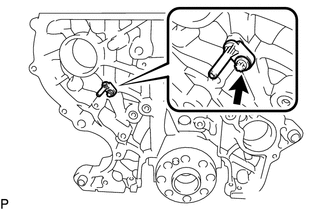
Using an E8 "TORX" socket wrench, remove the bolt and No. 2 oil nozzle sub-assembly.