HYBRID / BATTERY CONTROL FRAME WIRE INSTALLATION
PROCEDURE

 821H1
1.INSTALL HV FLOOR UNDER WIRE
- CAUTION:
-
Be sure to wear insulated gloves.
for 4WD/AWD:
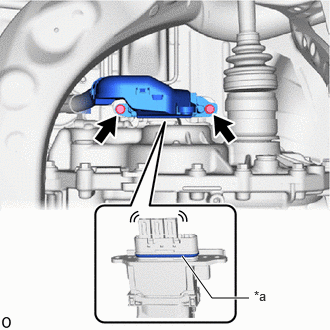
| *a | Waterproof Seal |
Install the HV floor under wire to the rear traction motor with transaxle assembly with the 2 bolts.
- Torque:
- 8.0 N*m (82 kgf*cm, 71 in.*lbf)
- NOTICE:
- ·
Make sure that the connector is fully engaged.
·Do not damage the terminals, interlock connector or rear traction motor with transaxle assembly during installation.
·Do not touch the waterproof seal or terminals of the connector.
·Do not allow any foreign matter or water to enter the rear traction motor with transaxle assembly.
·Although the connector may feel loose, this is not due to a malfunction.
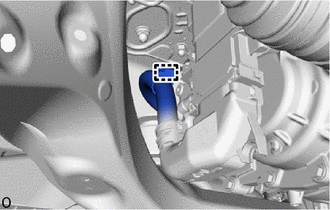
Engage the clamp.
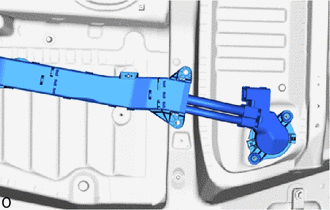
Insert the HV floor under wire into the floor panel hole and engage the grommet.
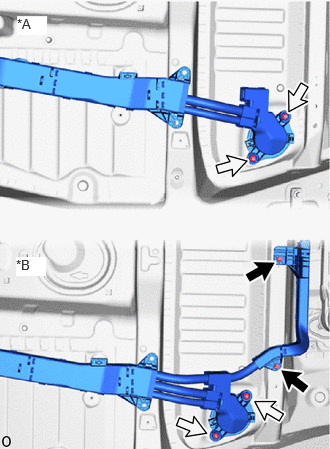
| *A | for 2WD |
| *B | for 4WD/AWD |

|
Bolt |

|
Nut |
for 2WD:
Install the 2 nuts.
- Torque:
- 8.0 N*m (82 kgf*cm, 71 in.*lbf)
for 4WD/AWD:
Install the 2 nuts and 2 bolts.
- Torque:
- 8.0 N*m (82 kgf*cm, 71 in.*lbf)
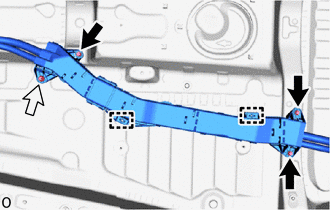
Install new 2 stud clamps.
Install the 3 bolts and nut.
- Torque:
- 8.0 N*m (82 kgf*cm, 71 in.*lbf)
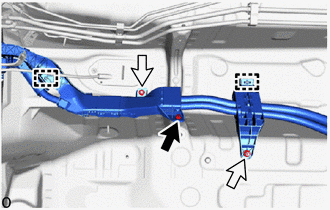
Install new 2 stud clamps.
Install the bolt and 2 nuts.
- Torque:
- 8.0 N*m (82 kgf*cm, 71 in.*lbf)
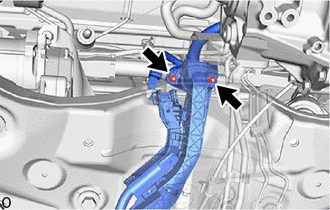
Install the 2 nuts.
- Torque:
- 8.0 N*m (82 kgf*cm, 71 in.*lbf)
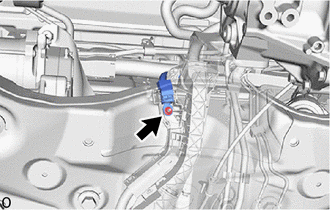
Connect the engine room main wire to the vehicle body with the nut.
- Torque:
- 8.0 N*m (82 kgf*cm, 71 in.*lbf)
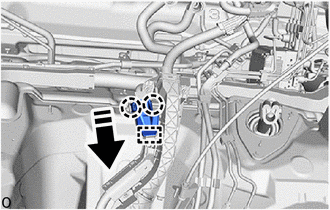

|
Install in this Direction |
Engage the guide and 2 claws to install the No. 1 terminal cap.
77100
2.INSTALL FUEL TANK ASSEMBLY
for A25A-FXS, w/ Canister Pump Module:
Click hereEngine / Hybrid System>A25A-FXS (FUEL)>FUEL TANK (w/ Canister Pump Module)>INSTALLATION
for A25A-FXS, w/o Canister Pump Module:
Click hereEngine / Hybrid System>A25A-FXS (FUEL)>FUEL TANK (w/o Canister Pump Module)>INSTALLATION
for A25B-FXS:
Click hereEngine / Hybrid System>A25B-FXS (FUEL)>FUEL TANK>INSTALLATION
17141
3.INSTALL EXHAUST MANIFOLD
for A25A-FXS:
Click hereEngine / Hybrid System>A25A-FXS (INTAKE / EXHAUST)>EXHAUST MANIFOLD>INSTALLATION
for A25B-FXS:
Click hereEngine / Hybrid System>A25B-FXS (INTAKE / EXHAUST)>EXHAUST MANIFOLD>INSTALLATION
17410
4.INSTALL FRONT EXHAUST PIPE ASSEMBLY
for A25A-FXS:
Click hereEngine / Hybrid System>A25A-FXS (INTAKE / EXHAUST)>EXHAUST PIPE>INSTALLATION
for A25B-FXS:
Click hereEngine / Hybrid System>A25B-FXS (INTAKE / EXHAUST)>EXHAUST PIPE>INSTALLATION
33820B
5.CONNECT TRANSMISSION CONTROL CABLE ASSEMBLY
Connect the transmission control cable assembly to the vehicle body with the nut.
- Torque:
- 6.0 N*m (61 kgf*cm, 53 in.*lbf)
58723E
6.INSTALL ENGINE SERVICE COVER CUSHION
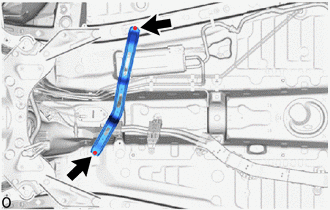
Install the engine service cover cushion with the 2 nuts.
- Torque:
- 4.9 N*m (50 kgf*cm, 43 in.*lbf)
58724F
7.INSTALL NO. 2 ENGINE SERVICE COVER CUSHION
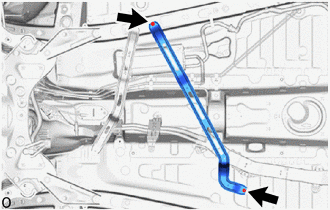
Install the No. 2 engine service cover cushion with the 2 nuts.
- Torque:
- 4.9 N*m (50 kgf*cm, 43 in.*lbf)
58151
8.INSTALL FRONT NO. 1 FLOOR HEAT INSULATOR
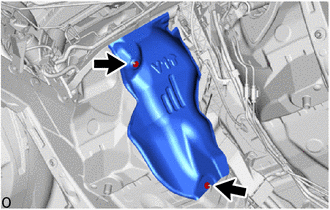
Install the front No. 1 floor heat insulator with the 2 nuts.
- Torque:
- 4.9 N*m (50 kgf*cm, 43 in.*lbf)
58152A
9.INSTALL FRONT LOWER NO. 1 FLOOR HEAT INSULATOR
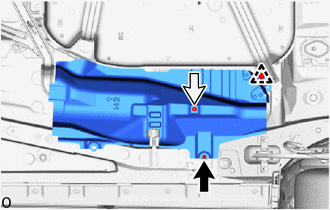
Install the front lower No. 1 floor heat insulator with the nut and bolt.
- Torque:
- 4.9 N*m (50 kgf*cm, 43 in.*lbf)
Install the clip.
58153E
10.INSTALL FRONT NO. 2 FLOOR HEAT INSULATOR
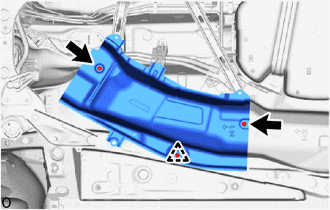
Install the front No. 2 floor heat insulator with the 2 nuts.
- Torque:
- 4.9 N*m (50 kgf*cm, 43 in.*lbf)
Install the clip.
58167A
11.INSTALL FRONT CENTER FLOOR COVER
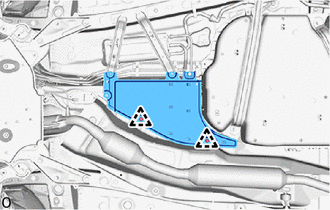
Install the front center floor cover with the 2 clips.
58165C
12.INSTALL FRONT FLOOR COVER RH
for A25A-FXS:
Click hereEngine / Hybrid System>A25A-FXS (ENGINE MECHANICAL)>ENGINE ASSEMBLY>INSTALLATION
for A25B-FXS:
Click hereEngine / Hybrid System>A25B-FXS (ENGINE MECHANICAL)>ENGINE ASSEMBLY>INSTALLATION
58166A
13.INSTALL FRONT FLOOR COVER LH
for A25A-FXS:
Click hereEngine / Hybrid System>A25A-FXS (ENGINE MECHANICAL)>ENGINE ASSEMBLY>INSTALLATION
for A25B-FXS:
Click hereEngine / Hybrid System>A25B-FXS (ENGINE MECHANICAL)>ENGINE ASSEMBLY>INSTALLATION
51468B
14.INSTALL ENGINE UNDER COVER HEAT INSULATOR
for A25A-FXS:
Click hereEngine / Hybrid System>A25A-FXS (ENGINE MECHANICAL)>ENGINE ASSEMBLY>INSTALLATION
for A25B-FXS:
Click hereEngine / Hybrid System>A25B-FXS (ENGINE MECHANICAL)>ENGINE ASSEMBLY>INSTALLATION
51420
15.INSTALL NO. 2 ENGINE UNDER COVER ASSEMBLY
for A25A-FXS:
Click hereEngine / Hybrid System>A25A-FXS (ENGINE MECHANICAL)>ENGINE ASSEMBLY>INSTALLATION
for A25B-FXS:
Click hereEngine / Hybrid System>A25B-FXS (ENGINE MECHANICAL)>ENGINE ASSEMBLY>INSTALLATION
51441
16.INSTALL NO. 1 ENGINE UNDER COVER
for A25A-FXS:
Click hereEngine / Hybrid System>A25A-FXS (ENGINE MECHANICAL)>ENGINE ASSEMBLY>INSTALLATION
for A25B-FXS:
Click hereEngine / Hybrid System>A25B-FXS (ENGINE MECHANICAL)>ENGINE ASSEMBLY>INSTALLATION
53895B
17.INSTALL FRONT FENDER FRONT SPLASH SHIELD RH
for A25A-FXS:
Click hereEngine / Hybrid System>A25A-FXS (ENGINE MECHANICAL)>ENGINE ASSEMBLY>INSTALLATION
for A25B-FXS:
Click hereEngine / Hybrid System>A25B-FXS (ENGINE MECHANICAL)>ENGINE ASSEMBLY>INSTALLATION
53896B
18.INSTALL FRONT FENDER FRONT SPLASH SHIELD LH
for A25A-FXS:
Click hereEngine / Hybrid System>A25A-FXS (ENGINE MECHANICAL)>ENGINE ASSEMBLY>INSTALLATION
for A25B-FXS:
Click hereEngine / Hybrid System>A25B-FXS (ENGINE MECHANICAL)>ENGINE ASSEMBLY>INSTALLATION
19.INSTALL FRONT WHEELS
821H1
20.CONNECT HV FLOOR UNDER WIRE
- CAUTION:
-
Be sure to wear insulated gloves.
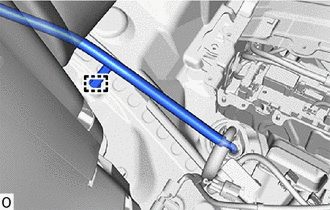
Engage the clamp.
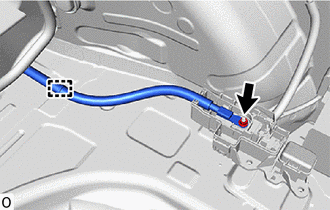
Install the HV under floor wire with the nut.
- Torque:
- 7.6 N*m (77 kgf*cm, 67 in.*lbf)
Engage the clamp.
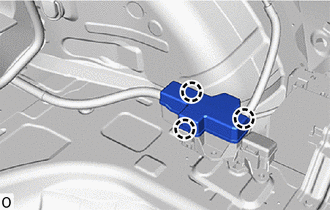
Engage the 3 claws to install the No. 4 relay block cover.
Connect the shield ground to the HV battery.
Connect the 2 HV battery junction block assembly connectors.
- NOTICE:
-
Make sure that the connectors are connected securely.
G92N4A
21.INSTALL NO. 1 HV BATTERY COVER PANEL RH
71033
22.INSTALL REAR SEAT CUSHION LEG SUB-ASSEMBLY
58464D
23.INSTALL BATTERY SERVICE COVER BOARD
58466J
24.INSTALL NO. 2 BATTERY SERVICE COVER BOARD
67917C
25.INSTALL REAR DOOR SCUFF PLATE RH
- HINT:
-
Use the same procedure as for the LH side.
Click hereVehicle Interior>INTERIOR PANELS / TRIM>ROOF HEADLINING>INSTALLATION
58467H
26.INSTALL NO. 3 BATTERY SERVICE COVER BOARD
67918E
27.INSTALL REAR DOOR SCUFF PLATE LH
72693
28.INSTALL REAR SEAT CUSHION LOCK HOOK
29.INSTALL BENCH TYPE REAR SEAT CUSHION ASSEMBLY
821H1
30.CONNECT HV FLOOR UNDER WIRE
82111
31.CONNECT ENGINE ROOM MAIN WIRE
- CAUTION:
-
Be sure to wear insulated gloves.
- NOTICE:
-
Do not allow any foreign matter or water to enter the inverter with converter assembly.
Connect the inverter with converter assembly connector and move the lock lever to lock them.
- NOTICE:
- ·
Do not touch the waterproof seal or terminals of the connectors.
·To prevent damage due to static electricity, do not touch the terminals of the disconnected connectors.
·Do not damage the terminals, connector housing or inverter with converter assembly when connecting the connectors.
G3834
32.INSTALL SERVICE PLUG GRIP
58398F
33.INSTALL NO. 1 FLOOR UNDER COVER (for 4WD/AWD, w/ NO. 1 FLOOR UNDER COVER)