HYBRID / BATTERY CONTROL HV BATTERY STACK REMOVAL
CAUTION / NOTICE / HINT
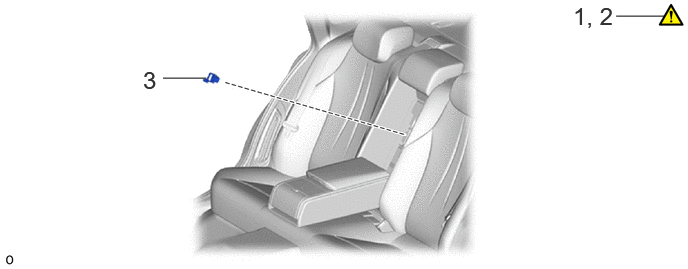
| Procedure | Part Name Code | 
|

|

|
|
|---|---|---|---|---|---|
| 1 | PRECAUTION | - | ( ) |
- | - |
| 2 | READ VALUE USING GTS | - | ()
|
- | - |
| 3 | SERVICE PLUG GRIP | G3834 | - | - | - |
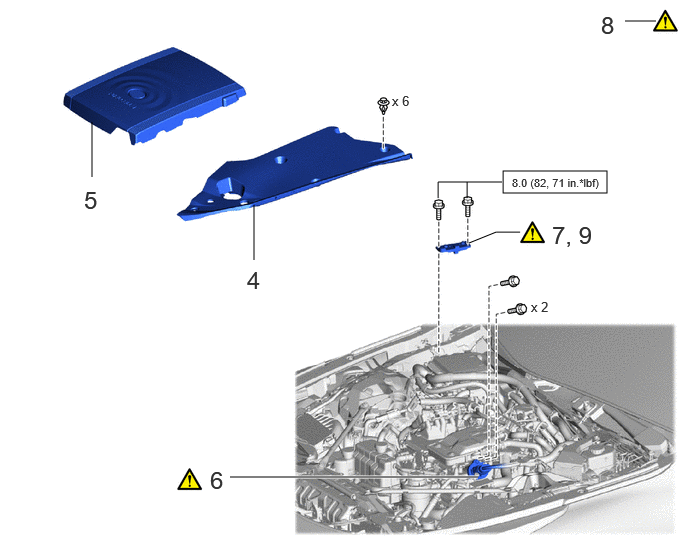
| Procedure | Part Name Code |
|
|
|
|
|---|---|---|---|---|---|
| 4 | UPPER RADIATOR SUPPORT SEAL | 53292A | - | - | - |
| 5 | FC STACK COVER SUB-ASSEMBLY | 1A906 | - | - | - |
| 6 | FC CONVERTER POWER OUTLET CABLE (INVERTER WITH CONVERTER ASSEMBLY) | G9200A | ()
|
- | - |
| 7 | REMOVE CONNECTOR COVER ASSEMBLY | - | ()
|
- | - |
| 8 | CHECK TERMINAL VOLTAGE | - | ()
|
- | - |
| 9 | INSTALL CONNECTOR COVER ASSEMBLY | - | ()
|
- | - |

|
N*m (kgf*cm, ft.*lbf): Specified torque | - | - |
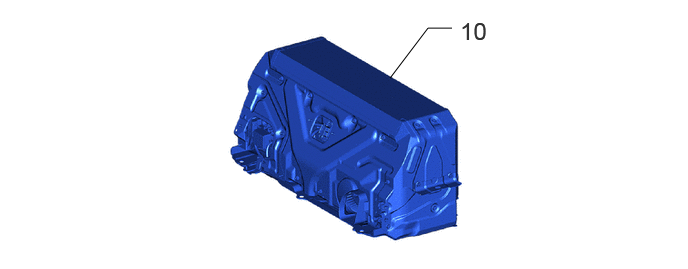
| Procedure | Part Name Code |
|
|
|
|
|---|---|---|---|---|---|
| 10 | EV SUPPLY BATTERY ASSEMBLY | G9510B | - | - | - |
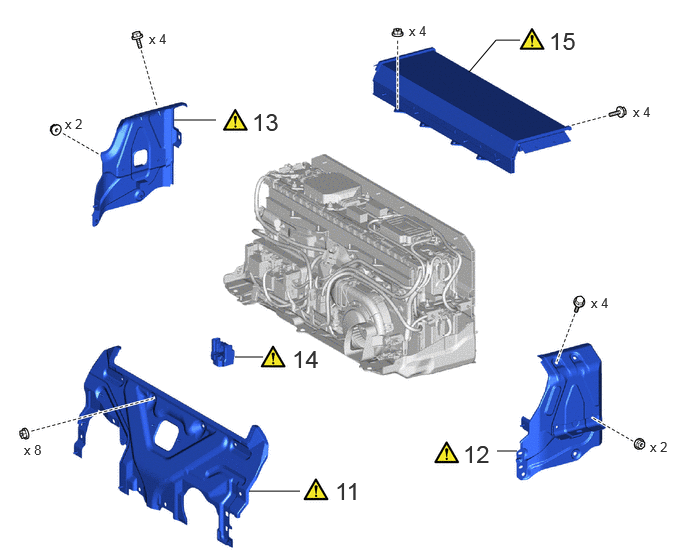
| Procedure | Part Name Code |
|
|
|
|
|---|---|---|---|---|---|
| 11 | UPPER EV BATTERY COVER PANEL | G92N1B | ()
|
- | - |
| 12 | NO. 2 EV BATTERY SHIELD SUB-ASSEMBLY | G920RB | ()
|
- | - |
| 13 | NO. 1 EV BATTERY SHIELD SUB-ASSEMBLY | G920QB | ()
|
- | - |
| 14 | EV BATTERY TERMINAL BLOCK | G92Z2A | ()
|
- | - |
| 15 | UPPER NO. 1 EV BATTERY COVER SUB-ASSEMBLY | G920LC | ()
|
- | - |
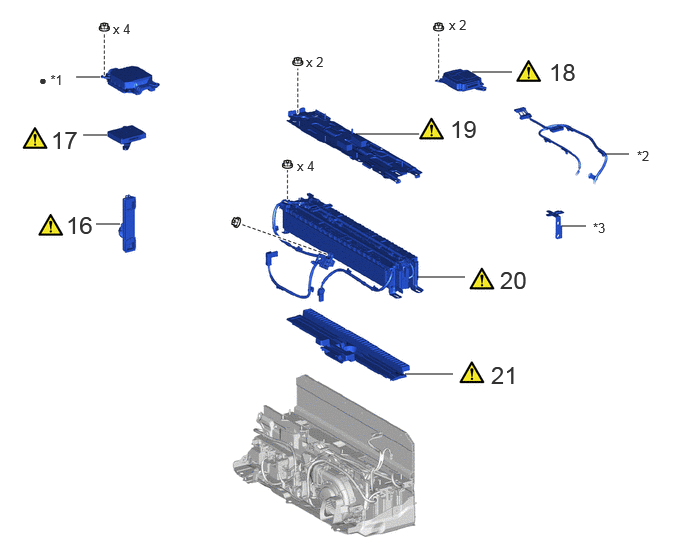
| Procedure | Part Name Code |
|
|
|
|
|---|---|---|---|---|---|
| 16 | NO. 1 EV BATTERY EXHAUST DUCT | G92F1A | ()
|
- | - |
| 17 | BATTERY VOLTAGE SENSOR (for Upper Side) | 89892A | ()
|
- | - |
| 18 | BATTERY ECU ASSEMBLY | 89890A | ()
|
- | - |
| 19 | NO. 7 EV BATTERY SHIELD SUB-ASSEMBLY (for Upper Side) | G920WA | ()
|
- | - |
| 20 | NO. 1 EV SUPPLY STACK SUB-ASSEMBLY | G9508A | ()
|
- | - |
| 21 | NO. 8 EV BATTERY INTAKE DUCT | G92D8A | ()
|
- | - |
| *1 | NO. 1 EV BATTERY PROTECTOR | *2 | NO. 2 EV BATTERY PACK WIRE |
| *3 | WIRE HARNESS CLAMP BRACKET | - | - |
| ● | Non-reusable part | - | - |
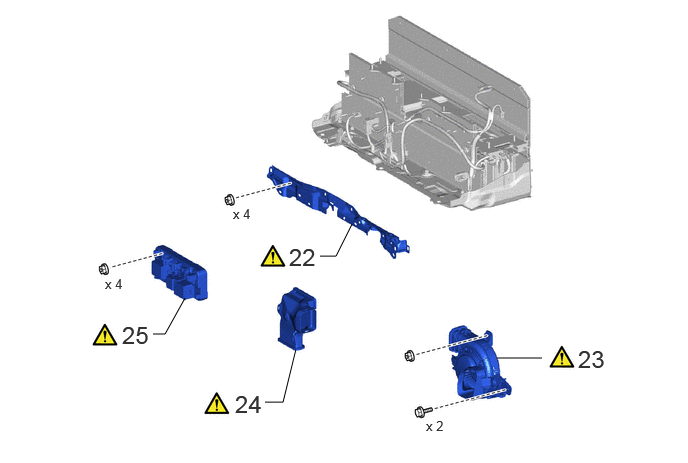
| Procedure | Part Name Code |
|
|
|
|
|---|---|---|---|---|---|
| 22 | WIRE HARNESS CLAMP BRACKET | - | ()
|
- | - |
| 23 | BATTERY COOLING BLOWER ASSEMBLY WITH NO. 5 EV BATTERY INTAKE DUCT | - | ()
|
- | - |
| 24 | NO. 6 EV BATTERY INTAKE DUCT | G92D6A | ()
|
- | - |
| 25 | NO. 1 EV BATTERY JUNCTION BLOCK ASSEMBLY | G92Z0A | ()
|
- | - |
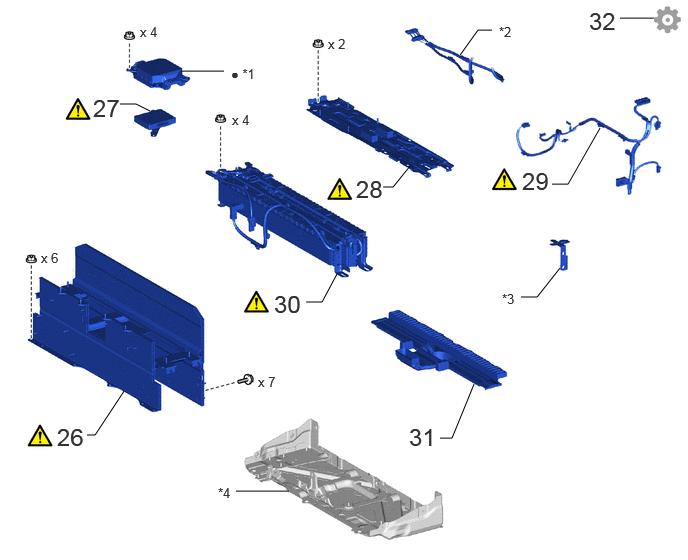
| Procedure | Part Name Code |
|
|
|
|
|---|---|---|---|---|---|
| 26 | UPPER EV BATTERY CARRIER SUB-ASSEMBLY | - | ()
|
- | - |
| 27 | BATTERY VOLTAGE SENSOR (for Lower Side) | 89892A | ()
|
- | - |
| 28 | NO. 7 EV BATTERY SHIELD SUB-ASSEMBLY (for Lower Side) | G920WA | ()
|
- | - |
| 29 | NO. 2 EV BATTERY PACK WIRE | G92X2A | ()
|
- | - |
| 30 | NO. 2 EV SUPPLY STACK SUB-ASSEMBLY | G9509A | ()
|
- | - |
| 31 | NO. 9 EV BATTERY INTAKE DUCT | G92D9A | - | - | - |
| 32 | PERFORM RECOVERY INSPECTION | - | - | - | |
| *1 | NO. 1 EV BATTERY PROTECTOR (for Lower Side) | *2 | NO. 1 EV BATTERY PACK WIRE |
| *3 | WIRE HARNESS BRACKET | *4 | LOWER EV BATTERY CARRIER SUB-ASSEMBLY |
| ● | Non-reusable part | - | - |
CAUTION / NOTICE / HINT
The necessary procedures (adjustment, calibration, initialization, or registration) that must be performed after parts are removed and installed, or replaced during EV supply stack sub-assembly removal/installation are shown below.
| Replacement Part or Procedure | Necessary Procedure | Effect/Inoperative when not Performed | Link |
|---|---|---|---|
| Disconnect cable from negative auxiliary battery terminal | Memorize steering angle neutral point | Parking assist monitor system | ()
|
| Panoramic view monitor system | ()
|
||
·
No. 1 EV supply stack sub-assembly ·
No. 2 EV supply stack sub-assembly |
·
Prediagnostic battery charge ·
Battery diagnosis ·
Battery status info update |
Warning light illumination | ()
|
- CAUTION:
- ·
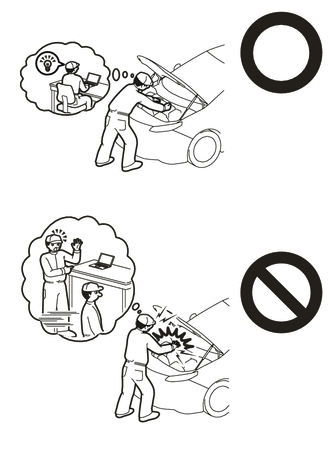
·Orange wire harnesses and connectors indicate high-voltage circuits. To prevent electric shock, always follow the procedure described in the repair manual.
Click hereEngine / Hybrid System>HYBRID / BATTERY CONTROL>HYBRID CONTROL SYSTEM>PRECAUTION
·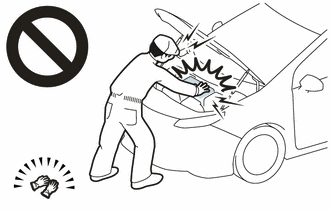
To prevent electric shock, wear insulated gloves when working on wire harnesses and components of the high voltage system.
·The hybrid system has high-voltage circuits. Accidents, such as electric shock, or electric leaks may result if the hybrid system is not operated in a correct manner. Make sure to follow the correct procedure.
·When disposing of an EV supply battery assembly or hybrid vehicle supply stack sub-assembly, make sure to return them through an authorized collection agent who is capable of handling them safely.
·Before returning an EV supply battery assembly, make sure to perform a recovery inspection.
·Before returning an EV supply stack sub-assembly, make sure to perform a recovery inspection.
·Make a note of the output DTCs as some of them may be necessary for "Recovery Inspection" of the EV supply battery assembly and EV supply stack sub-assemblies.
- NOTICE:
-
When replacing the No. 1 EV supply stack sub-assembly or No. 2 EV supply stack sub-assembly, it is necessary to check, adjust and equalize the SOC of the EV supply battery assembly. Otherwise, resulting in a decrease in fuel efficiency.
-
Click hereEngine / Hybrid System>HYBRID / BATTERY CONTROL>HV BATTERY STACK>BASIC INSPECTION
- HINT:
-
When the cable is disconnected/reconnected to the auxiliary battery terminal, systems temporarily stop operating. However, each system has a function that completes learning the first time the system is used.
- ·
Learning completes when vehicle is driven
Effect/Inoperative Function When Necessary Procedures are not Performed Necessary Procedures Link Lane tracing assist system Drive the vehicle straight ahead at 35 km/h (22 mph) or more for 5 seconds or more. ( )
Pre-collision system Adaptive high beam system
- ·
Learning completes when vehicle is operated normally
Effect/Inoperative Function When Necessary Procedures are not Performed Necessary Procedures Link Air conditioning system After the ignition switch is turned to ON, the servo motor and expansion valve standard position is recognized. -
PROCEDURE

 1. PRECAUTION
|
|
Click here()
|
2. READ VALUE USING GTS
Read the Data List.
- Powertrain > EV Battery > Data List
-
Tester Display Hybrid/EV Battery Temperature 1 Hybrid/EV Battery Temperature 2 Hybrid/EV Battery Temperature 3 Hybrid/EV Battery Temperature 4 Hybrid/EV Battery Temperature 5 Hybrid/EV Battery Temperature 6 - 50003 398 62,63,64,65,66,67
- NOTICE:
-
If any of the temperatures listed in "Hybrid/EV Battery Temperature 1 to 6" are 50°C or more, leave the vehicle until the temperature drops to less than 50°C.
G3834
3.REMOVE SERVICE PLUG GRIP
53292A
4.REMOVE UPPER RADIATOR SUPPORT SEAL
1A906
5.REMOVE FC STACK COVER SUB-ASSEMBLY
G9200A
6.DISCONNECT FC CONVERTER POWER OUTLET CABLE (INVERTER WITH CONVERTER ASSEMBLY)
|
|
Click here()
|
7.REMOVE CONNECTOR COVER ASSEMBLY
|
|
Click here()
|
8.CHECK TERMINAL VOLTAGE
|
|
Click here()
|
9.INSTALL CONNECTOR COVER ASSEMBLY
|
|
Click here()
|
G9510B
10.REMOVE EV SUPPLY BATTERY ASSEMBLY
G92N1B
11.REMOVE UPPER EV BATTERY COVER PANEL
|
|
|
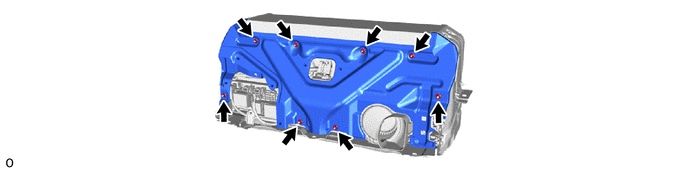
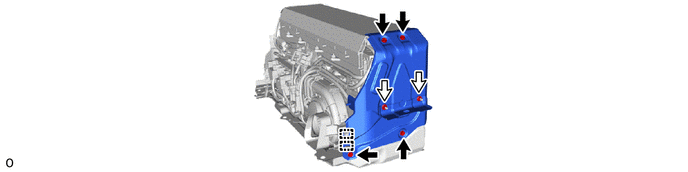
G920RB
12.REMOVE NO. 2 EV BATTERY SHIELD SUB-ASSEMBLY
|
|
|
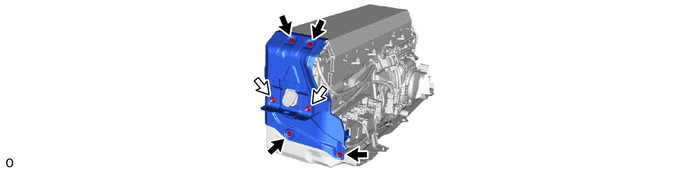
G920QB
13.REMOVE NO. 1 EV BATTERY SHIELD SUB-ASSEMBLY
|
|
|
G92Z2A
14.REMOVE EV BATTERY TERMINAL BLOCK
|
|
Click here()
|
G920LC
15.REMOVE UPPER NO. 1 EV BATTERY COVER SUB-ASSEMBLY
|
|
|
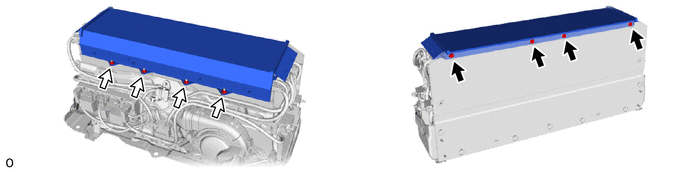
G92F1A
16.REMOVE NO. 1 EV BATTERY EXHAUST DUCT
|
|
|
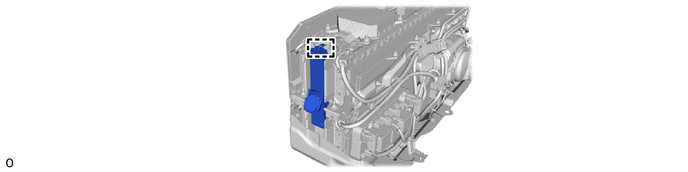
89892A
17.REMOVE BATTERY VOLTAGE SENSOR (for Upper Side)
|
|
Click here()
|
89890A
18.REMOVE BATTERY ECU ASSEMBLY
|
|
Click here()
|
G920WA
19.REMOVE NO. 7 EV BATTERY SHIELD SUB-ASSEMBLY (for Upper Side)
|
|
|
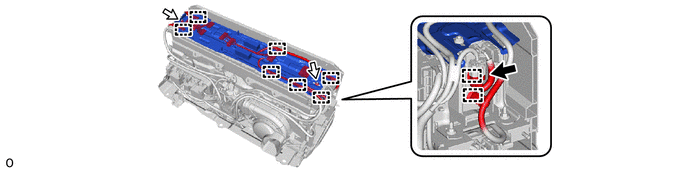
G9508A
20.REMOVE NO. 1 EV SUPPLY STACK SUB-ASSEMBLY
|
|
|
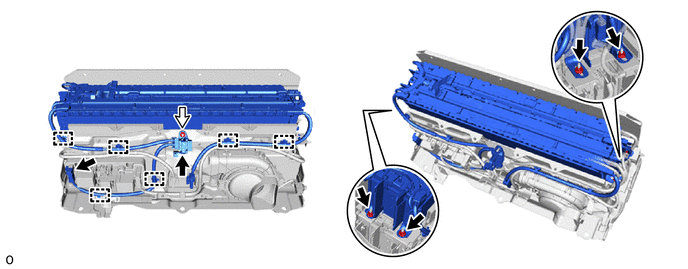
G92D8A
21.REMOVE NO. 8 EV BATTERY INTAKE DUCT
|
|
|
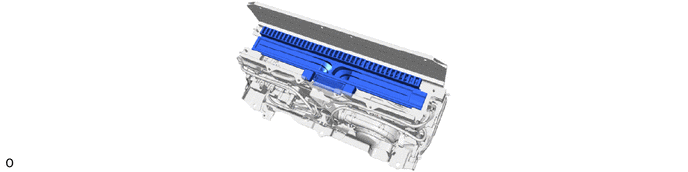
22.REMOVE WIRE HARNESS CLAMP BRACKET
|
|
|
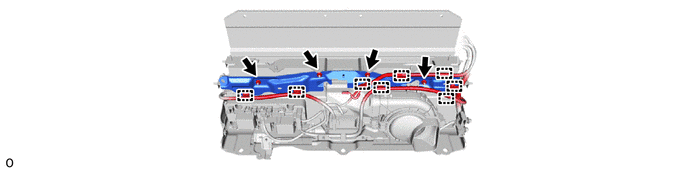
23.REMOVE BATTERY COOLING BLOWER ASSEMBLY WITH NO. 5 EV BATTERY INTAKE DUCT
|
|
|

G92D6A
24.REMOVE NO. 6 EV BATTERY INTAKE DUCT
|
|
|

G92Z0A
25.REMOVE NO. 1 EV BATTERY JUNCTION BLOCK ASSEMBLY
|
|
|
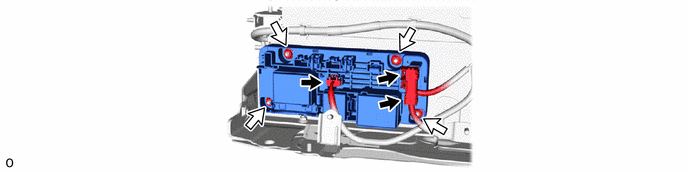
26.REMOVE UPPER EV BATTERY CARRIER SUB-ASSEMBLY
|
|
|
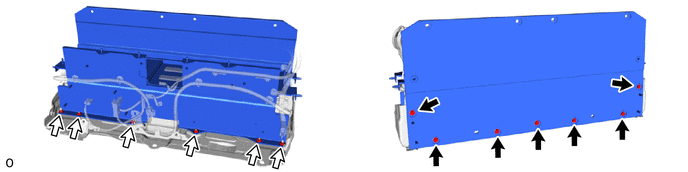
89892A
27.REMOVE BATTERY VOLTAGE SENSOR (for Lower Side)
|
|
Click here()
|
G920WA
28.REMOVE NO. 7 EV BATTERY SHIELD SUB-ASSEMBLY (for Lower Side)
|
|
|
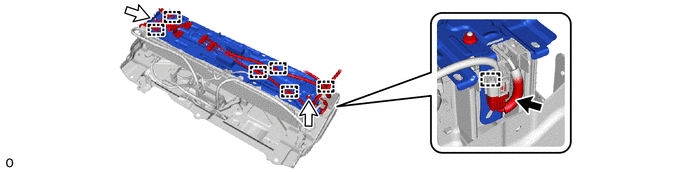
G92X2A
29.REMOVE NO. 2 EV BATTERY PACK WIRE
|
|
|
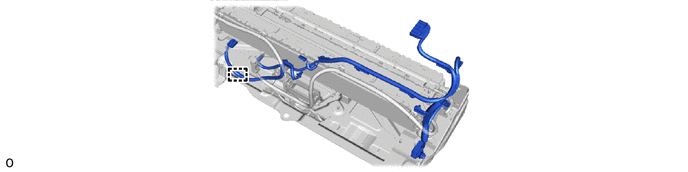
G9509A
30.REMOVE NO. 2 EV SUPPLY STACK SUB-ASSEMBLY
|
|
|
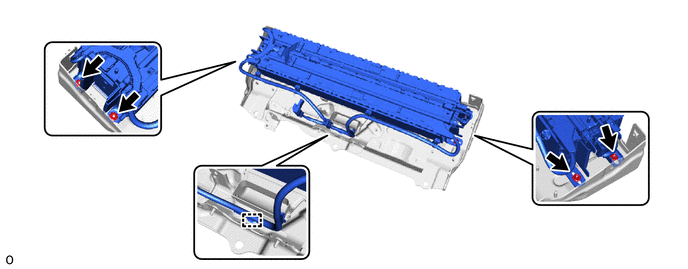
G92D9A
31.REMOVE NO. 9 EV BATTERY INTAKE DUCT
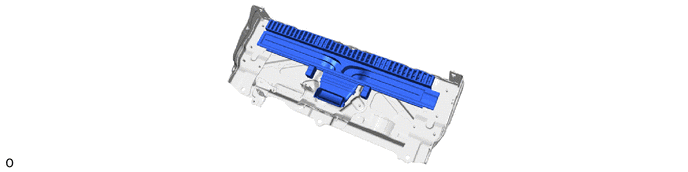
32.PERFORM RECOVERY INSPECTION
Before returning the EV supply stack sub-assembly, make sure to perform a recovery inspection.
Click hereEngine / Hybrid System>HYBRID / BATTERY CONTROL>HV BATTERY STACK>RECOVERY INSPECTION