2AR-FE ENGINE MECHANICAL ENGINE ASSEMBLY REMOVAL
PROCEDURE

 1. PRECAUTION
- CAUTION:
-
The engine assembly with transmission is very heavy. Be sure to follow the procedure described in the repair manual, or the engine lifter may suddenly drop.
- NOTICE:
- ·
After turning the ignition switch off, waiting time may be required before disconnecting the cable from the negative (-) battery terminal. Therefore, make sure to read the disconnecting the cable from the negative (-) battery terminal notices before proceeding with work.
Click hereGeneral>INTRODUCTION>REPAIR INSTRUCTION>INITIALIZATION
·When the manual transaxle is removed, be sure to use a new clutch release with bearing cylinder and new installation bolts. Removal of the manual transaxle allows the compressed clutch release with bearing cylinder to return to its original position, and dust from the moving section could damage the seal of the clutch release with bearing cylinder, possibly causing clutch fluid leaks.
2.RECOVER REFRIGERANT FROM REFRIGERATION SYSTEM
3. DISCHARGE FUEL SYSTEM PRESSURE
4. PLACE FRONT WHEELS FACING STRAIGHT AHEAD
5.SECURE STEERING WHEEL
6.REMOVE FRONT WHEELS
7.DISCONNECT CABLE FROM NEGATIVE BATTERY TERMINAL
- NOTICE:
-
When disconnecting the cable, some systems need to be initialized after the cable is reconnected.
-
Click hereGeneral>INTRODUCTION>REPAIR INSTRUCTION>INITIALIZATION
53852K
8.REMOVE FRONT WHEEL OPENING EXTENSION PAD LH
51442C
9.REMOVE ENGINE UNDER COVER LH
53851Z
10.REMOVE FRONT WHEEL OPENING EXTENSION PAD RH
51441C
11.REMOVE ENGINE UNDER COVER RH
53737B
12.REMOVE FRONT FENDER APRON SEAL LH
53736
13.REMOVE FRONT FENDER APRON SEAL RH
14.DRAIN ENGINE OIL
15.DRAIN ENGINE COOLANT
16.DRAIN AUTOMATIC TRANSAXLE FLUID (for Automatic Transaxle)
17.DRAIN MANUAL TRANSAXLE OIL (for Manual Transaxle)
18.DRAIN BRAKE FLUID (for Manual Transaxle)
12601B
19.REMOVE NO. 1 ENGINE COVER SUB-ASSEMBLY
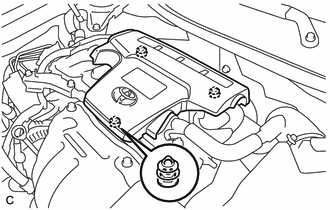
Lift the rear of the engine cover to detach the cover from the 2 pins, and then lift the front of the engine cover to detach the cover from the pin and remove the engine cover.
- NOTICE:
-
Attempting to disengage both front and rear clips at the same time may cause the No. 1 engine cover sub-assembly to break.
17750A
20.REMOVE INLET AIR CLEANER ASSEMBLY
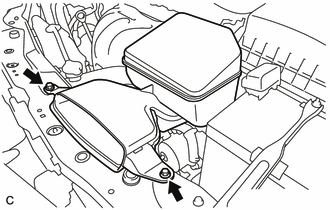
Remove the 2 bolts and inlet air cleaner assembly.
21.REMOVE AIR CLEANER CAP SUB-ASSEMBLY
17801
22.REMOVE AIR CLEANER FILTER ELEMENT SUB-ASSEMBLY
23.REMOVE AIR CLEANER CASE SUB-ASSEMBLY
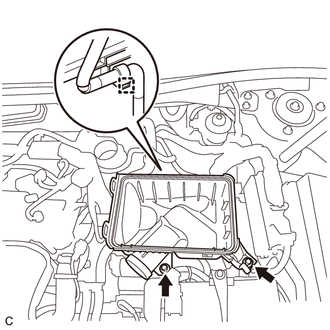
Disconnect the wire harness clamp.
Remove the 2 bolts and air cleaner case sub-assembly.
24.REMOVE BATTERY
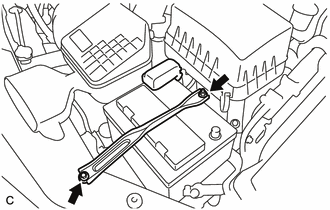
Loosen the nut, and separate the positive (+) battery terminal.
Loosen the nut, and remove the bolt and battery clamp.
Remove the battery and battery tray.
16571C
25.DISCONNECT NO. 1 RADIATOR HOSE
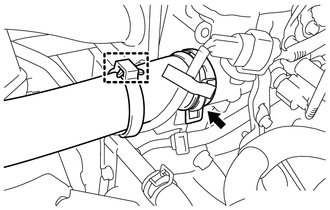
Remove the hose clamp to separate the air fuel ratio sensor wire from the No. 1 radiator hose.
Disconnect the No. 1 radiator hose.
16572D
26.DISCONNECT NO. 2 RADIATOR HOSE
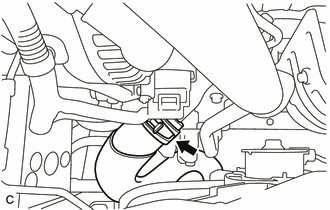
Disconnect the No. 2 radiator hose.
87245
27.DISCONNECT INLET HEATER WATER HOSE
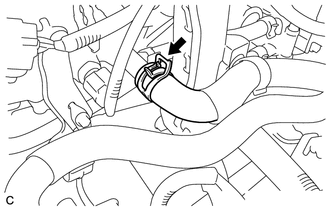
Disconnect the inlet heater water hose.
87246
28.DISCONNECT OUTLET HEATER WATER HOSE (for LHD)
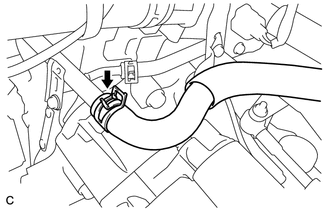
Disconnect the outlet heater water hose.
87246
29.DISCONNECT OUTLET HEATER WATER HOSE (for RHD)
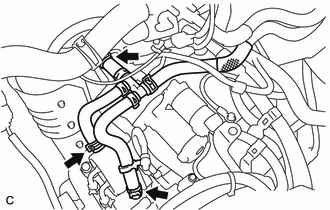
Disconnect the 3 outlet heater water hoses.
32942
30.DISCONNECT OUTLET NO. 1 OIL COOLER HOSE (for Automatic Transaxle LHD)
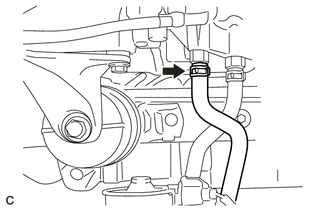
Disconnect the outlet No. 1 oil cooler hose from the automatic transaxle assembly.
32941
31.DISCONNECT INLET NO. 1 OIL COOLER HOSE (for Automatic Transaxle LHD)
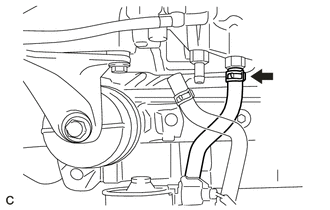
Disconnect the inlet No. 1 oil cooler hose from the automatic transaxle assembly.
28100
32.REMOVE STARTER ASSEMBLY
82121
33.DISCONNECT ENGINE WIRE
Remove the No. 1 relay block cover.
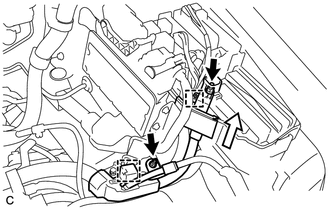
Remove the 2 nuts and disconnect the wire clamp.
Using a screwdriver, unlock the claw and separate the engine wire from the engine room relay block.
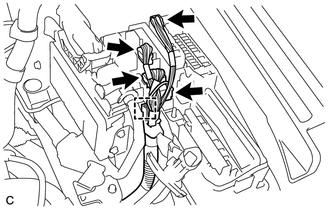
Disconnect the 4 connectors.
Using a screwdriver, unlock the claw and separate the engine wire from the engine room relay block.
for Automatic Transaxle:
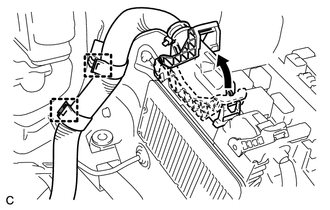
Pull up the lever to disconnect the ECM connector.
Disconnect the 2 wire clamps.
for Manual Transaxle:
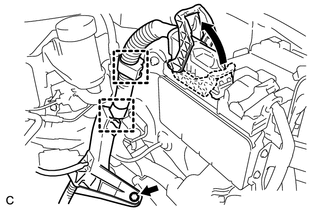
Pull up the lever to disconnect the ECM connector.
Disconnect the 2 wire clamps and remove the bolt.
17771A
34.REMOVE NO. 1 AIR CLEANER BRACKET
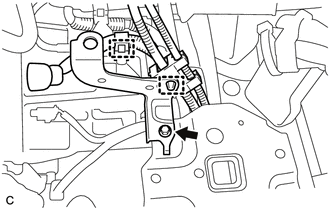
Disconnect the 2 wire clamps.
Remove the bolt and No. 1 air cleaner bracket.
33820B
35.DISCONNECT TRANSMISSION CONTROL CABLE ASSEMBLY (for Manual Transaxle)
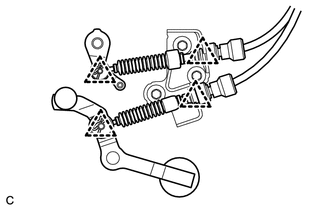
Remove the 4 clips and disconnect the transmission control cable assembly from the control cable bracket.
33820B
36.DISCONNECT TRANSMISSION CONTROL CABLE ASSEMBLY (for Automatic Transaxle)
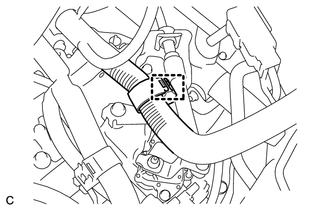
Disconnect the wire harness clamp.
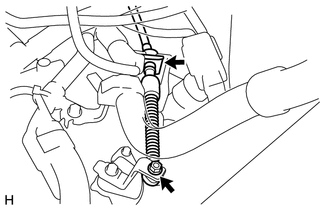
Remove the nut and clip, and disconnect the transmission control cable assembly.
12327A
37.REMOVE NO. 2 ENGINE MOUNTING STAY RH
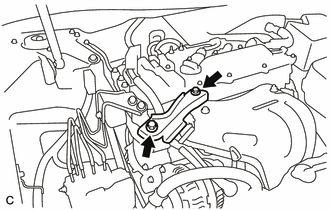
Remove the 2 bolts and No. 2 engine mounting stay RH.
82284
38.SEPARATE EARTH WIRE
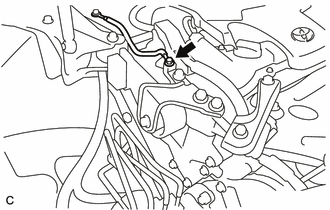
Remove the bolt and separate the earth wire from the engine moving control rod bracket.
12309
39.REMOVE ENGINE MOVING CONTROL ROD SUB-ASSEMBLY
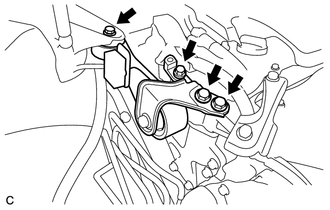
Remove the 4 bolts and engine moving control rod sub-assembly.
44774
40.DISCONNECT UNION TO CONNECTOR TUBE HOSE (for LHD)
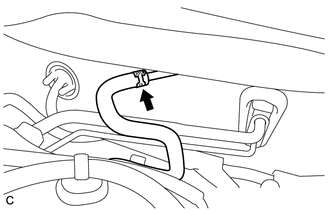
Disconnect the union to connector tube hose.
44773F
41.DISCONNECT UNION TO CHECK VALVE HOSE (for RHD)
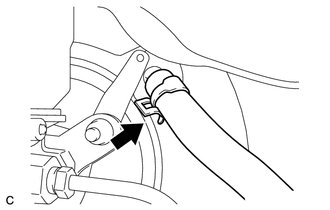
Disconnect the union to check valve hose.
88711
42.DISCONNECT NO. 1 COOLER REFRIGERANT DISCHARGE HOSE
88704
43.DISCONNECT SUCTION HOSE SUB-ASSEMBLY
31418
44.DISCONNECT CLUTCH HOSE (for Manual Transaxle)
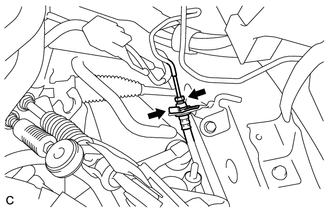
Disconnect the clutch hose and remove the clip.
23901
45.DISCONNECT FUEL TUBE SUB-ASSEMBLY
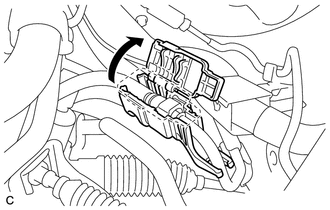
Release the claw and remove the No. 1 fuel pipe clamp.
Pinch the fuel tube connector and then pull out the fuel main tube.
- NOTICE:
- ·
Check for dirt and foreign objects on the pipe and around the connector. Clean if necessary and then disconnect the connector.
·Disconnect the connector by hand.
·Do not bend, fold or rotate the nylon tube.
·If the pipe and connector are stuck together, push and pull the connector until it becomes free.
·Put the pipe and connector ends in vinyl bags to prevent damage and contamination.
17410
46.REMOVE FRONT EXHAUST PIPE ASSEMBLY
43502H
47.REMOVE FRONT AXLE SHAFT NUT LH
43501H
48.REMOVE FRONT AXLE SHAFT NUT RH
- HINT:
-
Use the same procedure described for the LH side.
48810
49.SEPARATE FRONT STABILIZER LINK ASSEMBLY LH
48820B
50.SEPARATE FRONT STABILIZER LINK ASSEMBLY RH
- HINT:
-
Use the same procedure described for the LH side.
89543
51.SEPARATE FRONT SPEED SENSOR LH
89542
52.SEPARATE FRONT SPEED SENSOR RH
- HINT:
-
Use the same procedure described for the LH side.
45470
53.SEPARATE TIE ROD ASSEMBLY LH
45460
54.SEPARATE TIE ROD ASSEMBLY RH
- HINT:
-
Use the same procedure described for the LH side.
48069
55.SEPARATE FRONT LOWER NO. 1 SUSPENSION ARM SUB-ASSEMBLY LH
48068
56.SEPARATE FRONT LOWER NO. 1 SUSPENSION ARM SUB-ASSEMBLY RH
- HINT:
-
Use the same procedure described for the LH side.
43502C
57.SEPARATE FRONT AXLE ASSEMBLY LH
43501C
58.SEPARATE FRONT AXLE ASSEMBLY RH
- HINT:
-
Use the same procedure described for the LH side.
45220
59.SEPARATE STEERING INTERMEDIATE SHAFT ASSEMBLY
11361J
60.REMOVE FLYWHEEL HOUSING UNDER COVER
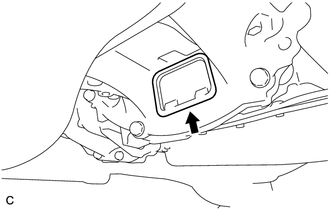
Remove the flywheel housing under cover.
32101A
61.REMOVE DRIVE PLATE AND TORQUE CONVERTER ASSEMBLY SETTING BOLT (for Automatic Transaxle)
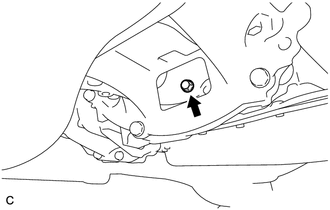
Turn the crankshaft to gain access to the removal locations of the 6 torque converter assembly setting bolts and remove each bolt while holding the crankshaft pulley bolt with a wrench.
62.REMOVE ENGINE ASSEMBLY WITH TRANSAXLE
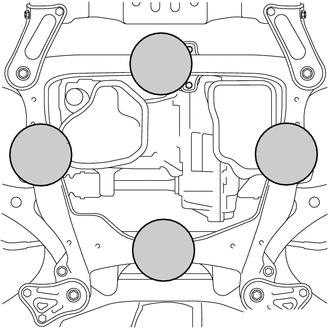

|
Attachment Installation Position |
Set an engine lifter.
- NOTICE:
- ·
Install a height adjustment attachment and plate lift attachment onto the engine assembly with transaxle.
·Securely support the engine assembly to prevent it from turning upside down until it is secured to an engine stand.
·To prevent the oil pan from deforming, do not place any attachments onto the oil pan of the engine assembly with transaxle.
·Servicing an engine assembly while it is hanging is dangerous. This can be done only when installing/removing the engine assembly to/from an engine stand.
·Do not perform any procedure while the engine assembly is suspended because doing so may cause the engine assembly to drop, resulting in injury. However, the engine assembly needs to be suspended when it is installed or removed from an engine stand.
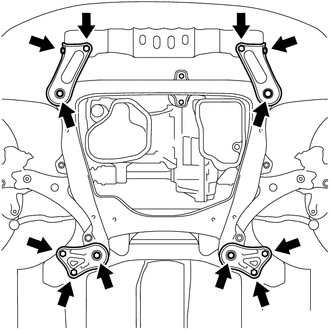
Remove the 4 bolts, 2 nuts, and frame side rail plate RH and LH.
Remove the 4 bolts, 2 nuts, and front suspension member brace rear RH and LH.
Operate the engine lifter and remove the engine assembly from the vehicle.
- NOTICE:
- ·
Make sure that the engine is clear of all wiring and hoses.
·While lowering the engine from the vehicle, do not allow it to contact the vehicle.
Install engine hangers.
Click hereEngine / Hybrid System>2AR-FE ENGINE MECHANICAL>ENGINE UNIT>INSTALLATION
82121
63.REMOVE ENGINE WIRE
Remove the engine wire from the engine with transaxle.
16361A
64.REMOVE V-RIBBED BELT
88310
65.REMOVE COMPRESSOR ASSEMBLY WITH PULLEY
27020
66.REMOVE GENERATOR ASSEMBLY
43420
67.REMOVE FRONT DRIVE SHAFT ASSEMBLY LH
43420G
68.REMOVE FRONT DRIVE SHAFT HOLE SNAP RING LH
43410
69.REMOVE FRONT DRIVE SHAFT ASSEMBLY RH
51100G
70.REMOVE FRONT FRAME ASSEMBLY
for Manual transaxle:
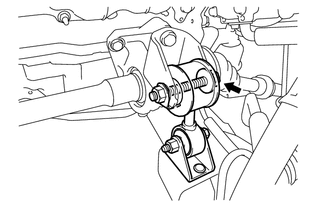
Loosen the through bolt
Remove the 2 hole plugs.
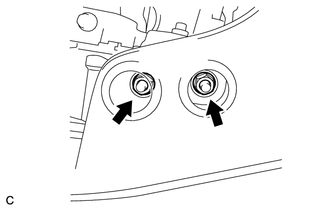
Remove the 2 nuts and separate the engine lateral control rod.
Loosen the 4 bolts and nut.
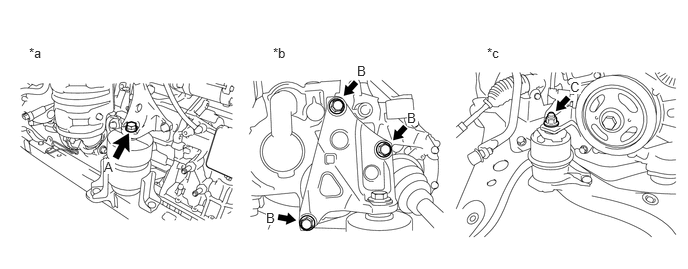
| *a | Front Side | *b | LH Side |
| *c | RH Side | - | - |
for Automatic Transaxle:
Loosen the bolt and 2 nuts.
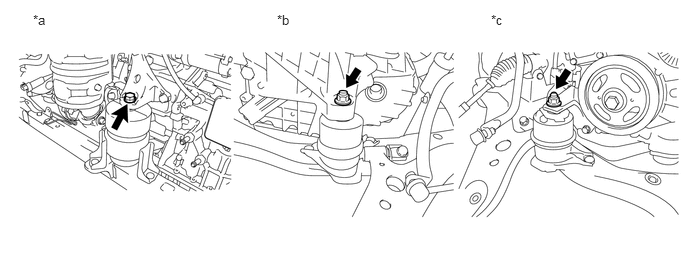
| *a | Front Side | *b | LH Side |
| *c | RH Side | - | - |
Remove the 4 hole plugs.
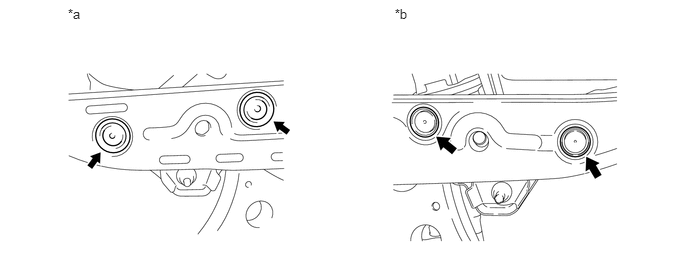
| *a | Engine Mounting Insulator RH | *b | Engine Mounting Insulator LH |
Remove the 9 nuts, and separate the front frame assembly.
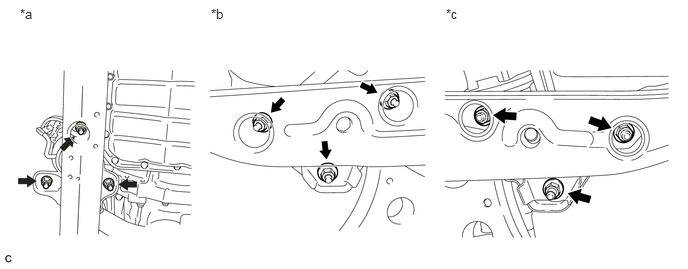
| *a | Front Side | *b | RH Side |
| *c | LH Side | - | - |
Using a height adjustable attachment and plate lift attachment, place the engine assembly on a flat level surface.
- NOTICE:
- ·
Using a height adjustable attachment and plate lift attachment, place the engine assembly with transaxle horizontally.
·To prevent the oil pan from deforming, do not place any attachments onto the oil pan of the engine assembly with transaxle.
·Using an engine sling device and engine lift, secure the engine assembly before service.
12361A
71.REMOVE FRONT ENGINE MOUNTING INSULATOR
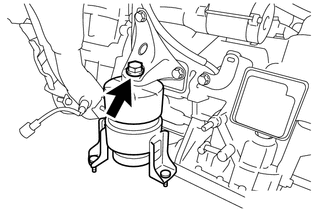
Remove the bolt and front engine mounting insulator.
12372A
72.REMOVE ENGINE MOUNTING INSULATOR LH (for Manual Transaxle)
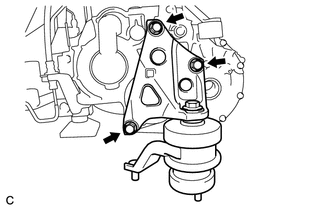
Remove the 3 bolts and engine mounting insulator LH.
12372A
73.REMOVE ENGINE MOUNTING INSULATOR LH (for Automatic Transaxle)
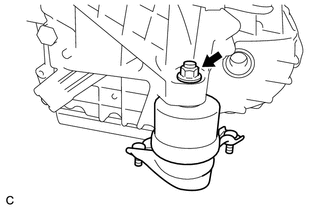
Remove the nut and engine mounting insulator LH.
12362A
74.REMOVE ENGINE MOUNTING INSULATOR RH
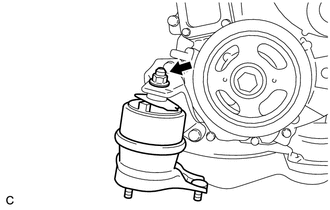
Remove the nut and engine mounting insulator RH.
12364A
75.REMOVE ENGINE LATERAL CONTROL ROD (for Manual Transaxle)
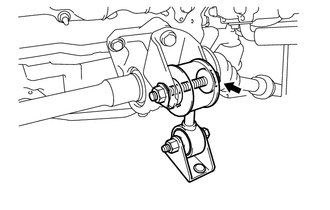
Remove the through bolt, nut and engine lateral control rod.
12322
76.REMOVE NO. 2 REAR ENGINE MOUNTING BRACKET (for Manual Transaxle)
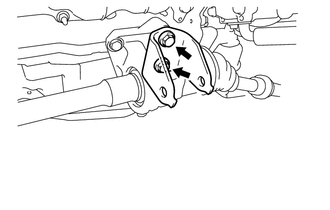
Remove the 2 bolts and No. 2 rear engine mounting bracket.
12321A
77.REMOVE REAR ENGINE MOUNTING BRACKET (for Manual Transaxle)
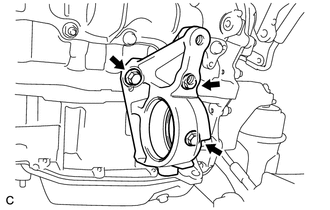
Remove the 3 bolts and rear engine mounting bracket.
43457
78.REMOVE DRIVE SHAFT BEARING BRACKET (for Automatic Transaxle)
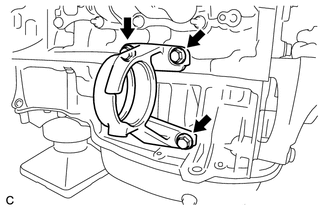
Remove the 3 bolts and drive shaft bearing bracket.
12315A
79.REMOVE ENGINE MOUNTING BRACKET RH
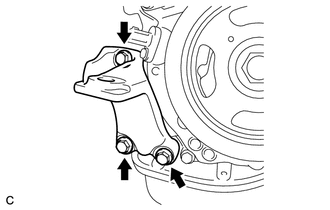
Remove the 3 bolts and engine mounting bracket RH.
30300
80.REMOVE MANUAL TRANSAXLE ASSEMBLY (for Manual Transaxle)
30500
81.REMOVE AUTOMATIC TRANSAXLE ASSEMBLY (for Automatic Transaxle)
82.REMOVE CLUTCH LINE (for Manual Transaxle)
Click hereDrivetrain>CLUTCH>CLUTCH UNIT>REMOVAL
31407B
83.REMOVE CLUTCH RELEASE BLEEDER SUB-ASSEMBLY (for Manual Transaxle)
Click hereDrivetrain>CLUTCH>CLUTCH UNIT>REMOVAL
84.REMOVE CLUTCH RELEASE WITH BEARING CYLINDER ASSEMBLY (for Manual Transaxle)
Click hereDrivetrain>CLUTCH>CLUTCH UNIT>REMOVAL
31483
85.REMOVE CLUTCH RELEASE CYLINDER TO BLEEDER TUBE (for Manual Transaxle)
Click hereDrivetrain>CLUTCH>CLUTCH UNIT>REMOVAL
31210
86.REMOVE CLUTCH COVER ASSEMBLY (for Manual Transaxle)
Click hereDrivetrain>CLUTCH>CLUTCH UNIT>REMOVAL
31250
87.REMOVE CLUTCH DISC ASSEMBLY (for Manual Transaxle)
13405
88.REMOVE FLYWHEEL SUB-ASSEMBLY (for Manual Transaxle)
32101
89.REMOVE DRIVE PLATE AND RING GEAR SUB-ASSEMBLY (for Automatic Transaxle)
90.INSTALL ENGINE STAND
Install the engine onto an engine stand with the bolts.