2WW ENGINE MECHANICAL ENGINE UNIT REMOVAL
PROCEDURE

 1. PRECAUTION
- NOTICE:
- ·
After the engine has stopped, wait at least 1 minute before releasing the high pressure lines.
·When working on the fuel circuit, protect the generator assembly against contamination. Cover the generator assembly with suitable materials. Failure to comply with this procedure may result in a generator assembly malfunction.
·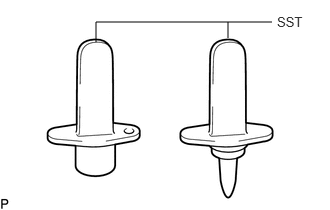 1,0.229 2.833,0.229 false 1,0.438 1,0.229 false 2.375,0.396 2.375,0.229 false 2.885,0.146 3.344,0.344 0.458,0.198 10 false SST
After disconnecting the pressure line, it is absolutely essential to seal the injector assemblies and the common rail assembly with SST.
- SST:
PZ4TB-04941-79
12612A
2.REMOVE ENGINE COVER
3.REMOVE ENGINE WIRE
Remove the engine wire from the engine assembly.
16361A
4.REMOVE V-RIBBED BELT
88310
5.REMOVE COMPRESSOR ASSEMBLY WITH PULLEY (w/ Air Conditioning System)
27020
6.REMOVE GENERATOR ASSEMBLY
16630G
7.REMOVE IDLER PULLEY ASSEMBLY
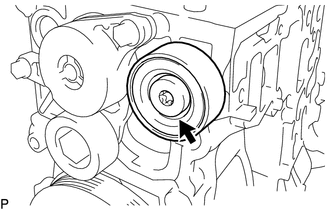
Using a T50 "TORX" socket wrench, loosen the bolt to remove the idler pulley assembly.
- HINT:
-
The bolt cannot be removed from the idler pulley assembly.
12315A
8.REMOVE ENGINE MOUNTING BRACKET
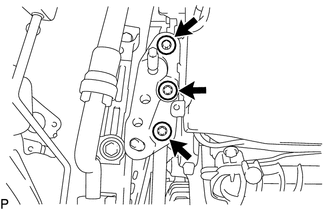
Using an E12 "TORX" socket wrench, remove the 3 bolts and engine mounting bracket.
Remove the 2 stud bolts from the engine mounting bracket.
16620
9.REMOVE V-RIBBED BELT TENSIONER ASSEMBLY
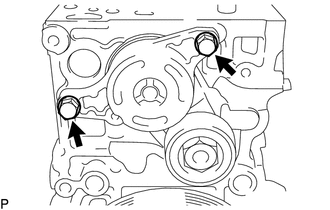
Remove the 2 bolts and V-ribbed belt tensioner assembly.
22030
10.REMOVE DIESEL THROTTLE BODY ASSEMBLY
11459
11.REMOVE ENGINE OIL LEVEL DIPSTICK GUIDE
12.DISCONNECT NO. 2 VACUUM HOSE ASSEMBLY
13.REMOVE NO. 2 VACUUM HOSE ASSEMBLY
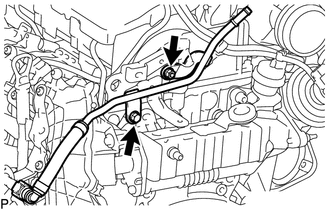
Remove the bolt, nut and No. 2 vacuum hose assembly from the No. 2 engine hanger.
25733A
14.REMOVE NO. 1 VACUUM PIPE
17111
15.REMOVE INTAKE MANIFOLD
23801Q
16.REMOVE FUEL FEED PIPE SUB-ASSEMBLY
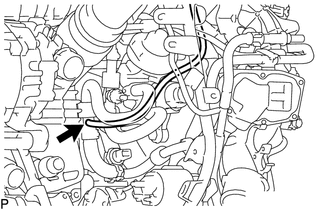
Disconnect the nozzle leakage pipe assembly from the fuel feed pipe sub-assembly.
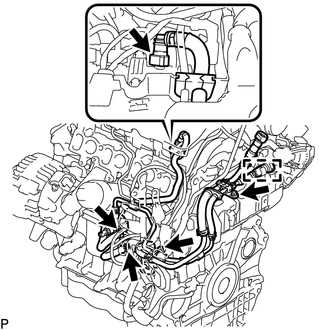
Loosen the 2 clamps and disconnect the 2 fuel hoses from the fuel supply pump assembly.
Disconnect the fuel return tube from the common rail assembly.
Detach the fuel hose clamp.
Remove the 2 bolts and fuel feed pipe sub-assembly.
17167
17.REMOVE NO. 1 EXHAUST MANIFOLD HEAT INSULATOR
25051
18.REMOVE EXHAUST MANIFOLD CONVERTER SUB-ASSEMBLY
15474
19.REMOVE TURBO OIL OUTLET PIPE
15481
20.DISCONNECT NO. 1 TURBO OIL PIPE
17201
21.REMOVE TURBOCHARGER SUB-ASSEMBLY
25680
22.REMOVE EGR COOLER ASSEMBLY WITH EGR VALVE ASSEMBLY
17141
23.REMOVE EXHAUST MANIFOLD
15481
24.REMOVE NO. 1 TURBO OIL PIPE
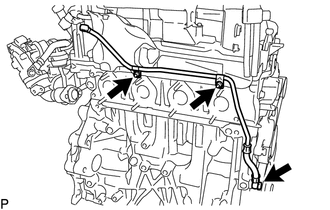
Remove the 2 nuts, union bolt, 2 gaskets and No. 1 turbo oil pipe.
17271
25.REMOVE NO. 2 TURBO INSULATOR
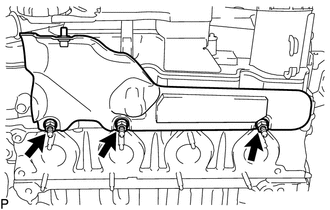
Remove the 3 bolts and No. 2 turbo insulator.
17293
26.REMOVE TURBOCHARGER STAY
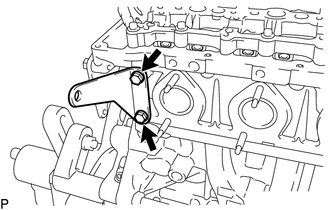
Remove the 2 bolts and turbocharger stay.
27.REMOVE EGR VALVE BRACKET
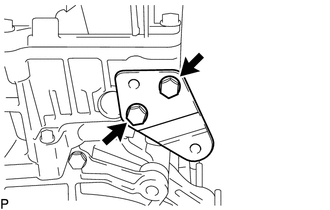
Remove the 2 bolts and EGR valve bracket from the cylinder head sub-assembly.
12282D
28.REMOVE NO. 2 ENGINE HANGER
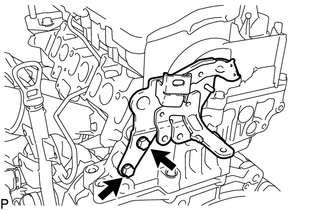
Remove the 2 bolts and No. 2 engine hanger from the cylinder head sub-assembly.
12281A
29.REMOVE NO. 1 ENGINE HANGER
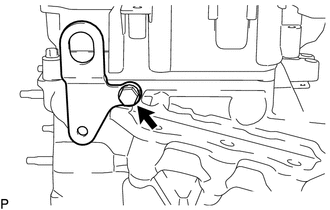
Remove the bolt and No. 1 engine hanger from the cylinder head sub-assembly.
30.REMOVE FUEL INLET PIPE SUB-ASSEMBLY
31.REMOVE INJECTION PIPE SUB-ASSEMBLY
23810A
32.REMOVE COMMON RAIL ASSEMBLY
19850
33.REMOVE GLOW PLUG ASSEMBLY
34.REMOVE EGR BYPASS VALVE SWITCHING VALVE
35.REMOVE VACUUM CONTROL VALVE BRACKET
43457
36.REMOVE DRIVE SHAFT BEARING BRACKET
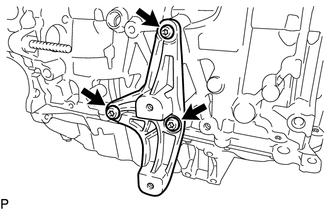
Using a T50 "TORX" socket wrench, remove the 3 bolts and drive shaft bearing bracket.